
Quick SSH tunnels, tidy tray.


GNOME tray applet to manage multiple named SSH dynamic (SOCKS5) tunnels and toggle the system proxy in one click. Exclusive model: at most one tunnel active at a time — it drives the system proxy and is reverted on stop, drop, or quit.
- One click — pick a tunnel in the tray, ssh comes up, system proxy follows.
- Always reverted — stop, crash, drop, or quit: your proxy never stays pointed at a dead port.
- Multiple tunnels — named profiles, each with its own host, port, and auth.
- Any auth — ssh-agent, a specific key file, or password (GNOME keyring / prompt; never written to disk).
- Self-healing — health-checks the tunnel and cleans up if ssh dies underneath.
- No daemons, no root — a single Python/GTK process running as you.
📖 Full user guide — first run, auth setup, troubleshooting.
📱 On Android? See Tunly Mobile —
the same named SSH tunnels, routing your whole device through a VpnService.
Tunly is a client. It doesn't provide servers — it tunnels your traffic
through an SSH server you control and then out to the internet, so your exit
IP becomes that server's IP. You need a Linux box you can SSH into with outbound
internet; almost any small VPS works (the tunnel only needs sshd + bandwidth —
no special software on the server).
Create a small Linux VM, note its public IP, and you're the root/sudo user.
Popular options (prices/tiers change — verify before signing up):
| Provider | Cheapest | Free tier | Notes |
|---|---|---|---|
| Google Cloud | — | 1× e2-micro/month free in select US regions |
Free-tier VM is enough for a tunnel |
| AWS | Lightsail ~$3.50/mo | EC2 t3.micro free for 12 months |
Lightsail is the simplest AWS path |
| Hetzner Cloud | ~€4/mo (CX22) | — | Cheapest reliable paid VPS; EU + US regions |
| Vultr | ~$2.50–5/mo | — | Many regions, hourly billing |
| DigitalOcean | $4/mo droplet | Signup credit (often $200/60 days) | Beginner-friendly |
| Linode (Akamai) | $5/mo | Signup credit | Simple, well-documented |
| Fly.io | small VMs, usage-based | limited free allowance | Container-style, quick to spin up |
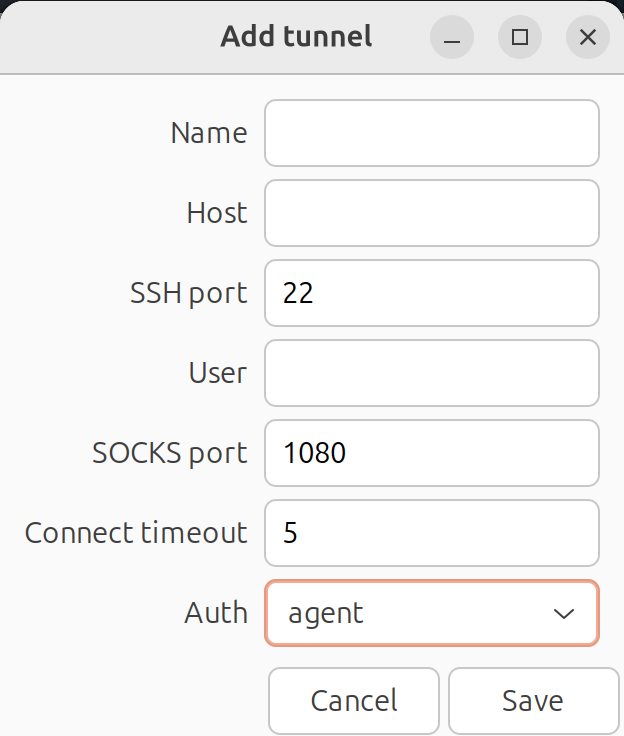
Then: add your key with ssh-copy-id user@SERVER_IP, open Manage tunnels…,
add a tunnel with that host/user/auth, and pick it from the tray. Harden the box
with key-only auth (PasswordAuthentication no) and a firewall on port 22.
wget https://github.com/thelinuxer/tunly/releases/latest/download/tunly_0.1.4_all.deb
sudo apt install ./tunly_0.1.4_all.debSystem packages (all preinstalled on a standard GNOME desktop; no pip):
python3+python3-gi(GTK 3 introspection)gir1.2-appindicator3-0.1orgir1.2-ayatanaappindicator3-0.1gir1.2-notify-0.7(optional — desktop notifications)ssh,curl
Optional, per auth method:
- Password auth works out of the box via an
SSH_ASKPASShelper (no extra deps). Ifsshpassis installed it is used instead. - Remember password in keyring needs
secret-tool(libsecret-tools). Without it, password-auth tunnels prompt on each connect.
The GTK/AppIndicator bindings are system packages (GObject-Introspection typelibs), not PyPI wheels — so sandboxed formats (Flatpak/Snap) can't drive the host proxy and are not used. Pick one:
make deb                 # produces tunly_<ver>_all.deb (needs dpkg-deb)
sudo apt install ./tunly_*.deb # pulls gir1.2-* deps automaticallyBecause AppIndicator has no PyPI package, the venv must see the system bindings:
sudo apt install python3-gi gir1.2-gtk-3.0 \
     gir1.2-ayatanaappindicator3-0.1 openssh-client
pipx install --system-site-packages tunly   # from PyPI (or "." from a checkout)
# then, for the app menu + icon:
tunly --install-desktop --autostartA PKGBUILD ships in packaging/aur/:
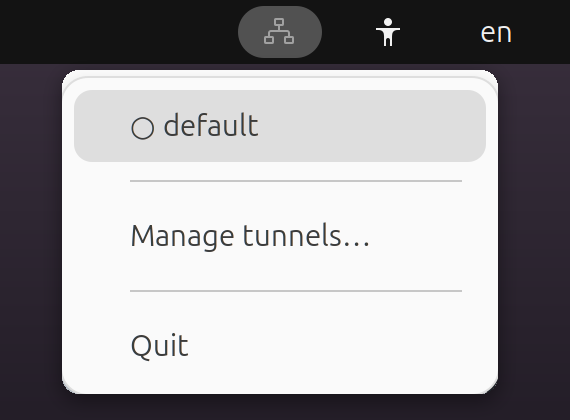
cd packaging/aur && makepkg -sisudo make install PREFIX=/usr/local # installs launcher + .desktop + iconAfter install, launch tunly (from the app menu or the shell). An icon appears
in the top-bar tray (green = a tunnel is active, grey = none). Click it → per-tunnel
start/stop, Manage tunnels…, Quit.
Run in place without installing:
PYTHONPATH=src python3 -m tunly &Menu/autostart integration for a pipx or in-place run:
tunly --install-desktop            # add --autostart to launch on login
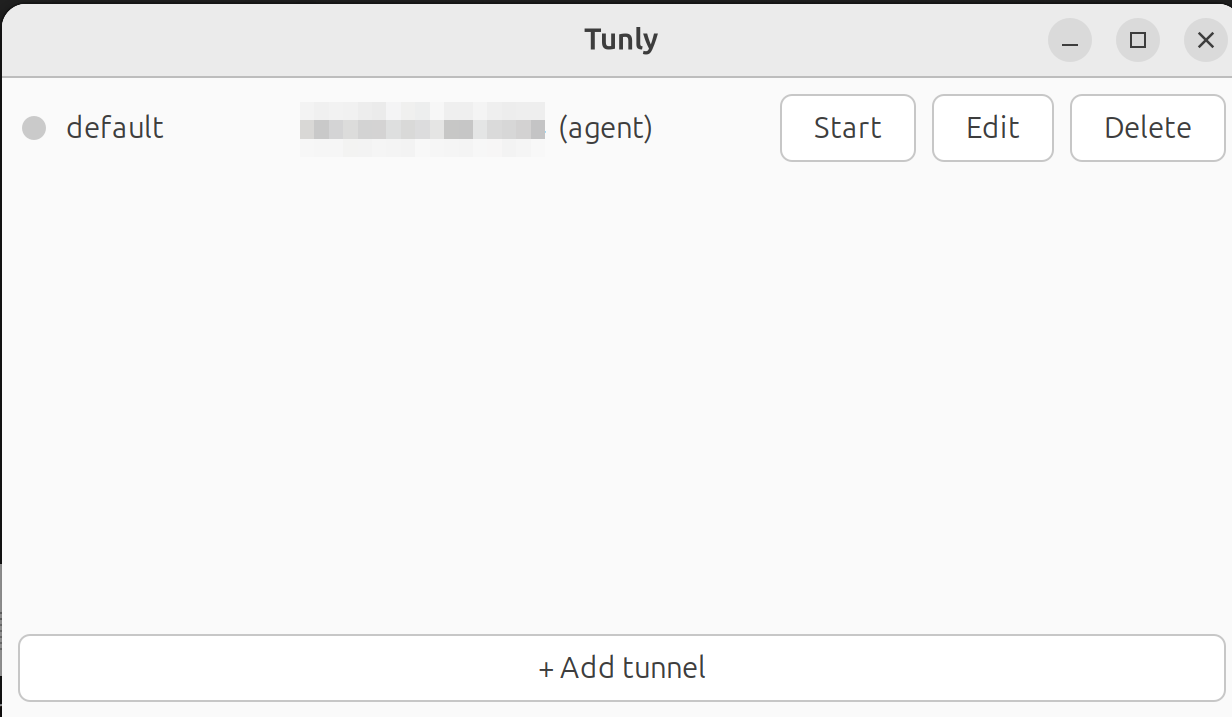
tunly --uninstall-desktop # remove itManage tunnels… opens a window listing every tunnel with a status dot and
Start/Stop, Edit, Delete buttons, plus + Add tunnel. Each tunnel has a
unique name and its own SOCKS port.
| auth | behaviour |
|---|---|
agent |
ssh-agent + default keys (default) |
key |
private key file (-i <path> -o IdentitiesOnly=yes) |
password |
GTK prompt at connect (or keyring); fed to ssh with no plaintext on disk |
~/.config/tunly/tunnels.json — created on first run. A legacy
config.ini (single-tunnel format) is auto-migrated to tunnel default.
Passwords are never written here (keyring or prompt-only).
Real end-to-end check (spawns ssh, sets + reverts proxy, prints exit IP). Point it at your own reachable SSH server via env vars — nothing is hardcoded:
SSTRAY_TEST_HOST=vps.example.com SSTRAY_TEST_USER=alice \
PYTHONPATH=src python3 -m tunly --selftest # or: tunly --selftest- Passwords are never written to
tunnels.json. They come from the GNOME keyring (secret-tool) or a prompt, and reachsshviasshpass -eor anSSH_ASKPASShelper — no plaintext on disk. The password does transit the ssh child's environment (as withsshpass), readable only by the same user via/proc/<pid>/environ. - Host-key policy is
StrictHostKeyChecking=accept-new: unknown host keys are trusted on first connect (TOFU) so the non-interactive tunnel can come up; a changed key is still refused. If you need strict first-connect verification, pre-populate~/.ssh/known_hosts. - Runs entirely as your user; it changes only your GNOME proxy settings and spawns
ssh. No privileged operations, no shell interpolation of user input.
Versions are tag-driven; pyproject.toml is the single source of truth
(the .deb version derives from it at build time). To cut a release:
# 1. bump `version` in pyproject.toml (and the Quick install URL above), commit
# 2. tag and push — CI builds wheel/sdist + .deb and attaches them to a GitHub Release
git tag v0.2.0 && git push origin v0.2.0
CI fails the release if the tag and pyproject.toml version disagree.
Unit tests run on every push (.github/workflows/ci.yml); live SSH integration
tests run locally with SSTRAY_TEST_HOST=<server> pytest tests/.
Enabling PyPI publishing (one-time): on pypi.org → Publishing → add a trusted
publisher with repository thelinuxer/tunly, workflow release.yml, environment
pypi; create a matching pypi environment in the GitHub repo settings; then
uncomment the pypi job in .github/workflows/release.yml. After that every tagged
release also lands on PyPI (pipx install tunly).
See docs/2026-07-05-tunly-design.md.