This page outlines the steps taken to implement a CI pipeline for the BuildIT Devops test - see BuildIt DevOps Test. Any changes made to the feature branch of this repository will trigger the pipeline resulting in deployment of the sample web app to a HA environment on Digital Ocean.
The following steps will assume that you have the following already setup
- GitHub account
- Digital Ocean account
- Codeship account
- Personal SSH key
This repository was created from a fork of the BuildIt DevOps Test repo at https://github.com/buildit/devops-test
A local working copy of this repo can be created using the following command once forked to your GitHub account.
git clone https://github.com/dazoido/devops-test.git
Create a droplet capable of running the Node web app. Use the steps below:
- Login to your Digital Ocean account
- Create a Droplet using a standard Ubuntu distribution (Note: You can use their pre-baked 'Node on Ubuntu' image under the Marketplace tab but for the purpose of being verbose we will use a standard image and install node on the droplet too)
- Add your public SSH key to the droplet
- Give you droplet and more friendly, identifiable name e.g. ws1-devops
- You can skip over most of the other options (for the purpose of creating this demo/test)
Create a deploy user for managing deployments to droplet
- SSH to droplet as root user -
ssh root@DROPLET_IP - Add 'deploy' user -
useradd -s /bin/bash -m -d /home/deploy deploy - Set password for 'deploy' user -
passwd deploy - Give 'deploy user' sudo/root level access -
usermod -aG sudo deploy - Create authorized_key file for ssh access to 'deploy' user -
Note: alternatively you can use
cd /home/deploy mkdir .ssh chown deploy:deploy .ssh chmod 700 .ssh cd .ssh touch authorized_keys chown deploy:deploy authorized_keys chmod 600 authorized_keysssh-copy-idcommand from your local machine to setup the necessary ssh directory, files and add your key. - Add your public SSH key to
/home/deploy/.ssh/authorized_keys
Generate SSH keys for 'deploy' user and use these to connect the droplet to GitHub
- SSH into your droplet as the 'deploy' user -
ssh deploy@DROPLET_IPWhen prompted save the key with an empty passphrase. This will save the generated private/public pair tossh-keygen -t rsa -C "deploy"/home/deploy/.ssh/id_rsa. - Add the following ssh-agent startup script to
/home/deploy/.bashrc. You will need to reboot the server for thessh-agentto be started and the deploy key automatically added.if [ ! -S ~/.ssh/ssh_auth_sock ]; then eval `ssh-agent` ln -sf "$SSH_AUTH_SOCK" ~/.ssh/ssh_auth_sock fi export SSH_AUTH_SOCK=~/.ssh/ssh_auth_sock ssh-add -l > /dev/null || ssh-add - Copy the contents of
id_rsa.pubto your Github repo - Settings > Deploy Keys. (Do not allow write permissions).
- To install Node and NPM, SSH into to your newly created droplet and run the following commands:
curl -sL https://deb.nodesource.com/setup_10.x -o node_10_setup.sh chmod 760 node_10_setup.sh sudo bash node_10_setup.sh sudo apt install nodejs - Verify successful installation using the following commands:
node -v
npm -v
Clone the repo to a folder on the droplet.
- Create folder where repo/app will reside
cd /var mkdir www sudo chown deploy:deploy -R www cd www - Clone repo
git clone git@github.com:dazoido/devops-test.git - Install app dependencies and start app
cd devops-test
npm install
npm start
- Create project and connect to repository
- Set deployment script - Project > Project Settings > Deploy
# deploy to ws1-devops ssh deploy@DROPLET_IP 'cd /var/www/devops-test && git checkout feature && git pull && npm install && pm2 restart all' - Set build triggers - Project > Project Settings > Build Triggers
- Select Behaviour - Run builds for these branches only enter 'feature' for only the feature branch to trigger build
- Select Build Trigger - Build on commit, merge, and tags
- Copy SSH key in - Project > Project Settings > General to
/home/deploy/.ssh/authorized_keys
- Either repeat steps 2-6 OR more convienently take a snapshot of the first droplet and use this to create the second droplet.
- SSH into the second droplet to start
ssh-agentand the deploy key - Start the app/server
cd /var/www/devops-test && npm start - Update the deploy script on Codeship to deploy to the second droplet
# deploy to ws1-devops
ssh deploy@DROPLET_IP 'cd /var/www/devops-test && git checkout feature && git pull && npm install && pm2 restart all'

# deploy to ws2-devops
ssh deploy@DROPLET_IP 'cd /var/www/devops-test && git checkout feature && git pull && npm install && pm2 restart all'
- Spin up a loadbalancer on Digital Ocean and add the droplets to its balancing group
- Configure the settings as follows
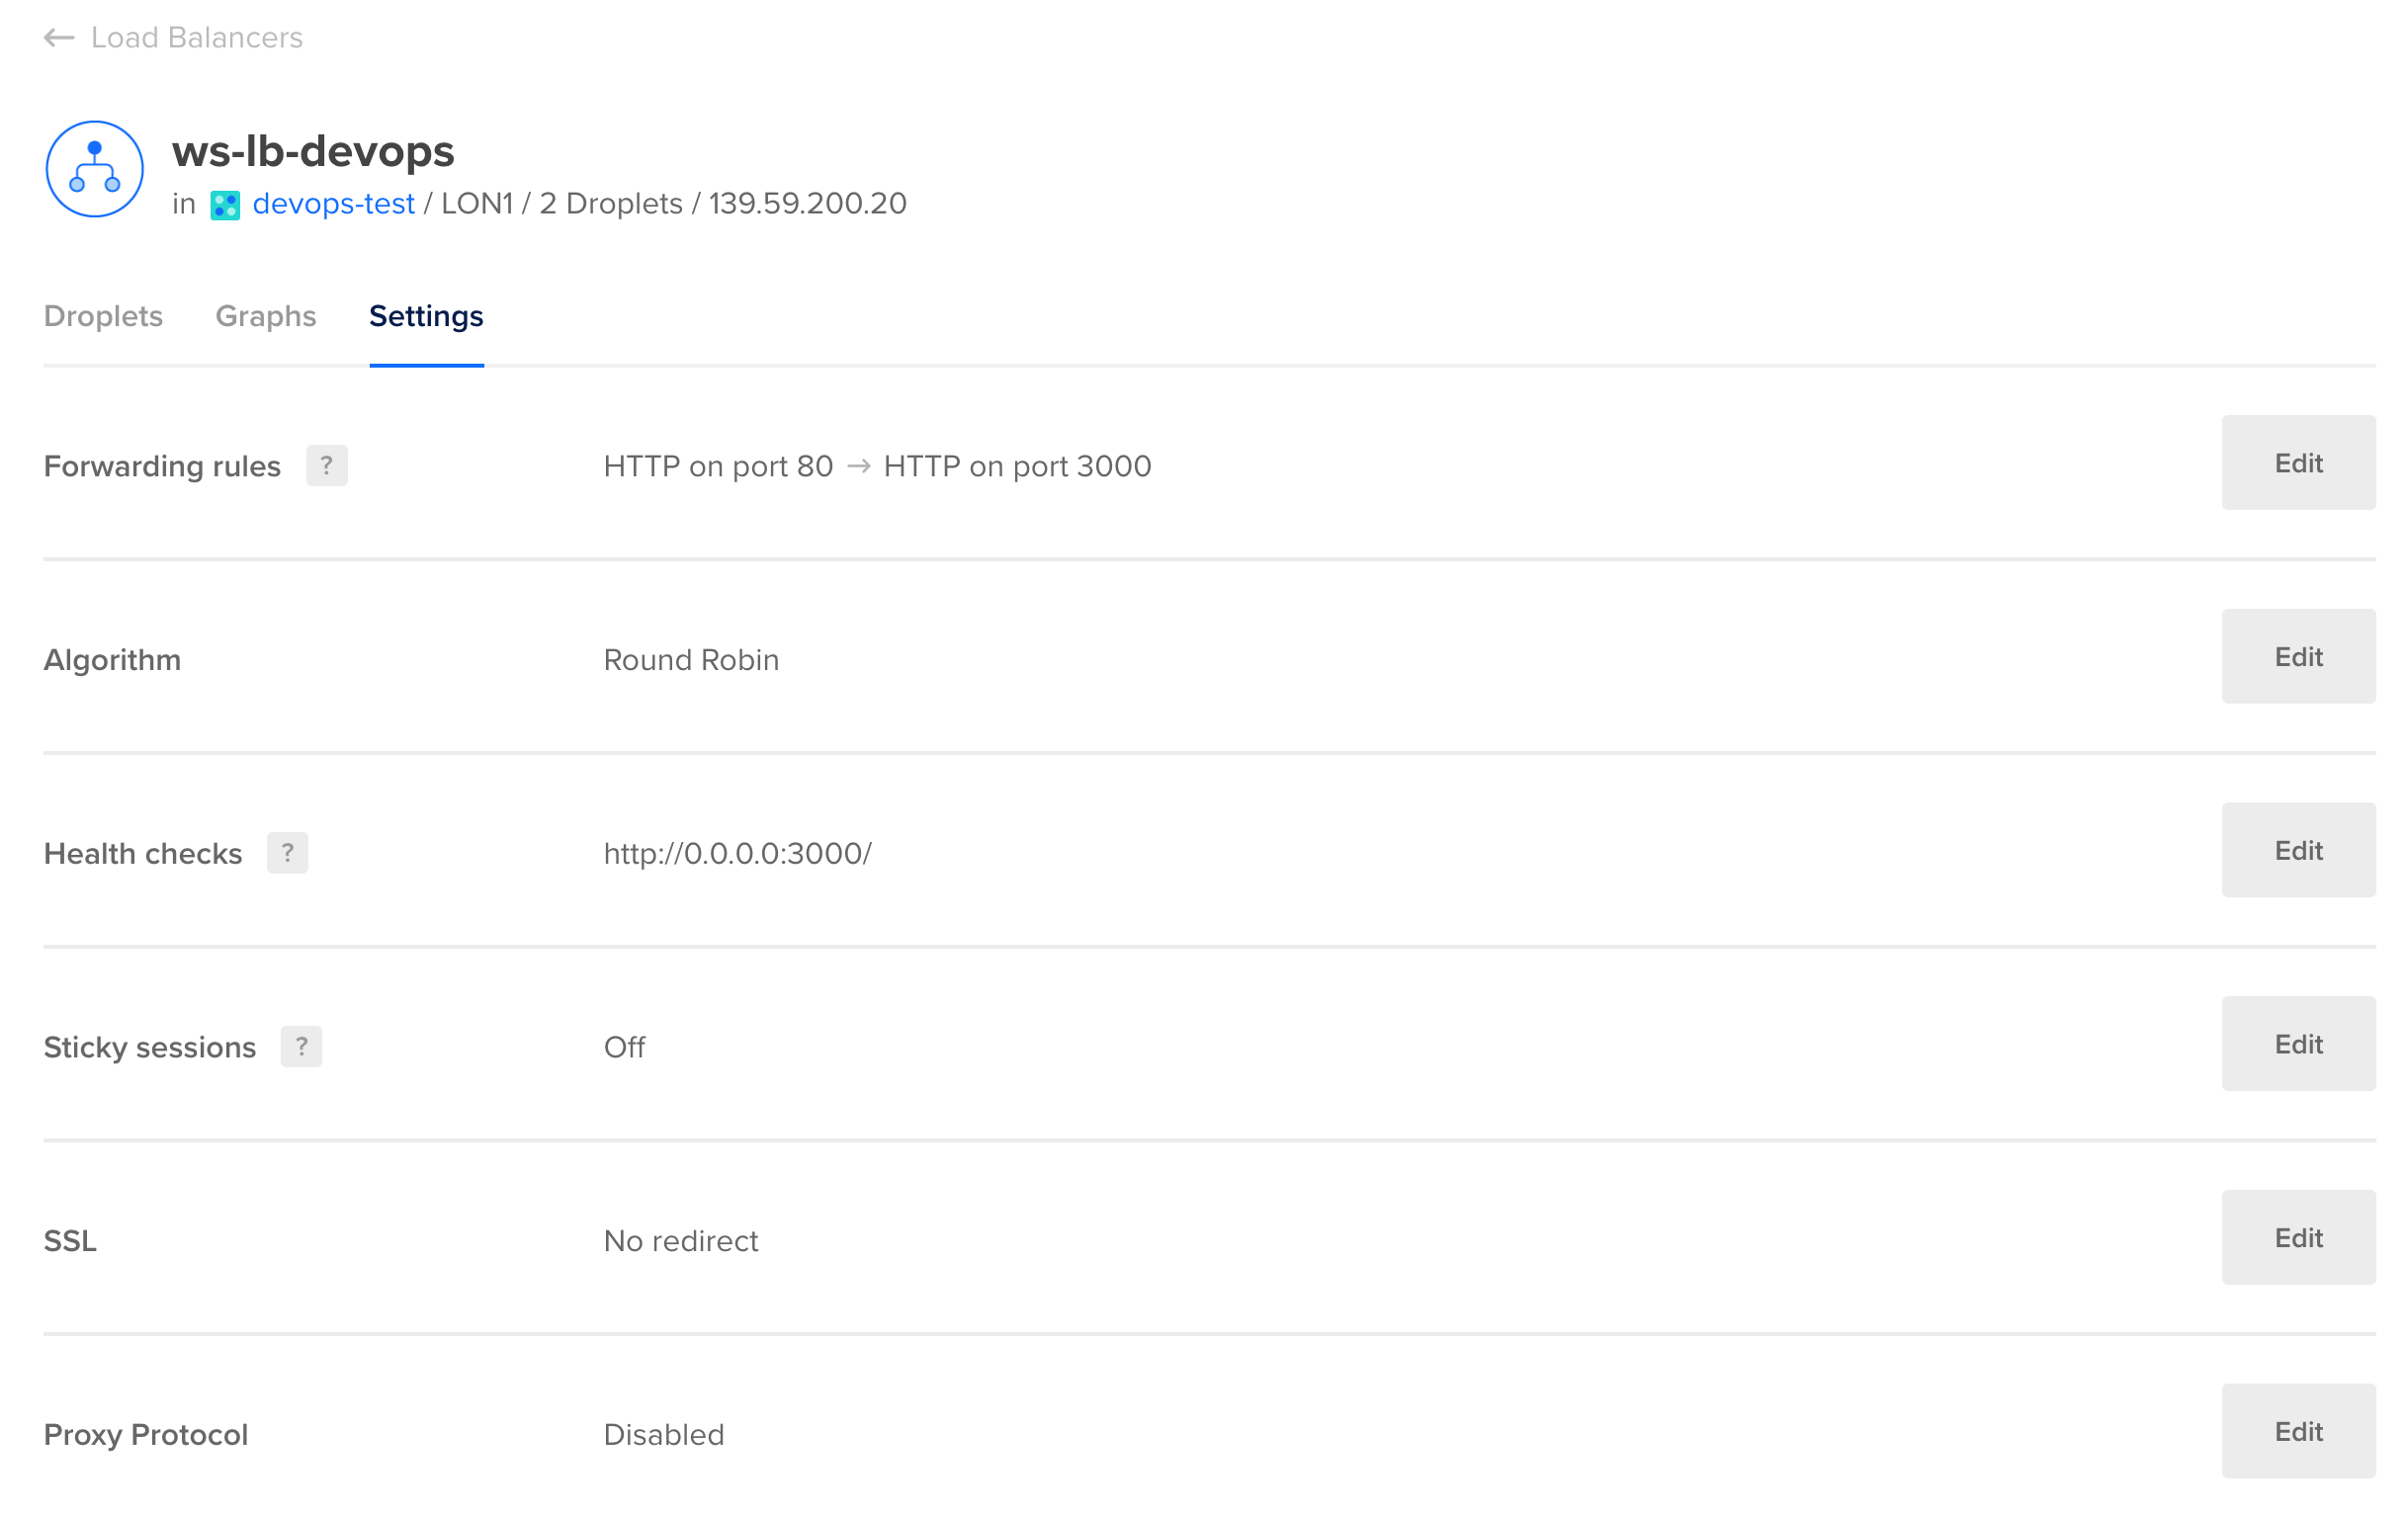
- Droplet 1 - http://ws1-devops.joelcalliste.me:3000
- Droplet 2 - http://ws2-devops.joelcalliste.me:3000
- Loadbalancer - http://ws-devops.joelcalliste.me