Detailed outline of steps required to configure Jupyter Data Science Notebook Server on Amazon Web Services
Setting up a SSH Key
- Open Terminal/Bash
- $ssh-keygen #This will generate an public/private rsa key pair
A generated key pair should be defaultly saved to a .ssh file. It is fine to not set a passphrase especially if it is a personal computer. Be careful of overwriting previously saved generated key pairs! - $ls ~/.ssh #This will list the files within the .ssh folder
You should see two files, one named id_rsa which will be your identification and id_rsa.pub which will be your public key. - $cat ~/.ssh/id_rsa.pub #This will display the contents of the key
Amazon EC2 Key pair and Security Group
- Sign into the Amazon Web Services Console
- Under the All Services tab, click into EC2
- Under resources or the network & security tab on the dashboard, click into Key Pairs
- Click import Key Pair
Give the Key Pair a name to help you differentiate your key pairs, such as based on when you created the key. Copy and Paste the contents of the id_rsa.pub key into the Public key contents box.Then import it. - Under resources or the network & security tab on the dashboard, click into Security Groups
- Click create Security Group
Give the Security Group a name, and enter a description for it such as ssh http. Under inbound rules, select type SSH and HTTP, which should be ports 22 and 80 respectively. Change the source for both of them to anywhere. Create the Security Group.
Setting up a AWS Operating System
- Click Launch Instance, which can also be found on the EC2 dashboard.
- Select the Amazon Machine Image (AMI) of your coosing.
Ubuntu being one of the more popular option that is widely used by many people and companies. If last digit on the version is even, it usually mean that it is a stable version while an odd number demarks it to be a test version. - Choose an Instance Type.
Select the Tier that lines up with the amount of computer processing power that is require for your project. - Skip the Configure Instance Step to move on to Add Storage.
- Add Storage.
Enter the amount of Elastic Block Store(EBS) volume needed for your project. - Skip the Add Tag Step to move on to Configure Security Group.
- Configure Security Group.
Choose to Select an existing Security Group and select the one that you have just created for this project. Make sure to check the inbound rules to see if the ports selected will allow you to connect to the Jupyter server. Click Review and Launch. - Review Instance Launch
The warning sign above that says that your security group is open to the world just shows that you are connected to the internet and you can access it from anywhere. Make sure to go through and check each section to see if any mistakes were made on the above steps before clicking Launch. - Key Pairing
A prompt should show up after clicking Launch asking you to select a key pair. Choose to use an existing key pair and select the key pair that we created. Tick the checkbox asking if you have access to the selected key file and click Launch Instance. - Instances
Click on View Instances to bring you back to the Instances tab. Click on the Instance you just made to check that your imbound rules to see if your ports are open. Give a name to the Instance.
Docker Installation
- Copy the IPv4 Public IP number of the Instance you created for the project from the Instances tab on AWS.
- $ssh (AMI used, eg. ubuntu)@(Paste IPv4 Public IP number here) #On Terminal/Bash.
When prompted if we still want to continue due to being unable to authenticate the host server, say yes. This will then establish a connection between your local system to the AWS system that you had just set up. - $curl -sSL https://get.docker.com | sh #This downloads the script off Docker.com to install Docker
- $sudo usermod -aG docker (AMI used, eg. ubuntu) #This adds our user to the Docker group on our system
- $exit #Logout from our user for the above to take effect
- $ssh (AMI used, eg. ubuntu)@(Paste IPv4 Public IP number here) #Log back in
- $docker -v #This verifies the version of docker that was installed
Jupyter Installation
- $docker pull jupyter/datascience-notebook #Pull the Jupyter Image to run our Jupyter notebook server
- $docker Images #This lists and verify the Image that was pulled
- Optional $docker tag (Image ID) (alternate name, eg. dsnb) #This creates a new Image that shares the same Image ID
- $docker run -v /home/ubuntu:/home/jovyan -p 80:8888 -d dsnb #This command allows the writing of files from Jupyter to AWS
-v allows us to write files to AWS. 80 is the port of HTTP which we assigned in AWS Security group. 8888 is Docker's assigned port. - $docker ps #This views the containers that are running
- $docker exec (container ID) jupyter notebook list #Jupyter notebook servers running on our docker container
From the currently running servers list, copy the token number within the displayed url parameter - Go to webpage browser and type (IPv4 Public IP number) into the address bar to take you to jupyter
- Paste the token number into the password/token number box to log into jupyter
Security Concerns with Jupyter
Jupyter has an arbitrary code execution, which means it includes output, people that accessed someone elses code and execute it if they opened a notebook that they did not write. Which is why, Jupyter added a next level of security by asking for a token number. As Jupyter is becoming more popular, it being a publicly accessible server that is on the open web, means that it is more susceptible to being hacked by nefarious people.
Diagram of Overall System
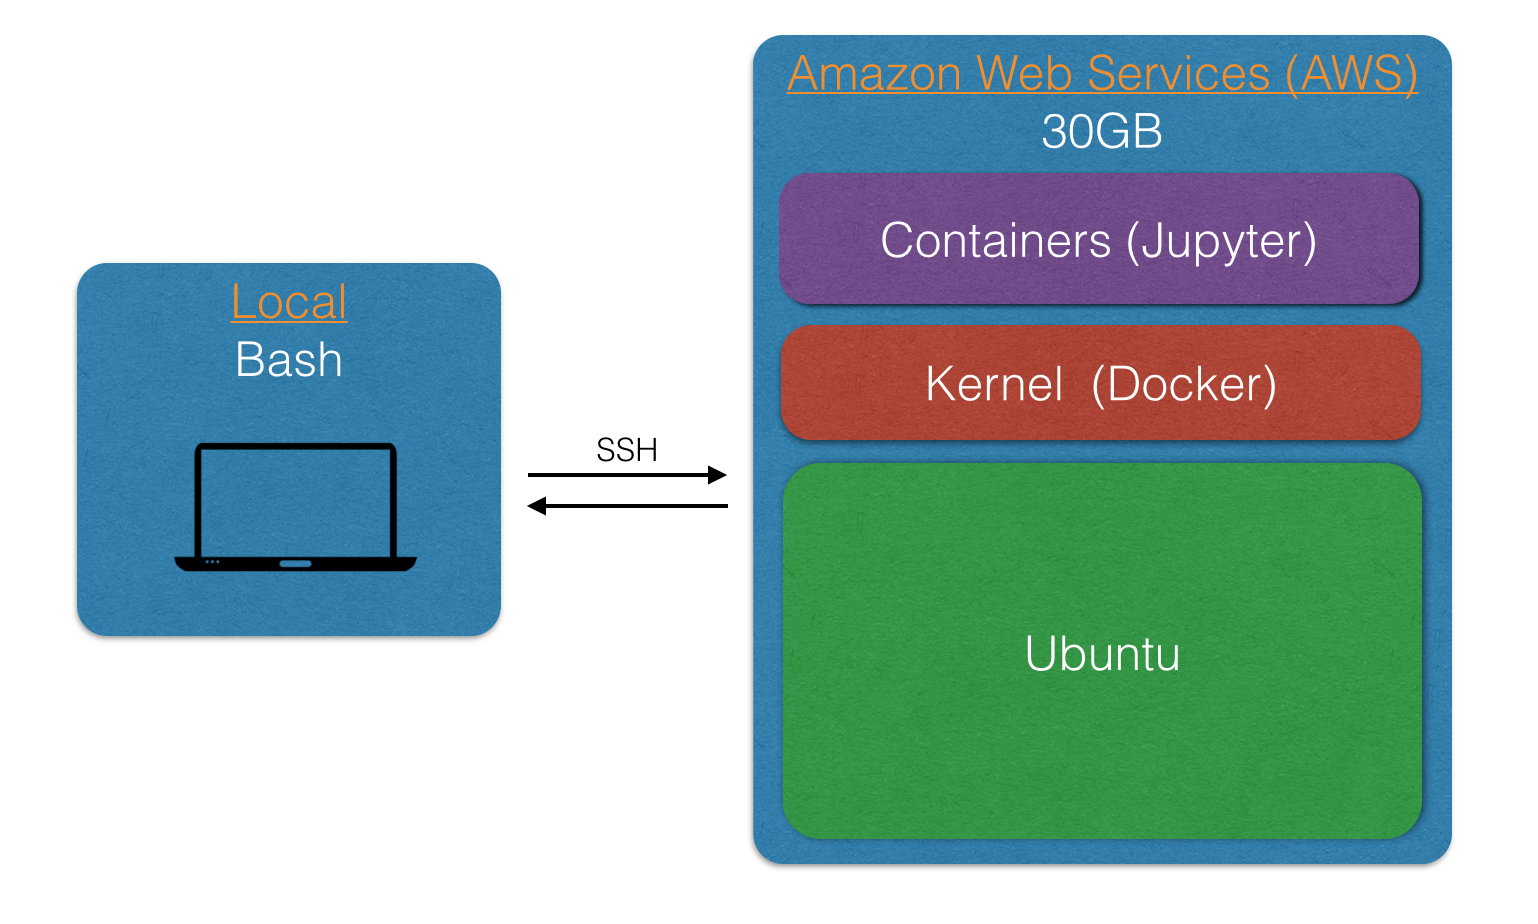
Calculating Budget for three EC2 instances
- Go the the Amazon Web Services website
- Click on the Pricing tab at the top of the website
- Scroll down the page until you see AWS Simple Monthly Calculator under the Calculate Your Savings section and click into it
- Put in the informations to estimate the cost per month
In these examples, I am choosing not to use the free-trial credits and using Oregon as the region.
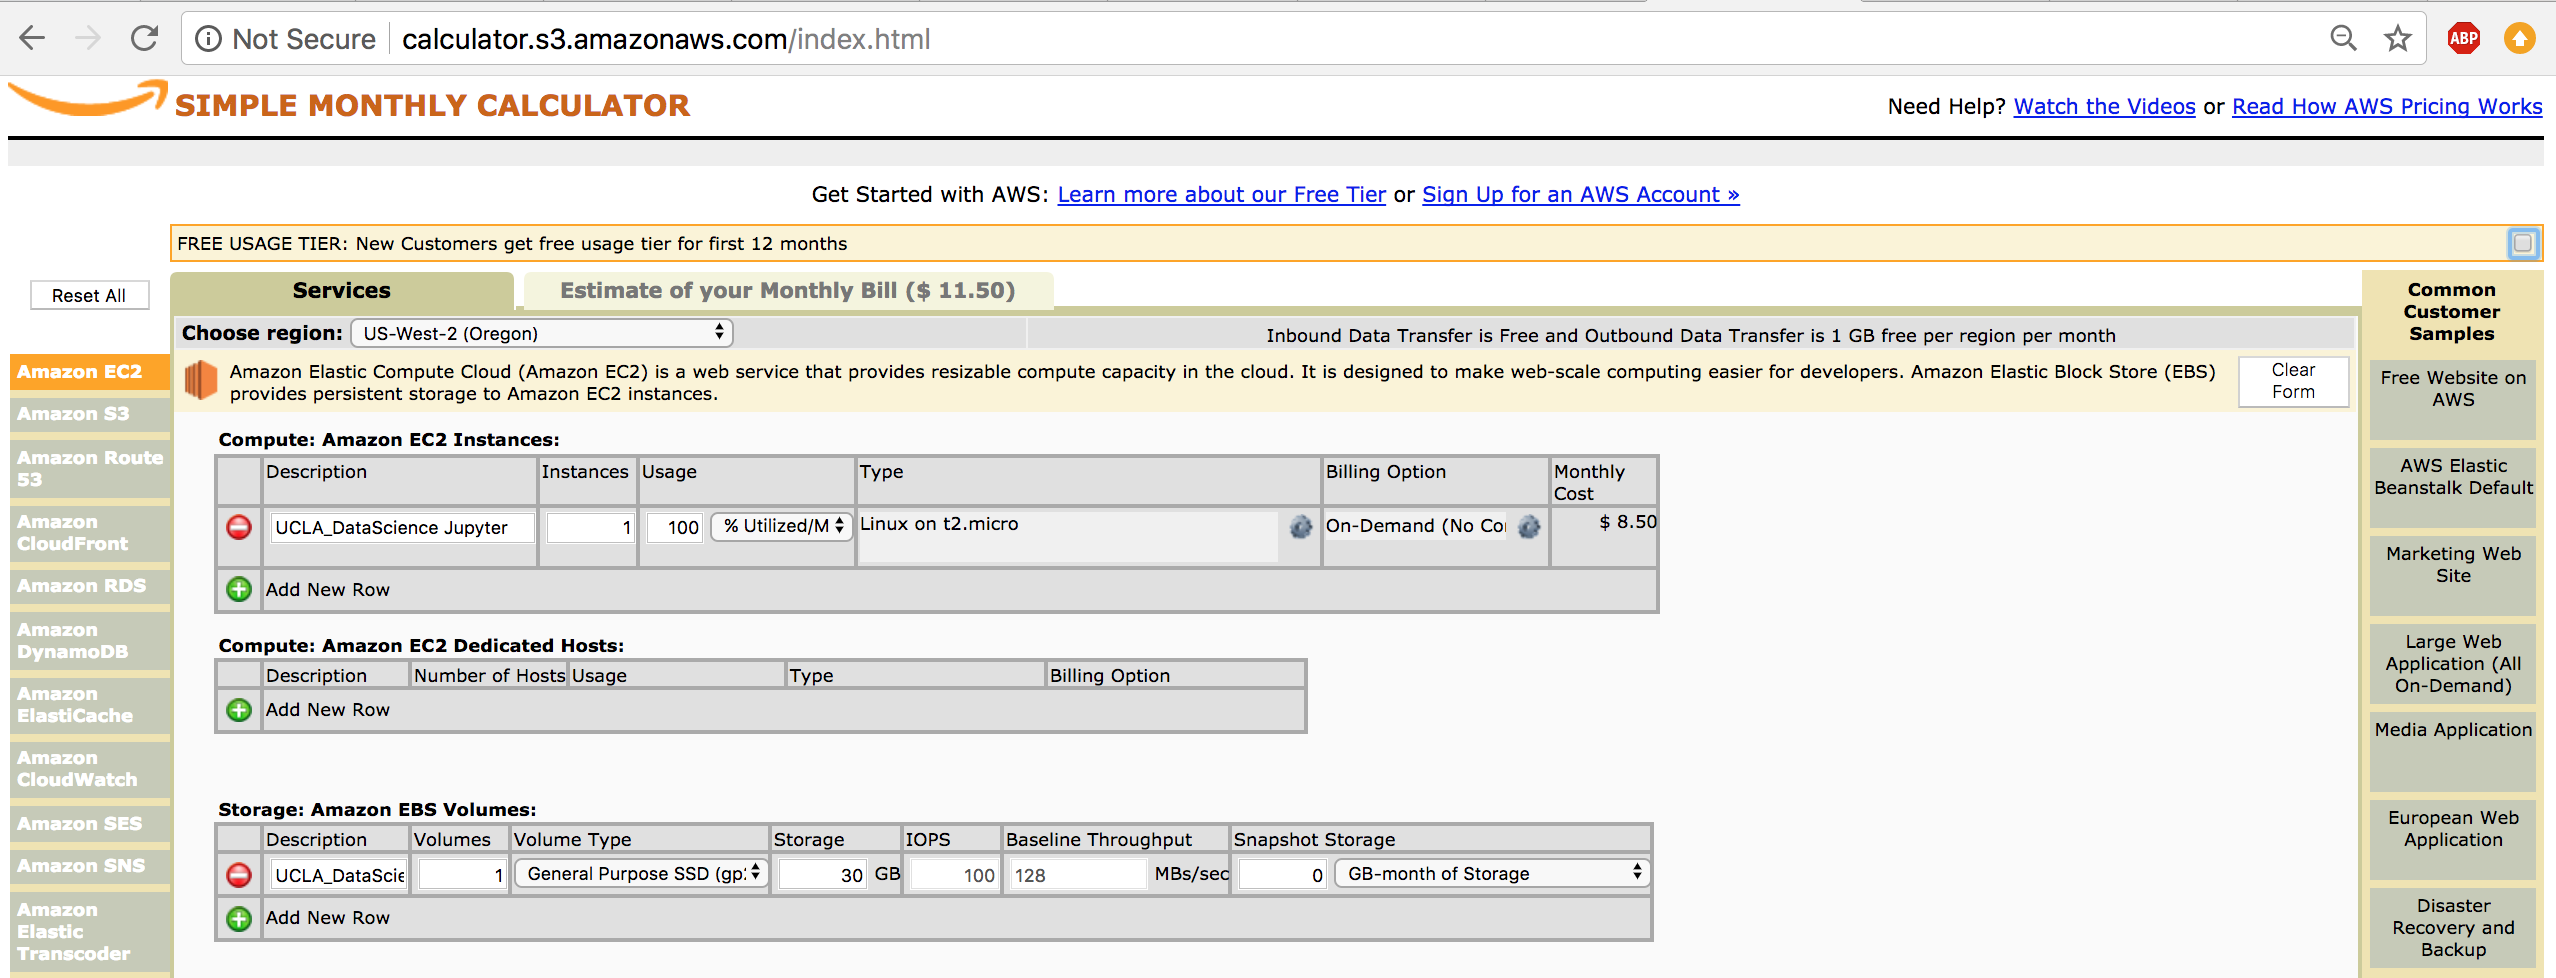
For this example of running a Jupyter Data Science Notebook Server, I am using a Linux t2.micro E2 Instance with a EBS Volume Storage of 30GB. As the picture shows, on the tab next to Services called Estimate of your Monthly Bill, it shows the estimated cost of $11.50 for this configuration. Thus 3 months of running this single Jupyter Data Science Notebook Server will cost about $34.50.
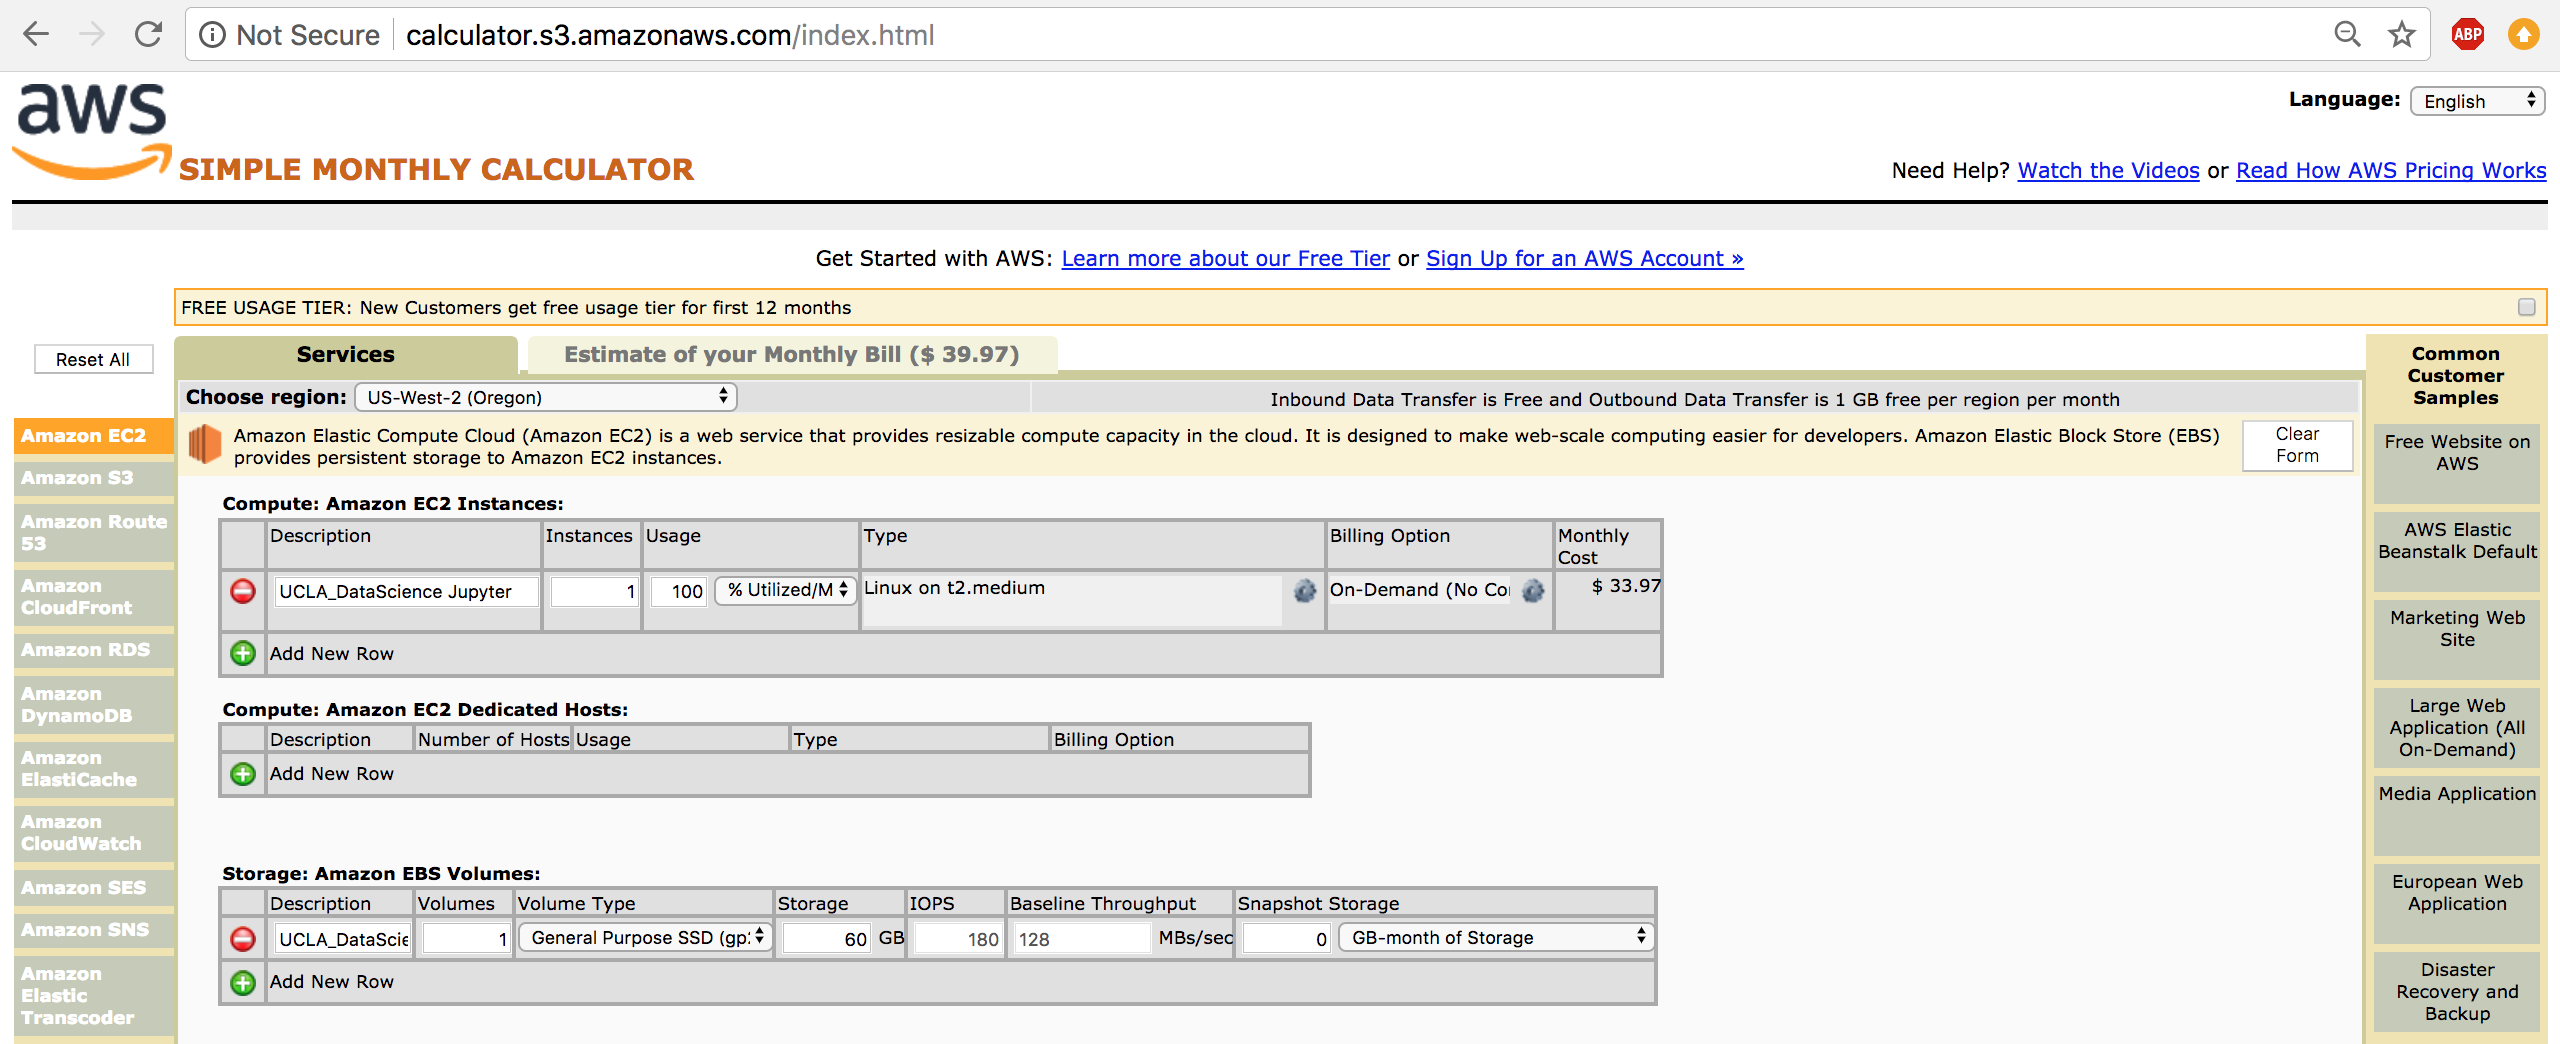
Changing the configurations, using a Linux t2.medium E2 Instance with a EBS Volume Storage of 60GB, the estimated monthly bill is $39.97. This mean running this E2 Instance for 3 months will cost an estimated $119.91.
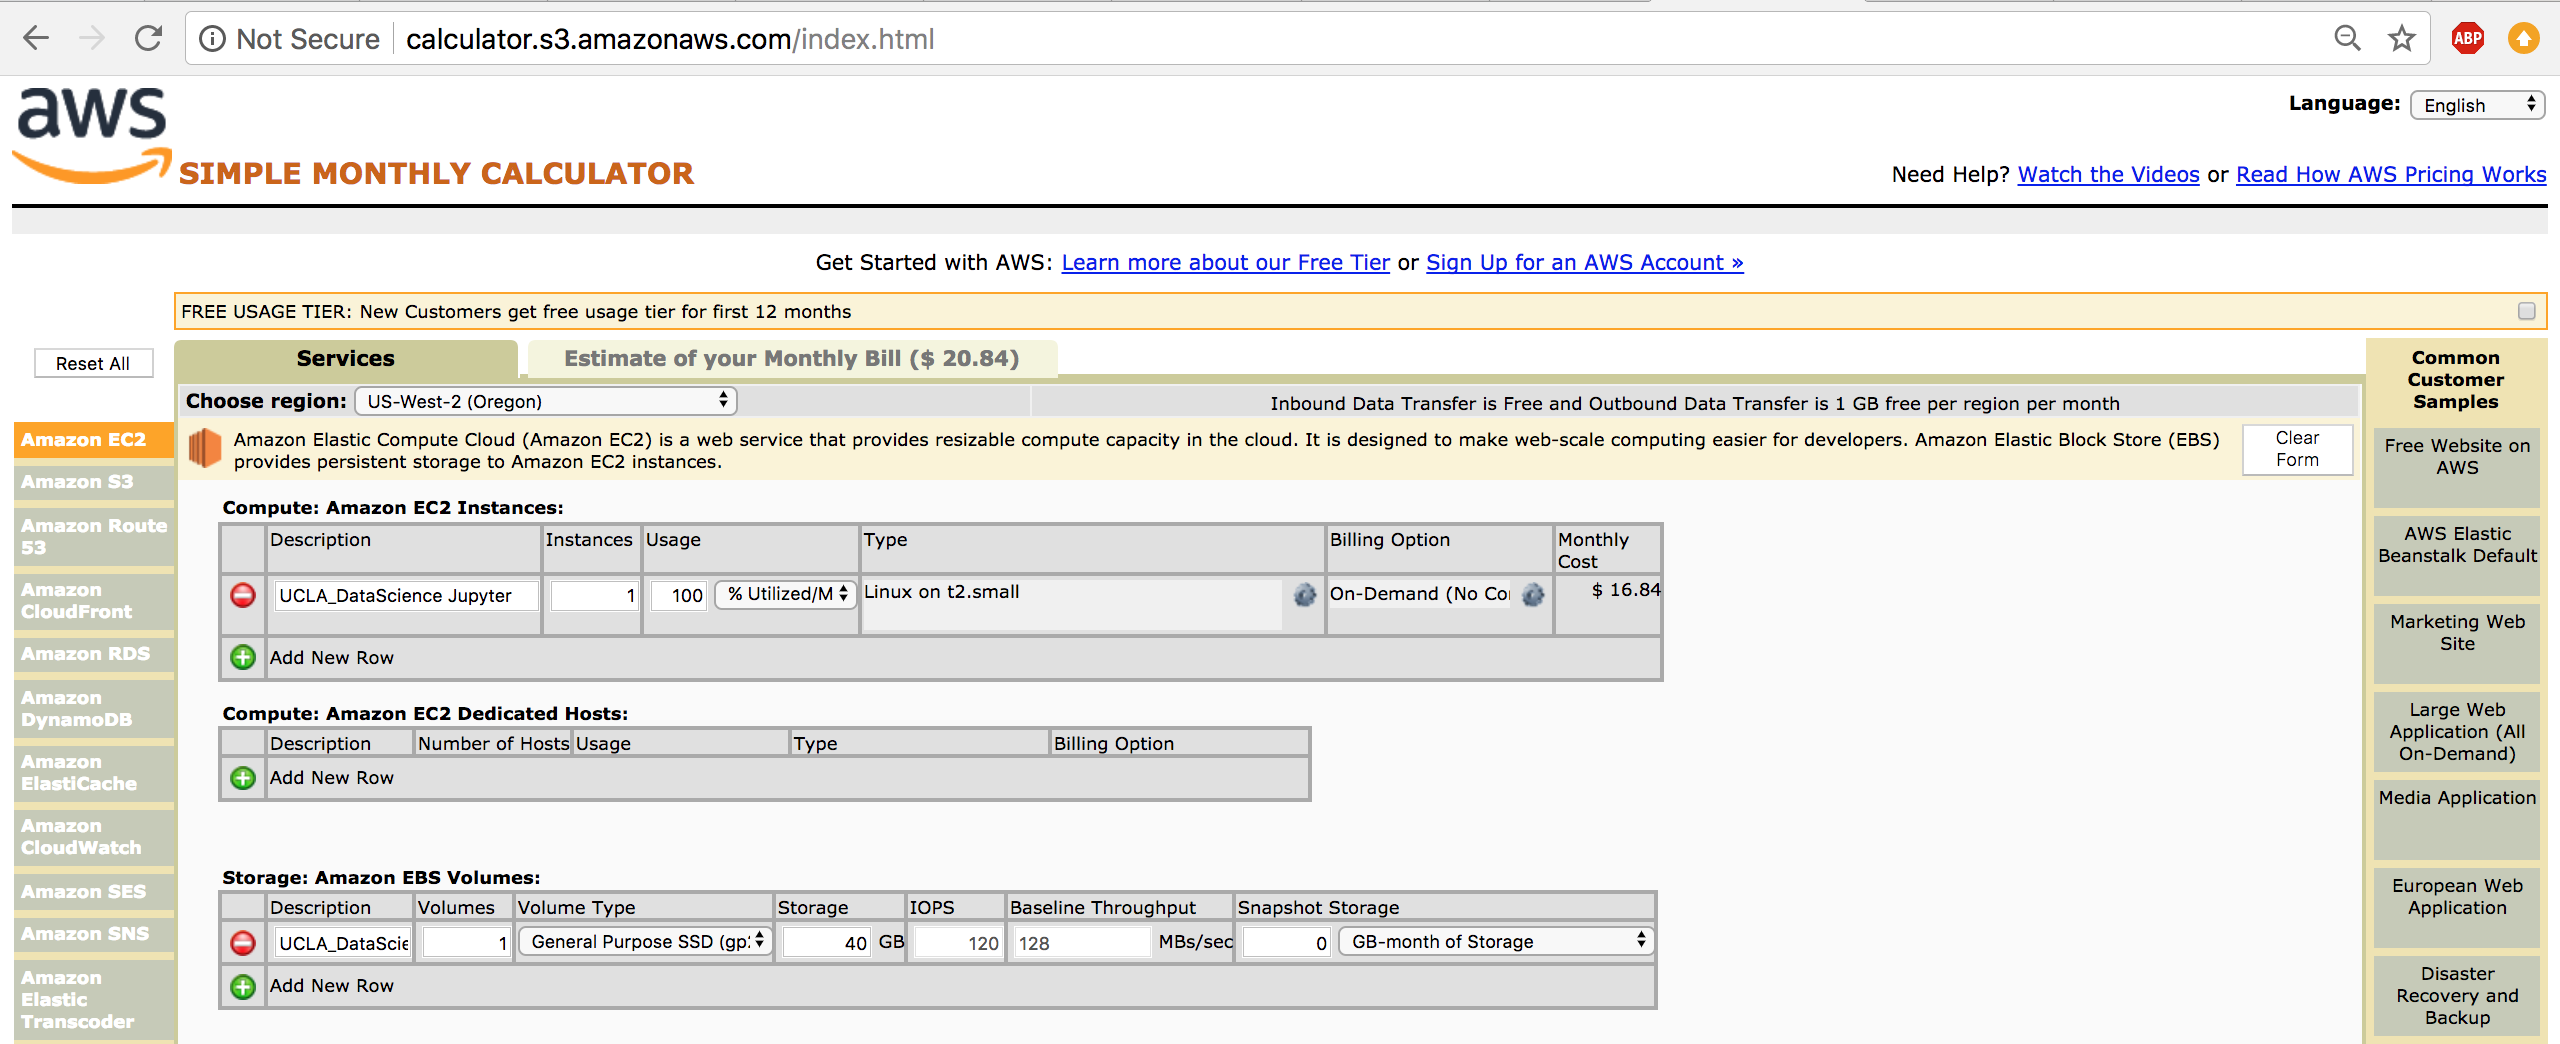
For the last example, I use a Linux t2.small E2 Instance with a EBS Volume Storage of 40GB, the estimated monthly bill is $20.84, which makes running it for 3 months to come up to be $62.52.