

ClipCascade is a lightweight, open-source utility that automatically syncs your clipboard across multiple devices—no manual input required. It ensures seamless sharing with robust end-to-end encryption, providing a secure and reliable clipboard experience across workstations.
No Server? No Problem! Instantly sync your clipboard using the Live Community Server at clipcascade.sathvik.dev—no setup needed. Just create an account and start sharing your clipboard across devices in seconds!
| Docker | Windows | macOS | Android | Linux |
|---|---|---|---|---|

|

|

|

|

|
|
|
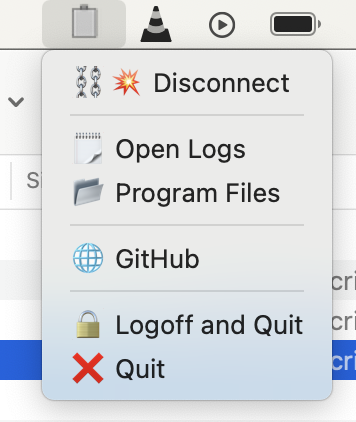
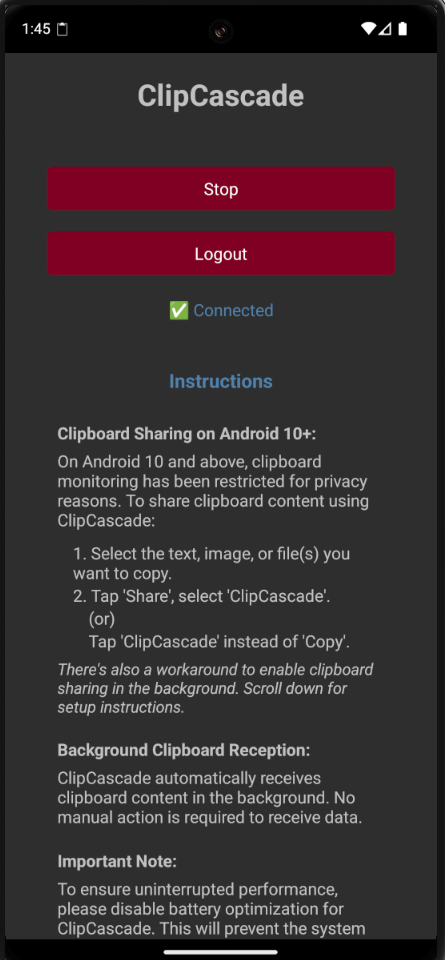
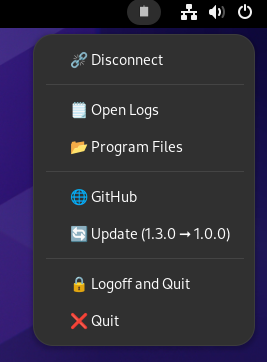
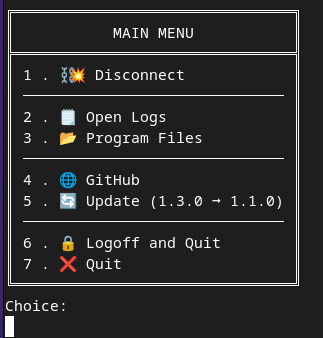
| 🪟 Desktop (Windows) | 🍏 Desktop (macOS) | 🤖📱 Mobile (Android) | 🐧🖱️ Desktop (Linux_GUI) | 🐧⌨️ Desktop (Linux_CLI) |
|---|---|---|---|---|
 |
 |
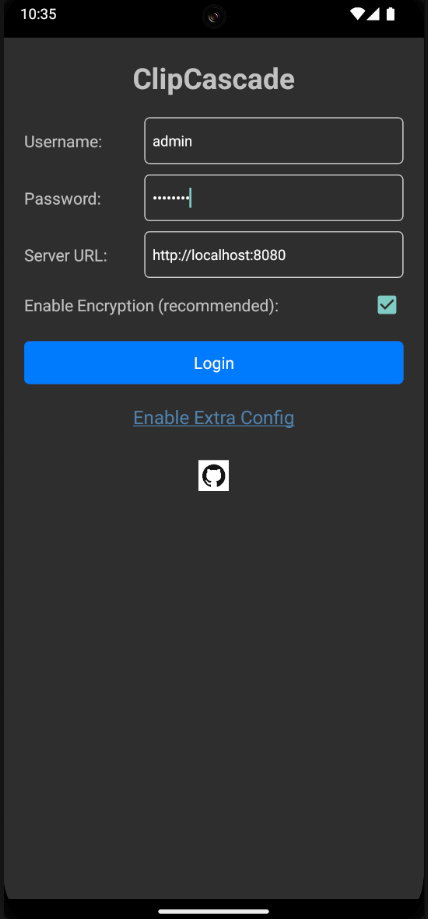 |
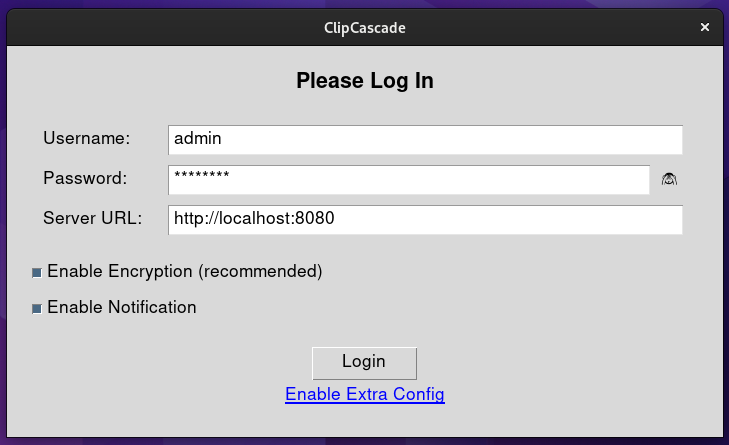 |
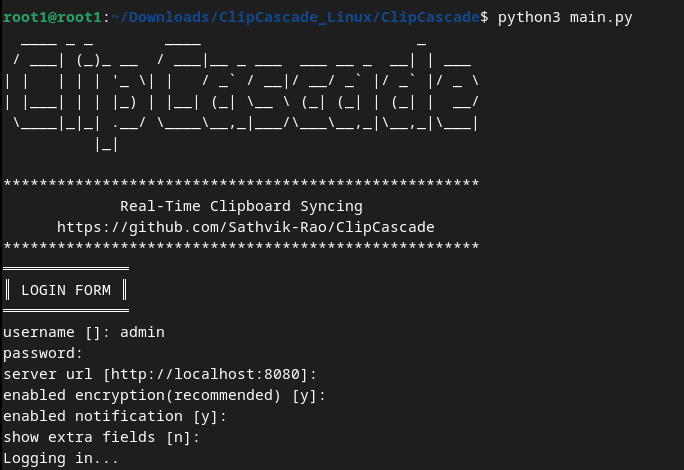 |
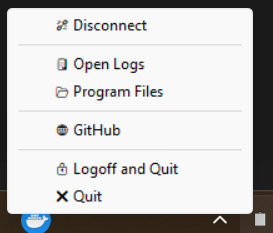 |
 |
 |
 |
 |
- 🚀 Instant Clipboard Sync – Clipboard content updates in real time across all connected devices. Just copy, and it’s there!
- 🔒 Secure Authentication – Ensures only authorized users can sync clipboard data.
- 🛡️ End-to-End Encryption – Protects clipboard content with advanced cryptographic security and hashing techniques.
- 🔄 Dual Sync Modes:
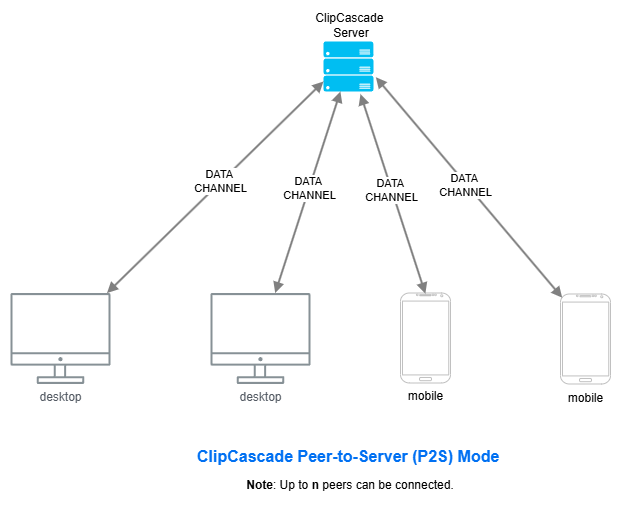
- ☁️ Server-Based Sync – Reliable cloud-based synchronization via a centralized server.
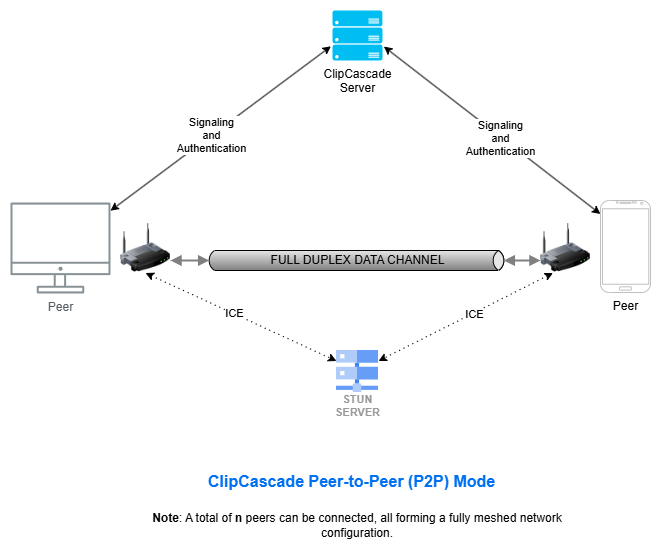
- 🔗 Peer-to-Peer Sync – Direct device-to-device connection for ultra-low latency and minimal server dependency.
- 💻 Cross-Platform Compatibility – Works seamlessly on Windows, macOS, Linux, and Android.
- 📄📷📁 Universal Clipboard – Syncs text, images, and files effortlessly across devices.
- 📦 Self-Hosting Option – Deploy your own secure instance using a Docker image or standalone JAR file.
- 👥 Multi-User Support – Isolates clipboard data per user while enabling seamless syncing between personal devices.
- 🌐 Web-Based Dashboard – Track clipboard activity and manage settings through an intuitive interface.
- ⚙️ Customizable Preferences – Fine-tune sync settings for performance, security, and usability.
↔️ Per-Device Sync Direction – Choose whether each device sends, receives, or syncs clipboard content both ways.- 🔔 Smart Update Notifications – Stay informed about new features, security patches, and enhancements.
| Type | Windows | MacOS | Linux GUI | Linux CLI | Android |
|---|---|---|---|---|---|
| Text | ✔ | ✔ | ✔ | ✔ | ✔ |
| Image | ✔ | ✔ | ✔ | ✔ | ✔ |
| Files | ✔ | ✔ | ✔ | ✔ | ✔ |
To deploy the ClipCascade server on any operating system that supports Java 21 or later, follow the steps outlined below.
-
Download the Server JAR File
Obtain the latest release of
ClipCascade-Server-JRE_21.jarfrom the release page. -
Configure Environment Variables (Optional)
The ClipCascade server supports various environment variables for customization. None of these variables are mandatory, but they can be configured as needed.
For a comprehensive list of available environment variables, refer to the Advanced Details section.
Variable Description Default Value Example CC_MAX_MESSAGE_SIZE_IN_MiBDefines the maximum allowed message size in MiB. Ignored if CC_P2P_ENABLEDis set totrue.13CC_ALLOWED_ORIGINSSpecifies the allowed WebSocket origin (not general HTTP CORS). *https://clipcascade.example.comCC_P2P_ENABLEDEnables or disables peer-to-peer mode. When enabled, CC_MAX_MESSAGE_SIZE_IN_MiBis ignored.falsetrueCC_SIGNUP_ENABLEDAllows or restricts user self-registration. falsefalseCC_PORTSpecifies the port on which the server listens for incoming connections. 80801234 -
Start the Server
Run the following command in the terminal to launch the ClipCascade server:java -jar ClipCascade-Server-JRE_21.jar
-
Access the Server
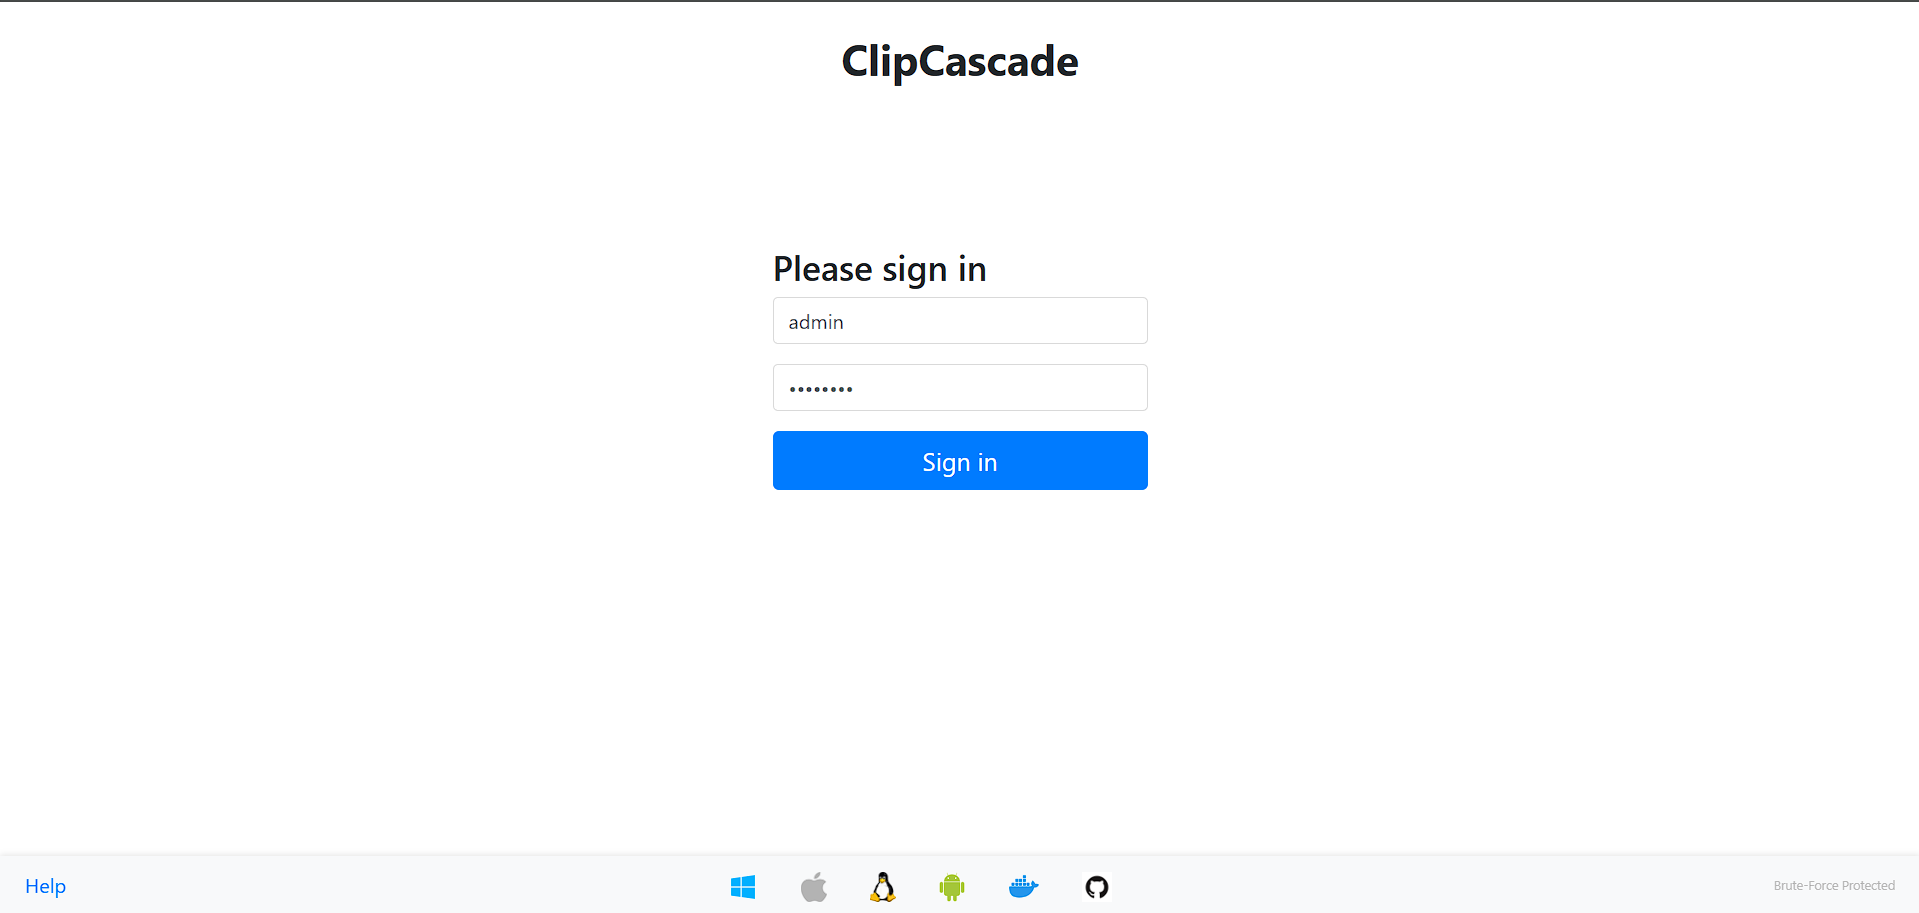
Once the server is running, you can access it via:http://localhost:8080- Default Credentials:
- Username:
admin - Password:
admin123
- Username:
- Default Credentials:
Important: It is strongly recommended to change the default credentials immediately after the initial login.
For guidance on setting up a reverse proxy, refer to the Reverse Proxy Setup section.
For users who prefer a one-liner, you can deploy ClipCascade instantly using:
docker run -d --name clipcascade -p 8080:8080 -e CC_MAX_MESSAGE_SIZE_IN_MiB=1 -v ./cc_users:/database sathvikrao/clipcascadeTo host ClipCascade on your server using Docker, follow these steps:
-
Create a
docker-compose.ymlFileCreate a
docker-compose.ymlfile with the following content, or download it from the release page:services: clipcascade: image: sathvikrao/clipcascade:latest ports: - "8080:8080" # Expose the ClipCascade server on port 8080 restart: always # Automatically restart the container if it stops volumes: - ./cc_users:/database # Persistent storage for user data environment: - CC_MAX_MESSAGE_SIZE_IN_MiB=1 # Maximum message size in MiB (ignored if P2P mode is enabled) - CC_P2P_ENABLED=false # Enables or disables peer-to-peer(P2P) mode # - CC_ALLOWED_ORIGINS=https://clipcascade.example.com # Restricts the WebSocket origin # - CC_SIGNUP_ENABLED=false # Enables or disables user self-registration
For HTTPS with Nginx, Traefik, Caddy, or Nginx Proxy Manager, use the reverse-proxy setups.
For additional
.ymlconfiguration files, visit ClipCascade Server Docker Configuration. -
Deploy the Docker Container
Run the Docker container using Docker Compose:
docker-compose up -d -
Access the Server
Once the server is running, you can access it via:http://localhost:8080- Default Credentials:
- Username:
admin - Password:
admin123
- Username:
- Default Credentials:
Important: It is strongly recommended to change the default credentials immediately after the initial login.
For guidance on setting up a reverse proxy, refer to the Reverse Proxy Setup section.
To install the ClipCascade Windows desktop application, follow these steps:
- Download the Installer
- Get the latest version of ClipCascade from the Releases page.
- Install the Application
- Run the downloaded
.msiinstaller and follow the on-screen instructions, and select the default installation path specified by the installer. - Startup is enabled by default; you can disable it in the Task Manager if desired.
- Run the downloaded
- Launch and Configure
- Open ClipCascade after installation and log in to start syncing your clipboard across devices.
- When prompted, enter your server's IP address, port number, or domain name.
- If encryption is enabled, ensure it is enabled on all devices.
- In the advanced settings section, you can set a local clipboard size limit. By default, no limit is enforced (note: large file transfers may cause temporary unresponsiveness).
- Network Access Prompt (P2P Mode)
-
If the server is running in P2P mode, you will see a Windows security prompt asking, "Do you want to allow public and private networks to access this app?"

-
This is because each client device acts as a peer in the network, requiring direct communication.
-
Click Allow to enable clipboard data syncing across your devices without the help of a server. The server is needed only for signaling and authentication.
-
Important Note: Since the application is not published or registered with Microsoft, you may see a warning suggesting that it could be unsafe. This is a standard precaution and does not indicate any issues with the software. You can choose to ignore this warning or temporarily disable your antivirus during installation. All source code is available in this repository, and everything is open source and free. If you prefer, you can compile the executable yourself. Feel free to review the code to ensure your comfort! Registering the application with Microsoft requires purchasing a certificate subscription, which is quite expensive, especially for an open-source project.
To build your own desktop executable from source (ClipCascade_Desktop/src):
pip3 install pyinstaller
pip3 install -r requirements_win.txt
python3 -m PyInstaller ClipCascade_win.spec
The .exe file does not need UAC approval because it is standalone executable, while the .msi installer will request UAC permissions because it creates a designated folder for the software, adds a startup option, and allows for uninstallation via the Control Panel. Additionally, with the .msi installer, you have the option to choose any location to save the software. However, select locations where even when you create a file manually at that location, Windows shouldn’t prompt for permission to answer "yes or no" questions.
To install the ClipCascade macOS desktop application, follow these steps:
-
Download the Application
- Visit the Releases page and download the appropriate version:
- For M-series chips (Apple Silicon), download
ClipCascade-Apple_macOS.ARM_M-Series.zip. - For Intel chips, download
ClipCascade-Apple_macOS.Intel-Series.zip.
- For M-series chips (Apple Silicon), download
- You can check your chip type by navigating to Apple Menu → About This Mac.
- Visit the Releases page and download the appropriate version:
-
Extract the Archive
- Double-click the
.zipfile to extract its contents.
- Double-click the
-
Locate the Application
- Open the extracted folder to find the ClipCascade application.
- Move the application to a preferred location, such as the Applications folder.
-
First-time launch (see note below for more information)
-
Right-click (not double-click) on the ClipCascade application and select Open.

-
If you encounter the warning "Apple could not verify 'ClipCascade' is free...", click Done or Ok. (Apple Guide)


-
Go to System Preferences > Security & Privacy > Click Open Anyway (if you see the option), and when you re-run(right click->open) the application warning prompt reappears one last time, click Open Anyway or Open. (Apple Guide)


-
-
-
Wait for the app to launch
- When you open the application, macOS will scan the application. This may take 10–30 seconds.
-
Configure the application
- When prompted, enter your server's IP address, port number, or domain name.
- If encryption is enabled, ensure it is enabled on all devices.
- In the advanced settings section, you can set a local clipboard size limit. By default, no limit is enforced (note: large file transfers may cause temporary unresponsiveness).
-
Network Access Prompt (P2P Mode)
-
If the server is running in P2P mode, you will see a macOS security prompt asking, "Allow "ClipCascade" to find devices on local networks?"

-
This is because each client device acts as a peer in the network, requiring direct communication.
-
Click Allow to enable clipboard data syncing across your devices without the help of a server. The server is needed only for signaling and authentication.
-
-
Access the App from the Menu Bar
- Once logged in, the application will run in the menu bar with a clipboard icon at the top of your screen.
-
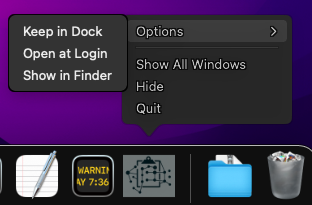
Enable Auto-Startup:
-
Right-click the ClipCascade icon in the dock (bottom of the screen).
-
Select Options and then check Open at Login.
-
Alternatively, open Settings → General → Login Items & Extensions, then add ClipCascade manually.
-
Important Note: Since the application is not published or registered with Apple, you may see a warning suggesting that it could be unsafe. This is a standard precaution and does not indicate any issues with the software. You can choose to ignore this warning. All source code is available in this repository, and everything is open source and free. If you prefer, you can compile the executable yourself. Feel free to review the code to ensure your comfort! Registering the application with Apple requires purchasing a certificate subscription, which is quite expensive, especially for an open-source project.
To build your own desktop executable from source (ClipCascade_Desktop/src):
pip3 install certifi pyinstaller
pip3 install --no-cache-dir -r requirements_mac.txt
python3 -m PyInstaller ClipCascade_macos.spec --cleanTo install the ClipCascade mobile application on your Android device, follow these steps:
- Download the latest APK from the Releases page.
- Enable installation from unknown sources in your device settings, if prompted.
- Install the APK by following the prompts on your device.
- Open ClipCascade and log in to begin syncing your clipboard across devices.
- When prompted, enter your server's IP address, port number, or domain name.
- If encryption is enabled, ensure it is enabled on all devices.
- In the advanced settings section, you can set a local clipboard size limit. By default, no limit is enforced (note: large file transfers may cause temporary unresponsiveness).
ClipCascade supports automatic clipboard monitoring for both rooted and non-rooted devices. To activate this feature, execute the following ADB commands.
These permissions can also be granted using Shizuku through Grant permissions using Shizuku in the app's Android setup guide.
Before proceeding, make sure ADB is installed on your system. Follow the instructions here to install ADB on Windows, macOS, or Linux.
-
Grant the
READ_LOGSpermission:adb -d shell pm grant com.clipcascade android.permission.READ_LOGS
-
Enable "Display/Drawing over other apps," "Screen overlay," or "Appear on top": This permission can also be enabled from the device's Settings. To set it via ADB, use:
adb -d shell appops set com.clipcascade SYSTEM_ALERT_WINDOW allow -
Kill the app for the new permissions to take effect:
adb -d shell am force-stop com.clipcascade

Once the setup is complete, it operates seamlessly without requiring any extra steps. It monitors log entries related to ClipCascade, and if it detects an error during a clipboard copy action, it will trigger an overlay window to gain focus. This overlay allows the app to capture the clipboard content and send it to the connected devices immediately before going out of focus and closing. When the app is uninstalled, these permissions will be removed, requiring you to redo these steps. Additionally, each time you start the foreground service, it will prompt you to choose whether to monitor logs. This ensures that everything remains secure and under your control.
After executing three ADB commands, when you click the Start button, you will see a pop-up message. Click "Allow."

This guide provides step-by-step instructions to install ClipCascade on Debian/Ubuntu, Fedora, and Arch-based systems. While the commands are specifically tailored for these distributions, you can adapt the process for other Linux distributions with minor modifications. The Linux code is available on the Releases page as ClipCascade_Linux.zip. Once downloaded, navigate to the ClipCascade/ folder containing main.py, and open a terminal in that directory.
Note: On startup, ClipCascade reads a handful of standard environment variables your desktop session already sets—such as
XDG_SESSION_TYPE,WAYLAND_DISPLAY, andDISPLAY—so it knows which display and clipboard APIs to use (the same kind of information any graphical app needs locally). From those values it classifies the environment as X11, XWayland (a Wayland session that also exposes an X11 socket), Hyprland, native Wayland, or unknown. That classification picks both the default clipboard integration (X11-style versus Wayland-style tools) and the default user interface (GTK tray / GUI versus terminal-based CLI). X11, XWayland, and unknown default to the X11-style clipboard path and GUI; native Wayland and Hyprland default to the Wayland-style clipboard path and CLI. You can override defaults with--guiand--xmode(see below)—for example,--gui trueon Wayland still uses the Wayland clipboard path unless you also change--xmode.
sudo apt update
sudo apt install -y python3 python3-pip python3-gi xclip wl-clipboard dunst
sudo dnf check-update
sudo dnf install -y python3 python3-pip python3-gobject xclip wl-clipboard dunst
sudo pacman -Syu --noconfirm python python-pip python-gobject xclip wl-clipboard dunst xdg-utils
sudo apt install -y python3-gi-cairo gir1.2-gtk-3.0 gir1.2-gdk-3.0
sudo dnf install -y libappindicator-gtk3
sudo pacman -S --noconfirm python-gobject gtk3
Install the GNOME tray support extension.
sudo pip3 install -r requirements.txt
sudo pip install -r requirements.txt
If you encounter the error: externally-managed-environment, install the required Python packages manually.
sudo apt install -y python3-xxhash python3-pyperclip python3-requests python3-websocket python3-pycryptodome python3-tk python3-pystray python3-pyfiglet python3-bs4 python3-plyer python3-aiortc python3-prompt-toolkit
sudo dnf install -y python3-xxhash python3-pyperclip python3-requests python3-websocket-client python3-pycryptodomex python3-tkinter python3-pystray python3-pyfiglet python3-beautifulsoup4 python3-plyer python3-aiortc python3-prompt-toolkit
sudo pacman -S --noconfirm python-xxhash python-pyperclip python-requests python-websocket-client python-pycryptodome tk python-pystray python-pyfiglet python-beautifulsoup4 python-plyer python-aiortc python-prompt_toolkit
- If you encounter the
error: target not found: python-plyer, install viayay -S --noconfirm python-plyer - If you encounter the
error: target not found: python-aiortc, install viayay -S --noconfirm python-aiortc
sudo apt install -y libavformat-dev libavcodec-dev libavdevice-dev libavutil-dev libavfilter-dev libswscale-dev libswresample-dev pkg-config
sudo dnf install -y ffmpeg ffmpeg-devel
sudo pacman -S --noconfirm ffmpeg
Start ClipCascade by running (use sudo if needed):
- When prompted, enter your server's IP address, port number, or domain name.
- If encryption is enabled, ensure it is enabled on all devices.
- In the advanced settings section, you can set a local clipboard size limit. By default, no limit is enforced (note: large file transfers may cause temporary unresponsiveness).
python3 main.py
Linux supports optional launch arguments to manually tune behavior when needed:
--gui <true|false>: force GUI (tray / GTK login) withtrue, or terminal CLI withfalse, independent of the auto-selected default.--xmode <true|false>: force X11 / XWayland-style clipboard handling (xclip, GTK clipboard when applicable) withtrue, or Wayland-style handling (wl-clipboard) withfalse.--polling <seconds>: override clipboard polling interval (must be a positive number).
When flags are omitted, display-server detection sets the default --xmode behavior, and the default GUI vs CLI follows that same classification (GUI for X11, XWayland, and unknown; CLI for native Wayland and Hyprland). Use --gui / --xmode if your session variables do not match how you want the app to run.
Examples:
python3 main.py --gui true
python3 main.py --gui false --xmode false --polling 3
python3 main.py --polling 1.5
If these flags are not provided, ClipCascade automatically detects your environment and selects the most suitable clipboard path and interface.
If you encounter the No module named 'Crypto' error, create a symbolic link for the Cryptodome library:
see more
sudo ln -s /usr/lib/python3/dist-packages/Cryptodome /usr/lib/python3/dist-packages/Crypto
sudo ln -s /usr/lib/python3/site-packages/Cryptodome /usr/lib/python3/site-packages/Crypto
sudo ln -s /usr/lib/python3.*/site-packages/Cryptodome /usr/lib/python3.*/site-packages/Crypto
If you encounter the No module named 'tkinter' error:
sudo apt install -y python3-tkinter
sudo dnf install -y python3-tkinter
sudo pacman -S --noconfirm tk
Step 5.3: Fix 'gtk_widget_get_scale_factor: assertion 'GTK_IS_WIDGET (widget)' failed' Error (if applicable)
This error occurs due to a missing tray icon extension in GNOME. To resolve it, you can install the extension from here
sudo apt install dbus-x11
sudo dnf install dbus-x11
sudo pacman -S --noconfirm dbus
To run ClipCascade as a background process (if the GUI setup is functional), use the following command:
nohup python3 main.py &> /dev/null &
If root privileges are required, use:
sudo nohup python3 main.py &> /dev/null &
To ensure ClipCascade starts automatically when your system boots, modify the file paths as necessary and add the appropriate command to your startup script.
cd /path/to/clipcascade/src/ && nohup python3 main.py &> /dev/null &
If root privileges are required, use:
cd /path/to/clipcascade/src/ && sudo nohup python3 main.py &> /dev/null &
cd /path/to/clipcascade/src/ && python3 main.py
If root privileges are required, use:
cd /path/to/clipcascade/src/ && sudo python3 main.py
Change the default admin credentials immediately after logging in to prevent unauthorized access.
- Username:
admin - Password:
admin123
- Purpose: Verifies if the server is running and operational.
- Endpoint:
/health - Response: Returns
OKwith a status code200when the server is up and running.
-
The server features a built-in update checker, prominently displayed on the homepage, keeping you informed about the latest enhancements and security fixes. This ensures your server stays up to date.

- Web pages follow your system's light/dark theme until you use the theme toggle. Your manual choice is saved in browser local storage and restored across page loads when storage is available.
- Use your browser's install or Add to Home Screen option, where supported, to open the web dashboard as an app.
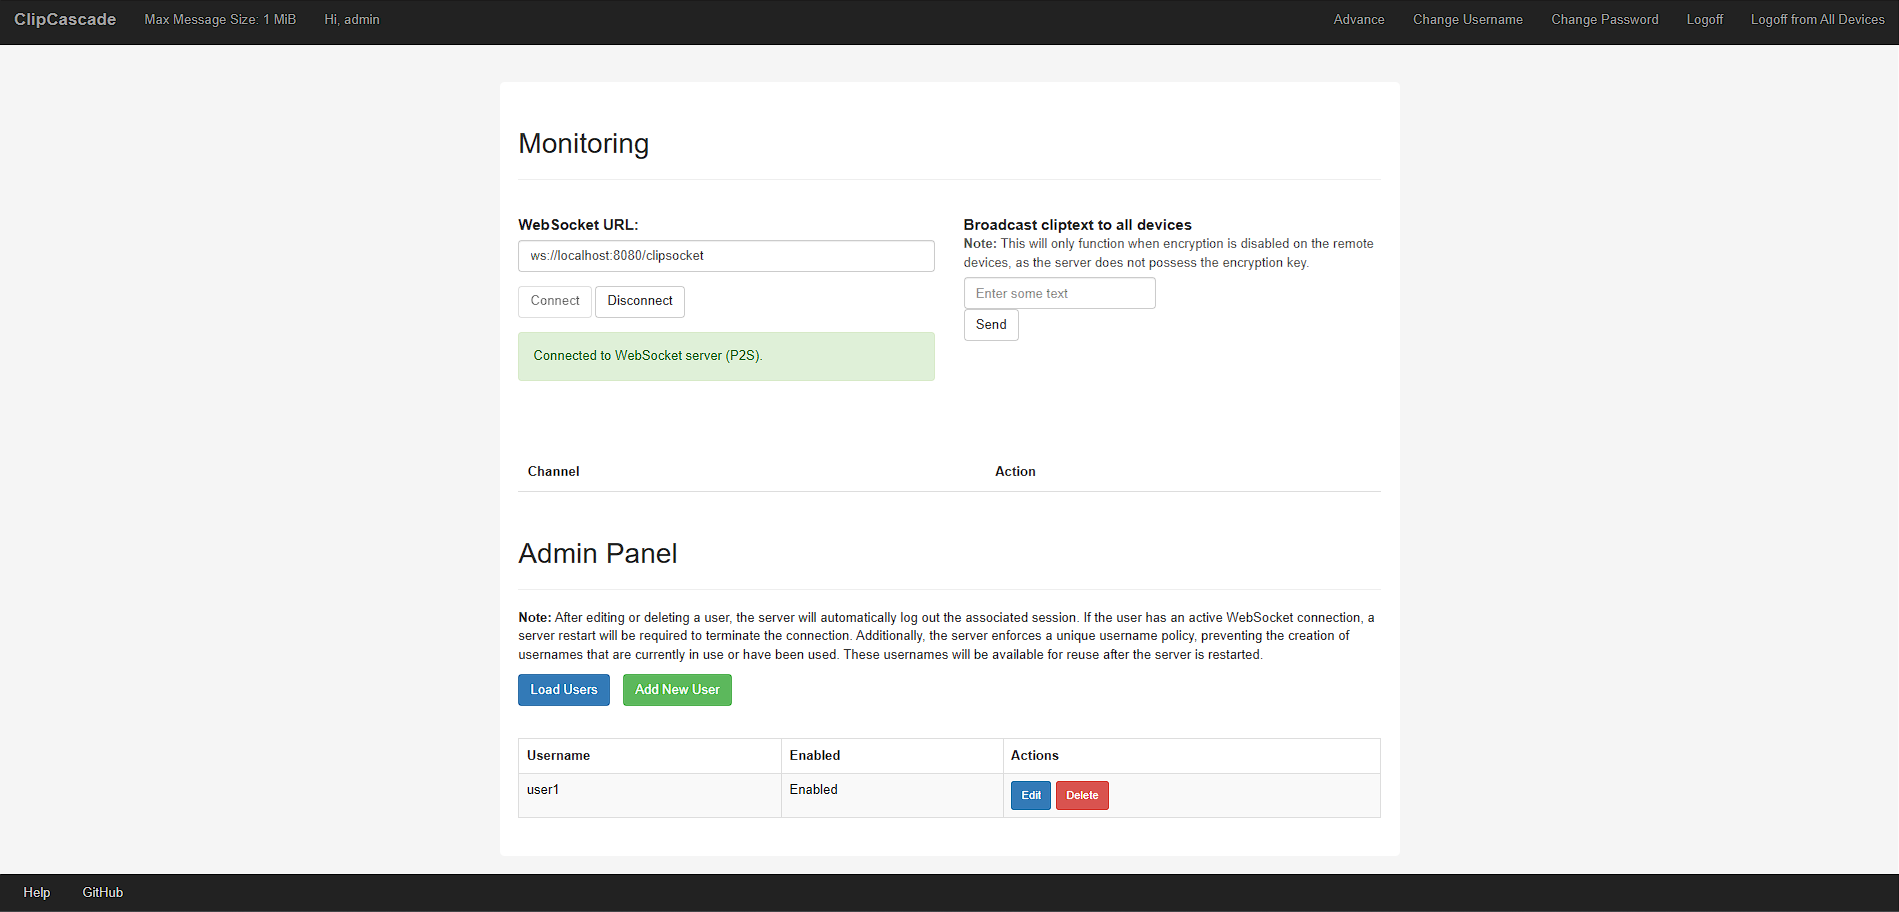
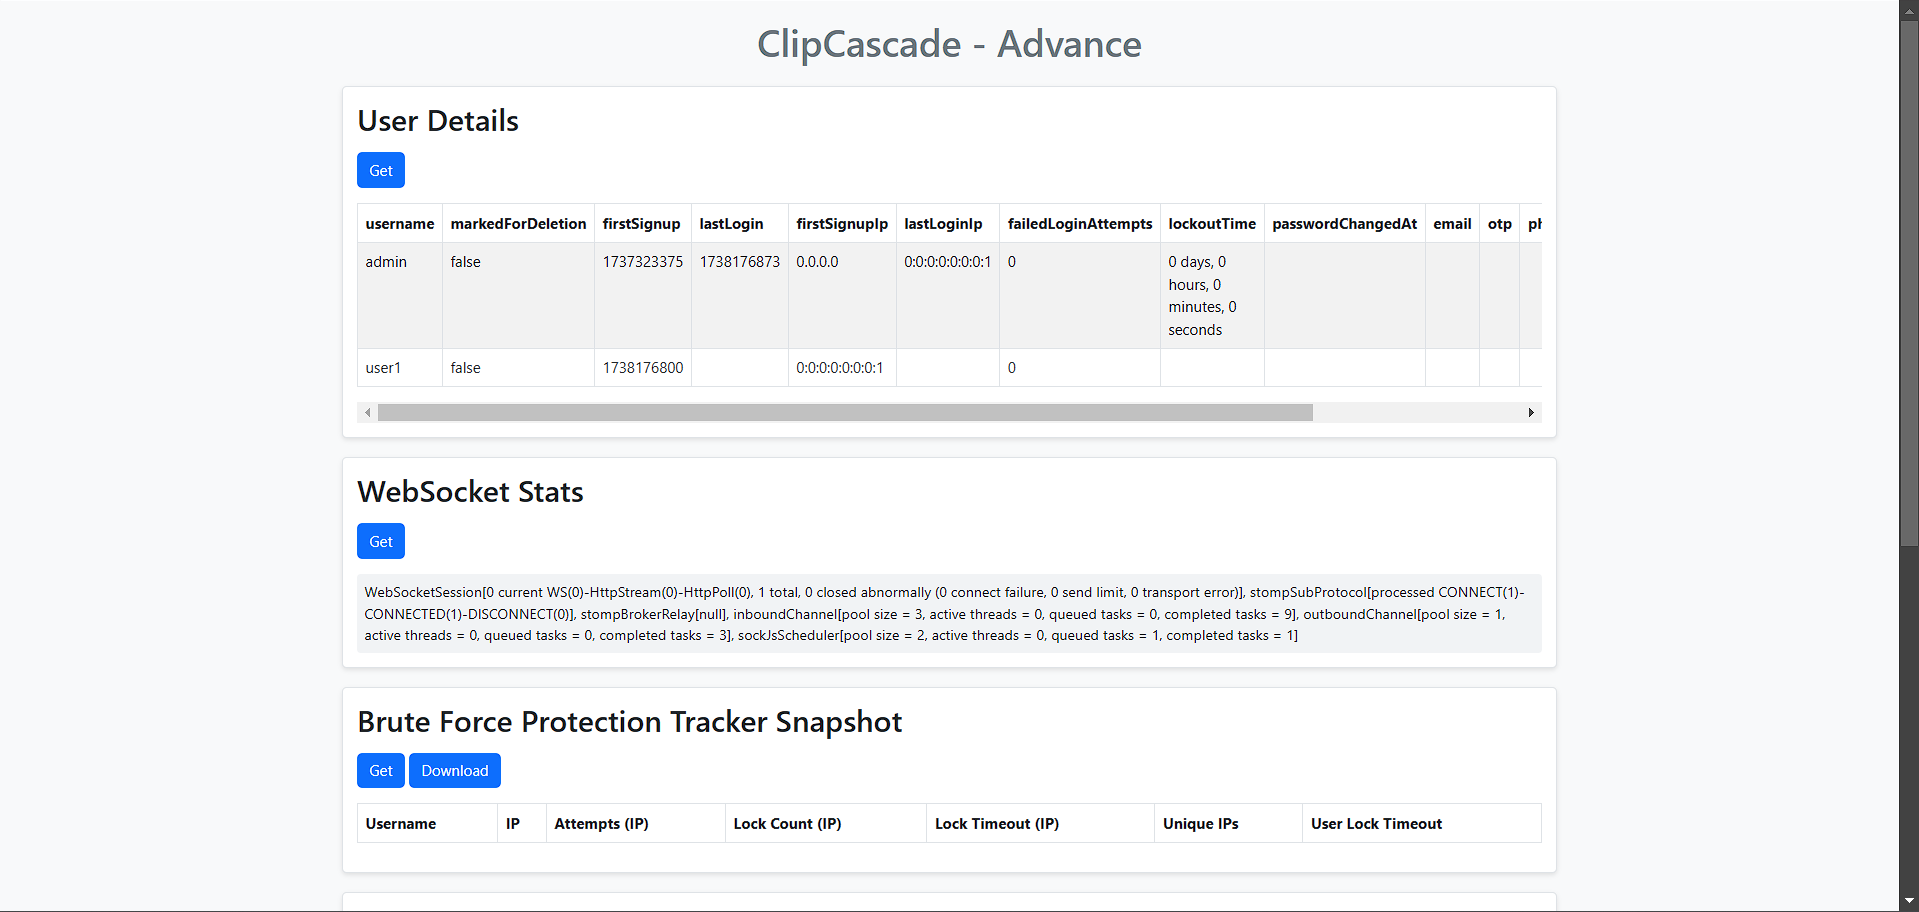
- The Admin Panel user list and the Advanced page's User Details, Online Users, and BFA tracker tables support searching, sorting, and pagination. Advanced tables also have resizable columns. Online Users shows active WebSocket connections in both P2S and P2P modes.
- Administrators can revoke sessions for an individual user or use Revoke All Sessions. Editing or deleting an account, or changing its password, also revokes its sessions and disconnects its active WebSocket connections on this server without a restart. Deleted or renamed usernames remain reserved until the server restarts.
| Environment Variable | Extended Description | Default Value |
|---|---|---|
| CC_MAX_MESSAGE_SIZE_IN_MiB |
Defines the maximum message size (in MiB) that the server can handle.
Note: - Android typically supports larger clipboard sizes for images and files but limits text to ~1 MiB. - Desktop supports larger clipboard sizes across text, images, and files. Additional Notes: - Clients can set their own limits via **Show advanced settings** on the login page. - If CC_P2P_ENABLED is true, this setting is ignored.
|
1 |
| CC_MAX_MESSAGE_SIZE_IN_BYTES |
Provides finer control over message size by specifying a limit in bytes.
Note: If set above zero, it overrides CC_MAX_MESSAGE_SIZE_IN_MiB.Ignored if CC_P2P_ENABLED is true.
|
0 |
| CC_P2P_ENABLED |
Toggles the Peer-to-Peer (P2P) feature, allowing direct device-to-device communication.
Advantages: - Reduces server load. - Removes size restrictions, enabling unlimited data transfer. Important Notes: - If enabled, CC_MAX_MESSAGE_SIZE_IN_MiB and CC_MAX_MESSAGE_SIZE_IN_BYTES are ignored.- Some network configurations may not support P2P. |
false |
| CC_P2P_STUN_URL |
Defines the STUN server URL used for P2P communication, helping devices discover each other across NAT.
Note: Required when CC_P2P_ENABLED is true.You can use a public STUN server or host your own. |
stun:stun.l.google.com:19302 |
| CC_ALLOWED_ORIGINS |
Specifies the exact origin permitted to access the WebSocket server. This is a WebSocket origin check, not general HTTP CORS configuration.
Security Note: - Leaving this unset allows all origins (not recommended for security-sensitive deployments). - To restrict access, specify the public origin (e.g., https://clipcascade.example.com); include a nonstandard port, such as :8743.
|
* |
| CC_SIGNUP_ENABLED |
Determines whether new users can sign up.
Default: false (public signups are disabled).
|
false |
| CC_MAX_USER_ACCOUNTS |
Defines the maximum number of user accounts allowed on the server.
Note: -1 means no limit.
|
-1 |
| CC_ACCOUNT_PURGE_TIMEOUT_SECONDS |
Specifies the duration (in seconds) after which inactive accounts are deleted.
Example: 63115200 (equivalent to 2 years).Note: -1 disables automatic purging.
|
-1 |
| CC_PORT |
Defines the internal port where the ClipCascade server listens for connections.
Default: 8080, but can be changed if necessary. |
8080 |
| CC_SESSION_TIMEOUT |
Specifies the duration before user sessions expire, using minute-based formatting ([number]m).
Default: 525960m (~1 year).
Sessions are lost on server restart unless CC_SESSION_PERSISTENCE_ENABLED is enabled.
|
525960m |
| CC_MAX_UNIQUE_IP_ATTEMPTS | Sets the maximum number of failed login attempts from different IP addresses before an account is blocked. | 15 |
| CC_MAX_ATTEMPTS_PER_IP | Limits the number of failed login attempts allowed per IP before temporarily blocking that IP. | 30 |
| CC_LOCK_TIMEOUT_SECONDS | Defines the initial lockout duration (in seconds) after too many failed login attempts. | 60 |
| CC_LOCK_TIMEOUT_SCALING_FACTOR |
Determines how the lockout time increases with each consecutive failed attempt.
Examples: - Factor 1: 60, 120, 180… - Factor 2: 120, 240, 360… - Factor 3: 180, 360, 540… |
2 |
| CC_BFA_CACHE_ENABLED | Controls whether brute force attack (BFA) data is cached in memory and disk. | false |
| CC_BFA_TRACKER_CACHE_MAX_JVM_ENTRIES |
Specifies the maximum number of entries in the BFA tracker cache, stored in JVM memory.
Note: Only used if CC_BFA_CACHE_ENABLED is true.
|
50 |
| CC_BFA_TRACKER_CACHE_RAM_PERCENTAGE |
Defines the percentage of the BFA tracker cache allocated to off-heap RAM.
Note: Only used if CC_BFA_CACHE_ENABLED is true.
|
0 |
| CC_BFA_TRACKER_CACHE_DISK_PERCENTAGE |
Defines the percentage of the BFA tracker cache allocated to disk.
Note: Only used if CC_BFA_CACHE_ENABLED is true.
|
40 |
| CC_SERVER_DB_USERNAME | Specifies the username for the database connection. | clipcascade |
| CC_SERVER_DB_PASSWORD |
Defines the password used for encrypting the user database.
Note: - (H2) Change the default password to secure values in the format <file password> <user password> before the first server start, especially when CC_SESSION_PERSISTENCE_ENABLED is enabled, since login sessions are stored in the database.- Keep the same value across restarts, upgrades, and migrations when reusing the database. Changing this variable alone does not update the existing database's password. |
QjuGlhE3uwylBBANMkX1 o2MdEoFgbU5XkFvTftky |
| CC_SERVER_DB_URL |
Defines the JDBC URL used to connect to the database.
Examples: - PostgreSQL: jdbc:postgresql://localhost:5432/clipcascade
|
jdbc:h2:file:./database/clipcascade;CIPHER=AES;MODE=PostgreSQL |
| CC_SERVER_DB_DRIVER |
Specifies the JDBC driver class used by the database connection.
Example: org.postgresql.Driver for PostgreSQL.
|
org.h2.Driver |
| CC_SERVER_DB_HIBERNATE_DIALECT |
Sets the Hibernate dialect for the chosen database.
Example: org.hibernate.dialect.PostgreSQLDialect for PostgreSQL.
|
org.hibernate.dialect.H2Dialect |
| CC_SERVER_LOGGING_LEVEL | Sets the logging verbosity level (TRACE, DEBUG, INFO). | INFO |
| CC_SERVER_LOG_HISTORY_MAX_DAYS | Specifies how many days of logs to retain before they are rotated or removed. | 30 |
| CC_SERVER_LOG_MAX_CAPACITY | Defines the maximum total size of logs to keep before older files are purged. | 1GB |
| CC_LOG_BRUTE_FORCE_TRACKER_ENABLED |
Enables detailed logging of each login attempt in the Brute Force Attack (BFA) tracker.
Useful for diagnosing repeated login failures. |
false |
| CC_EXTERNAL_BROKER_ENABLED | Determines whether an external STOMP broker is used for message handling. | false |
| CC_BROKER_HOST |
Specifies the STOMP broker host for external message handling.
Note: Only used if CC_EXTERNAL_BROKER_ENABLED is true.
|
localhost |
| CC_BROKER_PORT |
Specifies the STOMP broker port for external message handling.
Note: Only used if CC_EXTERNAL_BROKER_ENABLED is true.
|
61613 |
| CC_BROKER_USERNAME |
Defines the STOMP broker username for external message handling.
Note: Only used if CC_EXTERNAL_BROKER_ENABLED is true.
|
admin |
| CC_BROKER_PASSWORD |
Defines the STOMP broker password for external message handling.
Note: Only used if CC_EXTERNAL_BROKER_ENABLED is true.
|
admin |
| CC_MAX_WS_GLOBAL_CONNECTIONS |
Maximum number of global WebSocket connections allowed.
Supported Mode: Only applies when CC_P2P_ENABLED is true.
Note: - This value represents the total number of active WebSocket connections allowed across all users. - -1 means unlimited.
|
-1 |
| CC_MAX_WS_CONNECTIONS_PER_USER |
Maximum number of WebSocket connections allowed per user.
Supported Mode: Only applies when CC_P2P_ENABLED is true.
Note: - This value limits how many simultaneous WebSocket connections a single user can have. - -1 means unlimited.
|
-1 |
| CC_SESSION_PERSISTENCE_ENABLED |
Keeps login sessions across server restarts in the existing H2 or PostgreSQL database. Requires persistent database storage (the /database volume for Docker's default H2 setup).
Sessions still follow CC_SESSION_TIMEOUT. Starting the server with persistence disabled deletes previously saved sessions.
|
false |
| CC_P2P_SIGNALING_RATE_LIMIT_PER_SEC |
Limits P2P signaling messages per WebSocket session per second. Short bursts up to the limit are allowed; excess messages are dropped. Applies only in P2P mode. Values of 0 or less disable the limiter.
|
-1 |
| CC_CAPTCHA_DIFFICULTY_PERCENT |
Sets CAPTCHA difficulty from 0 (easiest) to 100 (hardest). Values are clamped to this range.
|
100 |
-
Logs (
clipcascade_log.log) are stored in the installation directory on Windows and Linux, and in<current user>/Library/Application Support/ClipCascade/on macOS. These logs allow you to review application activity and are automatically reset each time the application is reopened, preventing indefinite growth. -
The
DATAfile stores settings and user details, enabling the app to retain this information across both restarts and updates. -
On Linux and macOS, ClipCascade holds an operating-system lock on
ClipCascade.lockto allow only one instance at a time. The file remains after exit; the lock is released when the process exits, including after a crash. -
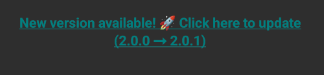
Desktop and Android check for updates at startup and once a day while running, retrying failed checks after an hour. Update status remains visible in the tray/menu or Android home screen. Alerts appear once per new version each app session; Android uses a popup while the app is active or a notification in the background.
Desktop Mobile 
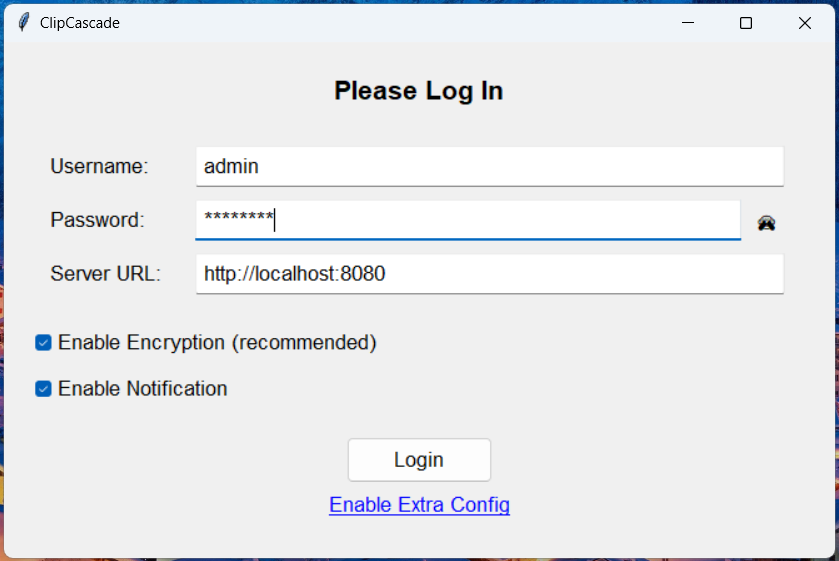
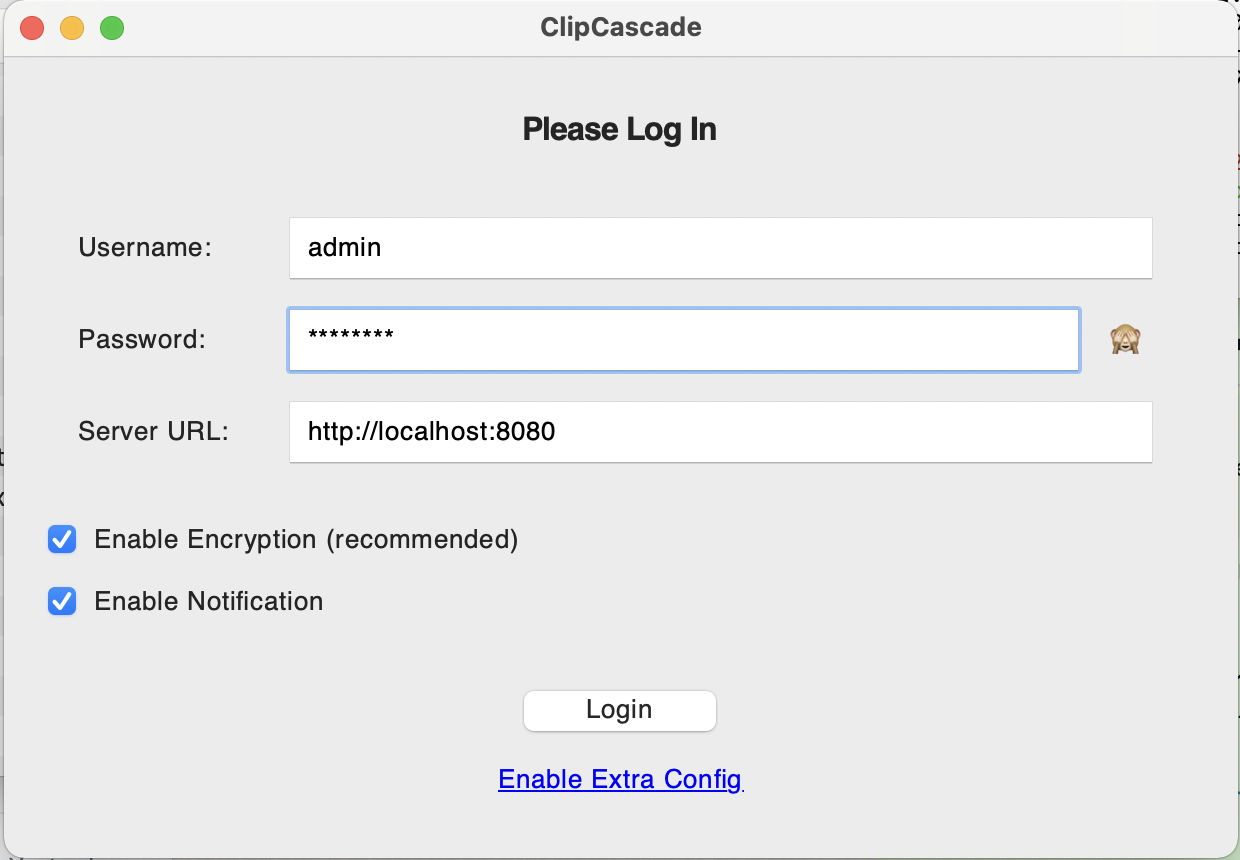
Use Log in to connect. Select Show advanced settings to expand additional options and Hide advanced settings to collapse them. On desktop, hover over settings for explanations. On Android, tap a label with a small ? to see its explanation, or use HELP to open this documentation.
Connection status notifications appear on the main login screen, outside advanced settings, on both desktop and Android. Desktop enables them by default; Android disables them by default. Encryption is also on the main login screen and is enabled by default on both platforms.
Device preferences save as you change them, without requiring a successful login: notification settings, local clipboard size limit, send/receive clipboard, image/file sharing, password-storage preference, the default download folder on desktop and Android, and Android startup/periodic checks. Server address, credentials, encryption settings, and custom CA configuration are saved after successful login.
-
Local clipboard size limit: If the app crashes or stops unexpectedly, it may be due to receiving clipboard content exceeding the platform's maximum size limit. Set a local limit to test a suitable threshold for your device; it applies to incoming and outgoing clipboard content alongside server and platform limits. On the desktop login window and Android, choose Bytes, KiB, MiB, or GiB. Decimal values such as
1.5 MiBare supported and rounded to the nearest byte; 1 KiB = 1024 bytes. Leave the value blank or select No local limit to remove the local limit. The Linux CLI accepts an integer byte count, or a blank value for no local limit. The server'sCC_MAX_MESSAGE_SIZE_IN_BYTESsetting can also set a limit below 1 MiB. -
Store Password Locally (not recommended): Enable this option if you frequently encounter session logouts. While the app stores session cookies for an extended period, a server restart may prompt a re-login unless the server enables session persistence. If re-entering the password becomes tedious, you can use this option to store your password locally for convenience. Disabling this option immediately clears the saved password.
Note: This option will only work if encryption is disabled, as encryption requires the raw password to generate a password hash.
-
Send Clipboard: Share clipboard changes from this device. Enabled by default. Disable it to stop sending while still receiving updates if Receive Clipboard is enabled.
-
Receive Clipboard: Apply clipboard updates from other devices. Enabled by default. Disable it to stop receiving while still sharing local changes if Send Clipboard is enabled. Both options are available on desktop and Android; enable both for two-way sync or disable both to pause clipboard syncing on this device.
-
Enable Image Sharing and Enable File Sharing: Enabling these options allows the app to send images or files when Send Clipboard is enabled. These options do not block incoming images or files; incoming content is controlled by Receive Clipboard.
-
Enable encryption (recommended): Enabling this option activates end-to-end encryption for clipboard data. This ensures that all clipboard content is encrypted before leaving your device. Refer to the section below on E2E encryption for detailed instructions on how it works and how to configure the encryption salt and key derivation iterations.
-
Custom CA certificate bundle: Use a PEM/CRT certificate bundle when your server uses a private/internal CA (for example, corporate PKI). Leave it empty to use default public CA/OS trust. The bundle affects HTTPS/WSS verification only; HTTP/WS connections are still allowed, and TLS certificate and hostname verification remain enabled.
Desktop: Enter the path to a PEM file containing your root CA or certificate chain, or use Browse… to select it. The picker offers PEM/CRT filters and an All files option; the bundle must contain PEM-encoded certificates. Cancelling keeps the current path unchanged. Use the trash button to remove the path and log in to use default certificate verification.
Android: Tap Import to select a certificate bundle (up to 1 MiB). The app saves a copy after successful login and restores it for background connections. Imported certificates are trusted alongside system CAs only for the configured server hostname; other hostnames use system trust. Tap Replace to import another bundle, or Remove and log in to return to system trust only.
-
Notify when an update is available: Enabled by default on desktop and Android. Disable it to stop update alerts; update checks and the visible update status remain available.
-
Notify when downloads finish: Enabled by default on desktop and Android, under advanced notification settings. Disable it to hide successful-download notifications. Saving progress, visible download results, and failure feedback remain available. Desktop does not show a separate download-start notification. Changes save immediately.
-
Show connection status notifications: Receive alerts when the WebSocket connection is lost or restored. Available on desktop and Android; enabled by default on desktop and disabled by default on Android. This setting is on the main login screen, outside advanced settings.

-
Default download folder: Select a folder to save downloads without prompting each time. Changes save immediately and persist across restarts. Cancelling the picker keeps the current setting. Clear the default to choose a destination for each download instead; this does not delete downloaded files.
Android: If the saved folder is no longer writable or accessible, the app asks you to select a replacement and saves it as the new default.
- Notify when clipboard content is received: Disabled by default. Enable it in advanced settings to show notifications for content received from another device, including a text preview, image dimensions, or file names with a file icon. Previews may be visible on your lock screen. This setting is independent of connection status and update notifications.
-
Start on device restart (disable if the READ_LOGS permission is granted via ADB): Enable this option to allow the app to automatically start on system reboot. By default, this option is disabled. If you are using the ADB workaround, keep this option disabled to avoid issues with the READ_LOGS permission popup being dismissed, which prevents clipboard monitoring in the background.
-
Enable Periodic Checks: Enabling this option performs periodic checks to ensure clipboard monitoring and the foreground service are running. It verifies the service status when monitoring starts and then checks every 15 minutes in the background. If the service is not running, a notification is displayed. Clicking the notification will restart the service.

When encryption is enabled, clipboard data is encrypted directly on the client devices, ensuring true end-to-end encryption. The server does not store the encryption key, offering maximum security for your data.
Enabling the encryption option is all that's needed to activate encryption by default. However, advanced users have the option to further customize the encryption process by adjusting the following parameters:
-
Encryption salt: An optional string used as an additional input in the hashing process. For example, you could use a unique string like
"myCustomSalt123"to enhance encryption security. -
Key derivation iterations: An integer that specifies the number of hashing iterations. Increasing the number of iterations strengthens encryption by making it more computationally demanding. You can increase the default value of 664,937 to a higher number, such as 1,000,000, to boost security.
It is crucial to ensure the same encryption salt and key derivation iterations are used across all client devices to maintain compatibility.
You can adjust these settings in the advanced settings section on the login page for users who require enhanced encryption options.

Note: In a peer-to-peer architecture, clipboard data is broadcasted to all connected devices directly without the need for a server. The encryption mechanism remains unchanged, ensuring the same level of security across all devices.
-
Text and Images: These are directly copied to the clipboard, enabling seamless sharing across devices.
Android: Content can exceed Android's system clipboard transaction limit even when ClipCascade's local limit is disabled. If copying fails with a system-limit message, use a smaller image or text selection, or transfer large text as a file. Increasing ClipCascade's limit cannot bypass Android's restriction.
-
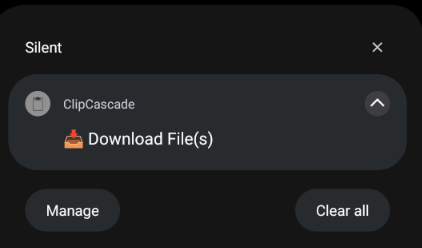
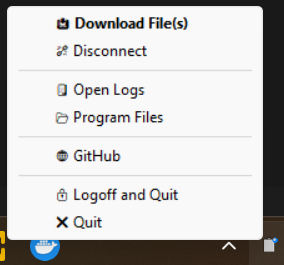
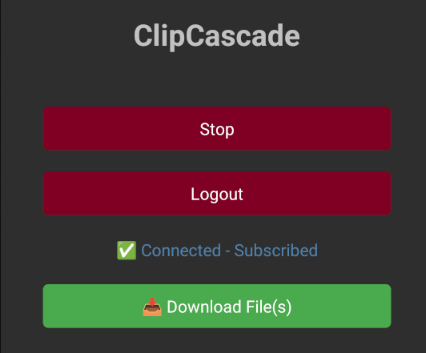
Files: When files are received, a notification icon appears in the system tray (on desktop platforms). Since the clipboard does not store files, only their file paths are retained.
Desktop Mobile 
-
Clipboard Monitoring:
Platform Implementation Details Windows Uses win32gui,win32api,win32con, andwin32clipboardto capture clipboard changes in an event-driven manner.macOS Utilizes the pasteboardto monitor the clipboard with polling every 0.3 seconds. Instead of checking clipboard content directly, it compares a counter to detect changes efficiently.Linux (X11) Integrates Gtk.Clipboardto capture clipboard changes in an event-driven manner. Default UI: GUI (tray).Linux (XWayland) Same X11-style stack as above: Gtk.Clipboardwhen possible, otherwisexclippolling (~0.3s). Default UI: GUI—not CLI. Detection treats XWayland as a Wayland session that also hasDISPLAYandWAYLAND_DISPLAYset.Linux (Unknown) Treated like the X11-style path for defaults (GTK / xclipas above). Default UI: GUI.Linux (native Wayland, Hyprland) Tries wl-paste --watchfirst (event-driven where the compositor supports it: clipboard changes wake the watcher instead of a fixed timer). If--watchis not supported or exits immediately, falls back to pollingwl-paste -l(default every 3 seconds;--polling). Default UI: CLI (terminal). Override with--gui/--xmode.Android Uses ClipboardManagerto capture clipboard changes in an event-driven manner.Type Send Receive Windows MacOS Linux GUI Linux CLI Android Windows MacOS Linux GUI Linux CLI Android Text ✱ ✱ ✱ ✱ ✱ / share ✱ ✱ ✱ ✱ ✱ Image ✱ ✱ ✱ ✱ ✱ / share ✱ ✱ ✱ ✱ ✱ Files ✱ ✱ ✱ ✱ share click click click click click
To build an alternative client, see the Server API and client implementation guide. It covers authentication and CSRF, HTTP endpoints, admin operations, P2S/STOMP and P2P/WebRTC protocols, clipboard encryption and payload formats, fragmentation, reconnection, and working examples with an interoperability checklist.
See the reverse-proxy configuration examples for Nginx, Traefik, Caddy, and Nginx Proxy Manager. The examples stay in the repository and include Compose files, certificate setup, custom HTTPS ports, and a login/WebSocket connection checker. They have been checked locally, but need validation with your own network, certificates, and client devices before deployment.
Clients need both HTTPS for login/API calls and WSS for live synchronization.
Loading the website does not prove the authenticated WebSocket works. Enter the
final public server URL in every client, including a custom port when used
(e.g. https://clipboard.example.com:8743), without /login or a path prefix.
When TLS ends at the proxy, configure the ClipCascade server with
SERVER_FORWARD_HEADERS_STRATEGY=framework. Configure the proxy to forward the
original scheme, hostname, and public port, and support both /clipsocket (P2S)
and /p2psignaling (P2P). The bundled setups do this together. Keep a backend that
trusts forwarded headers accessible only through trusted proxies.
See the guide's troubleshooting table for cookies, redirects, TLS, origin checks, session loss after restart, and WebSocket disconnects. P2P data travels directly between clients; a working HTTPS proxy does not guarantee direct WebRTC connectivity.
The screenshots below show a Cloudflare Tunnel configuration and the desktop login form. See the guide above for the corresponding server forwarding settings.


Native clients use ClipCascade's own username/password and session cookies. They
cannot complete an external browser-only SSO/MFA or bot-challenge page. Exempting
only /login and the WebSocket endpoints is insufficient because clients also
call authenticated API routes and follow the login redirect to /.
Use a dedicated client hostname that bypasses the external authentication layer for the whole ClipCascade application, while retaining ClipCascade's own login and network access controls. Keep an SSO-protected browser hostname separate. See SSO and Cloudflare guidance and the API guide before applying route-specific rules.
- Login: Use your credentials to log into ClipCascade.
- Sync: Copy any text or content to your clipboard, and it will automatically sync across your connected devices.
- Monitor: Open the web-based monitoring page to see your clipboard history in real-time.
Contributions are always welcome! Whether it's a feature request or a pull request, your input helps make ClipCascade even better.
ClipCascade is licensed under the GNU General Public License v3.0 (GPL-3.0). See the LICENSE file for more details.
Here are some planned features and improvements for future releases of ClipCascade:
🗳️ Poll for Prioritization: Cast your vote to prioritize features here.
- Clipboard Data Storage: Implement secure storage for clipboard data to store and access it later.
- OIDC/OAuth Authentication: Integrate OpenID Connect (OIDC) and OAuth authentication for user login and management.
- iOS Support: Develop and Release a version of ClipCascade for iOS.
ClipCascade uses Semantic Versioning (SemVer) for releases:
- 🔴 Major (X): Incremented for releases that introduce backward incompatible changes.
- 🟠 Minor (Y): Incremented for backward compatible functionality added.
- 🟢 Patch (Z): Incremented for backward compatible bug fixes or minor improvements.
X.Y.Z
Where:
- X is the major version.
- Y is the minor version.
- Z is the patch version.
Example versioning:
- 1.0.0: Initial release.
- 1.1.0: Added new features, backward compatible.
- 2.0.0: Major changes, not backward compatible.
If you have any issues or questions, feel free to open an issue on GitHub, start a discussion, or reach out to me via email.