
Replies: 18 comments 32 replies

|
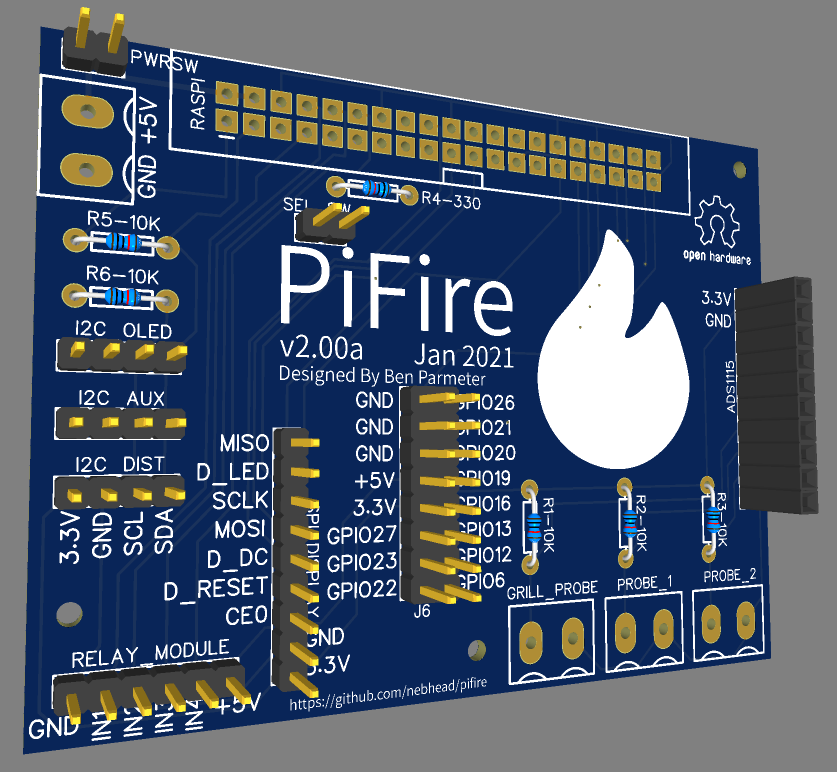
My first pass... not going to order this until I've implemented a few other features, but wanted to share.
|

|
Wow looks awesome might have to replan my enclosure to incorporate your new pcb also just as a side thought, after I finish testing the ssr board we might be able to incorporate the ssr on your new design saving space etc for the switching. I should get the fan soon so I can test. I have already tested pwm on the pi using software pwm control so we can use any io pin on the pi to implement control of the fan at a latter date. Works good so far using the omron ssr relay board. I have used a scope on the pi output and ssr output playing around with pwm(duty/frequency) on a resistive load but need to verify on the fan. Will update you as soon I get the fan and test it. But really awesome work so far. |

|
|

|
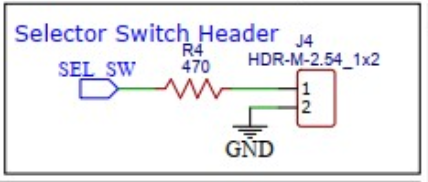
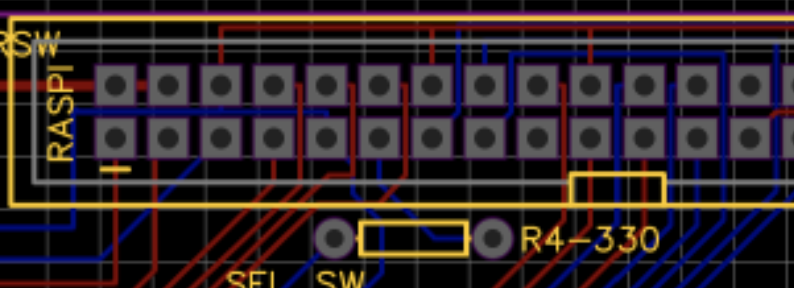
Ha! Well there's a mistake. Either size will be fine honestly. And... if you're not planning to use your existing controller in parallel, then you don't even need a switch or resistor here. But if you are keeping your existing controller, then go ahead an populate anything from 330-1k or so. |
|
Hey, I got the PCB in the mail last week, thank you! Been trying to get this 3d printer setup and tuned so between that and my body breaking down on me 35yrs going on 80 its sitting on my work table waiting for me to throw parts at it. Printer is a MK3S+ ICYWW ;) |

|
I received my PCB's from JLCPCB, will solder up and start testing, might redesign the enclosure for this PCB, if your happy with it. |
|
Oh that's great! It makes life a bit easier - much less wiring up of things. Yeah, I think I'm happy with it so far. I have done some limited testing, but all seems to be working OK for me thus far. I haven't tried the SPI interface, but will give that go, perhaps with the 1.3" IPS screen. |
|
BTW - I didn't populate R5/R6 on my board because there are actually embedded pullups already on the Pi, but put the option there if needed. So far, I don't think it's needed. |
|
Yes I saw that in your circuit diagram on easyeda. So far iits looking good to me. I will try the screen tomorrow if it gets delivered. Awesome work on the pcb design, really well thought out. If all goes well I will design an enclosure based on this pcb. |

|
I had a question about these. I've got a 2.00a that I'm working with. I'm seeing docs that the Pi Zero already has an onboard 1.8kOhm resister. I'm also running short on 10k resisters and just wondering if I can short these pads or stick a 1K on it be done. |
|
If you're talking about the R5/R6 resistors, just don't populate these at all (shorting these would be bad). They aren't really necessary so close to the Pi. If you have a long run of I2C wires, then it might be a good idea to put 10k pullups near the end of that run on the device side. |

|
So I'm looking at possibly ordering a PCB and trying this out for myself. Is development at a good point right now for me to do that or are there going to be important features implemented soon that I would miss out on if I order now? Thanks for all the work you've done on this by the way. I was getting ready to do something like this myself before I found your project. My solution was probably gonna be a lot more hack-y. I was looking at tying it into my homeassistant setup and using that as an interface but this seems like a better way of doing things for sure. |
|
@wbahm - Welcome! Yep, you can feel safe ordering the board right now. It will work fine for everything that we have implemented thus far. I actually have a small stack of boards left over from the last order. If you are US based, I can put one in a standard envelope and send one to you for no cost. We can connect over e-mail and get your address if you are interested. Also - I've been thinking about home assistant (which I haven't really done much with) and thought it would be really cool to have some integration with that (i.e. show the current operating temperatures on the dashboard). Do you have any experience with that? Thanks! |
|
I'd be interested in one of those PCBs ya got any left (for a small fee/donation of course) If not I might just hit this project with an uglystick and use a MakerSpot PCB but I like what you got going on here. I'm the jack of all trades master of none. I tinker with anything and everything. Either way let me know - thanks |
|
Hey @Aviator85 - I've got a few more so I can drop one in an envelope for you. Send me an e-mail at ---- with your home address and I'll drop in the mailbox on Monday. |
|
Awesome thanks @nebhead - the whole project very nicely done! |
|
You're welcome! Popping in an envelope now and will have it out in the mail by Monday afternoon. Good luck! |
|
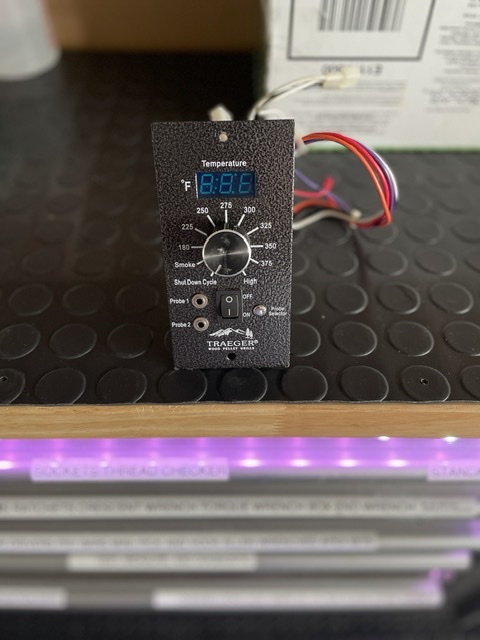
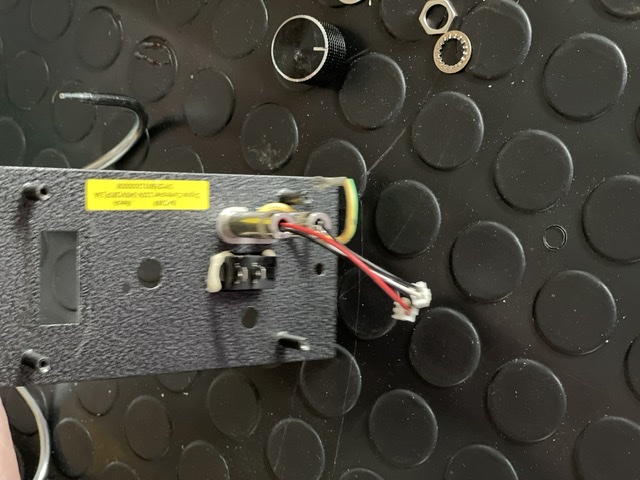
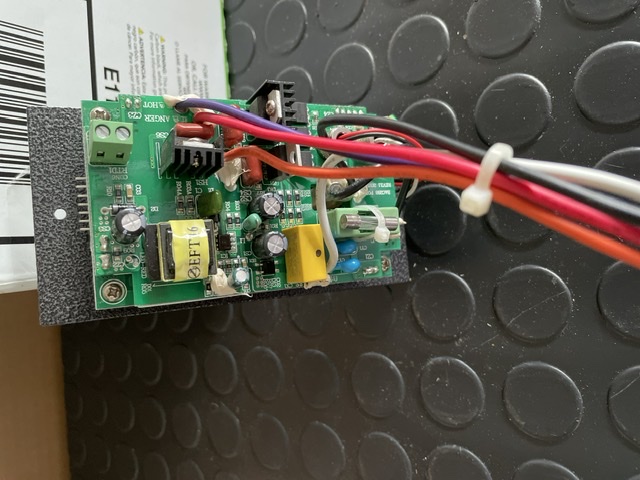
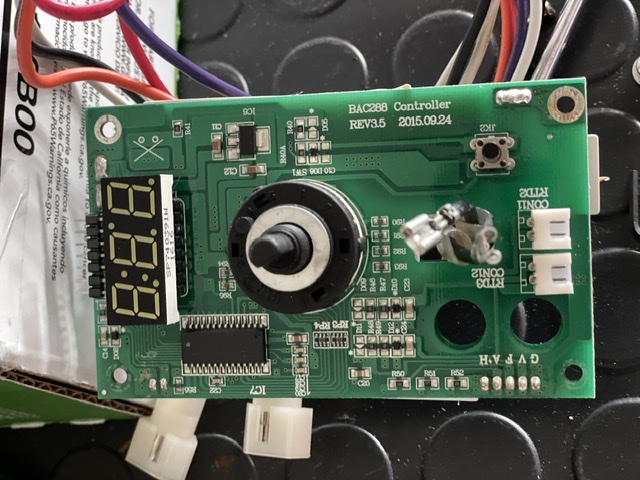
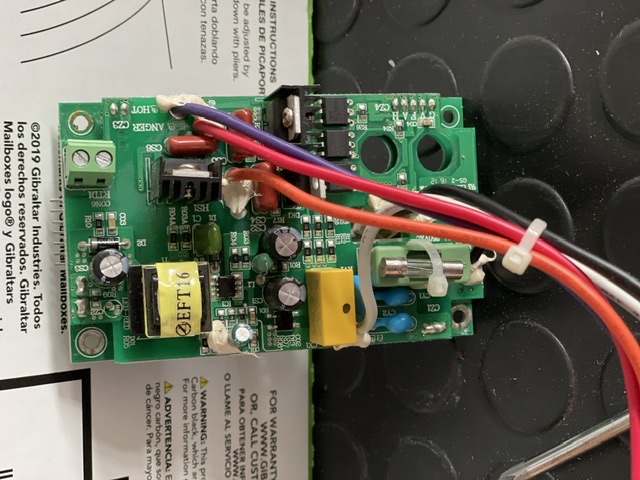
Thanks! I'm pretty pumped actually, i forgot i had an old controller that traeger warrantied when it stopped working. I looked it over really good and i couldn't find anything that failed gloriously so i just assume it's a bad solder joint somewhere from the heat cool cycle and using lead free solder. Will be a great organ donor! I thought i had tossed this in the trash because that's my super power - I'll save stuff for YEARS and throw it out a week before I could use it 😂. I'll be sharing pics of progress as it's made 😬. |
|
Hey, so I just got the PCB in the mail today. Thanks again for sending it.
Now the wait for the parts from China really begins.
Wyatt
…On Sun, Mar 28, 2021 at 7:12 PM nebhead ***@***.***> wrote:
Great questions! I probably should document this stuff, but hadn't gotten
around to it. Here's what I'm using.
As for probes, you can use generally most probes that have a 2.5mm jack,
like the ET-74, or Thermoworks probes. You may need to tune them and create
profiles for them in the probe profiles. PiFire has a rudimentary probe
tuning tool that allows you to create your own profiles based off of
real-world readings. The heater meter project is also a good resource for
information on probes, which is where I basically learned everything I know
about probes (
https://github.com/CapnBry/HeaterMeter/wiki/HeaterMeter-Probes). I think
others have used InkBird probes, etc. So feel free to use what you have
laying around if it will work.
Headers are 2.54mm pitch, and I just ordered a box of them from Amazon (
https://www.amazon.com/gp/product/B01FWC53C0)
Pi Header is also from Amazon (
https://www.amazon.com/gp/product/B00R1LLM1M)
Screw Terms are 5mm pitch (https://www.amazon.com/gp/product/B01MT4LC0F)
or (https://www.amazon.com/gp/product/B01F7KOM10)
I'm also using jumpers for a couple inputs (i.e. the 5V Power next to the
power input screw terminal), instead of switch right now. (
https://www.amazon.com/gp/product/B01HPSRZRK)
Let me know if you have any other questions!
—
You are receiving this because you were mentioned.
Reply to this email directly, view it on GitHub
<#19 (reply in thread)>,
or unsubscribe
<https://github.com/notifications/unsubscribe-auth/AFRBFA3J27TMAFL6DE3P6BTTF6ZUBANCNFSM4VQSDLEA>
.
|
|
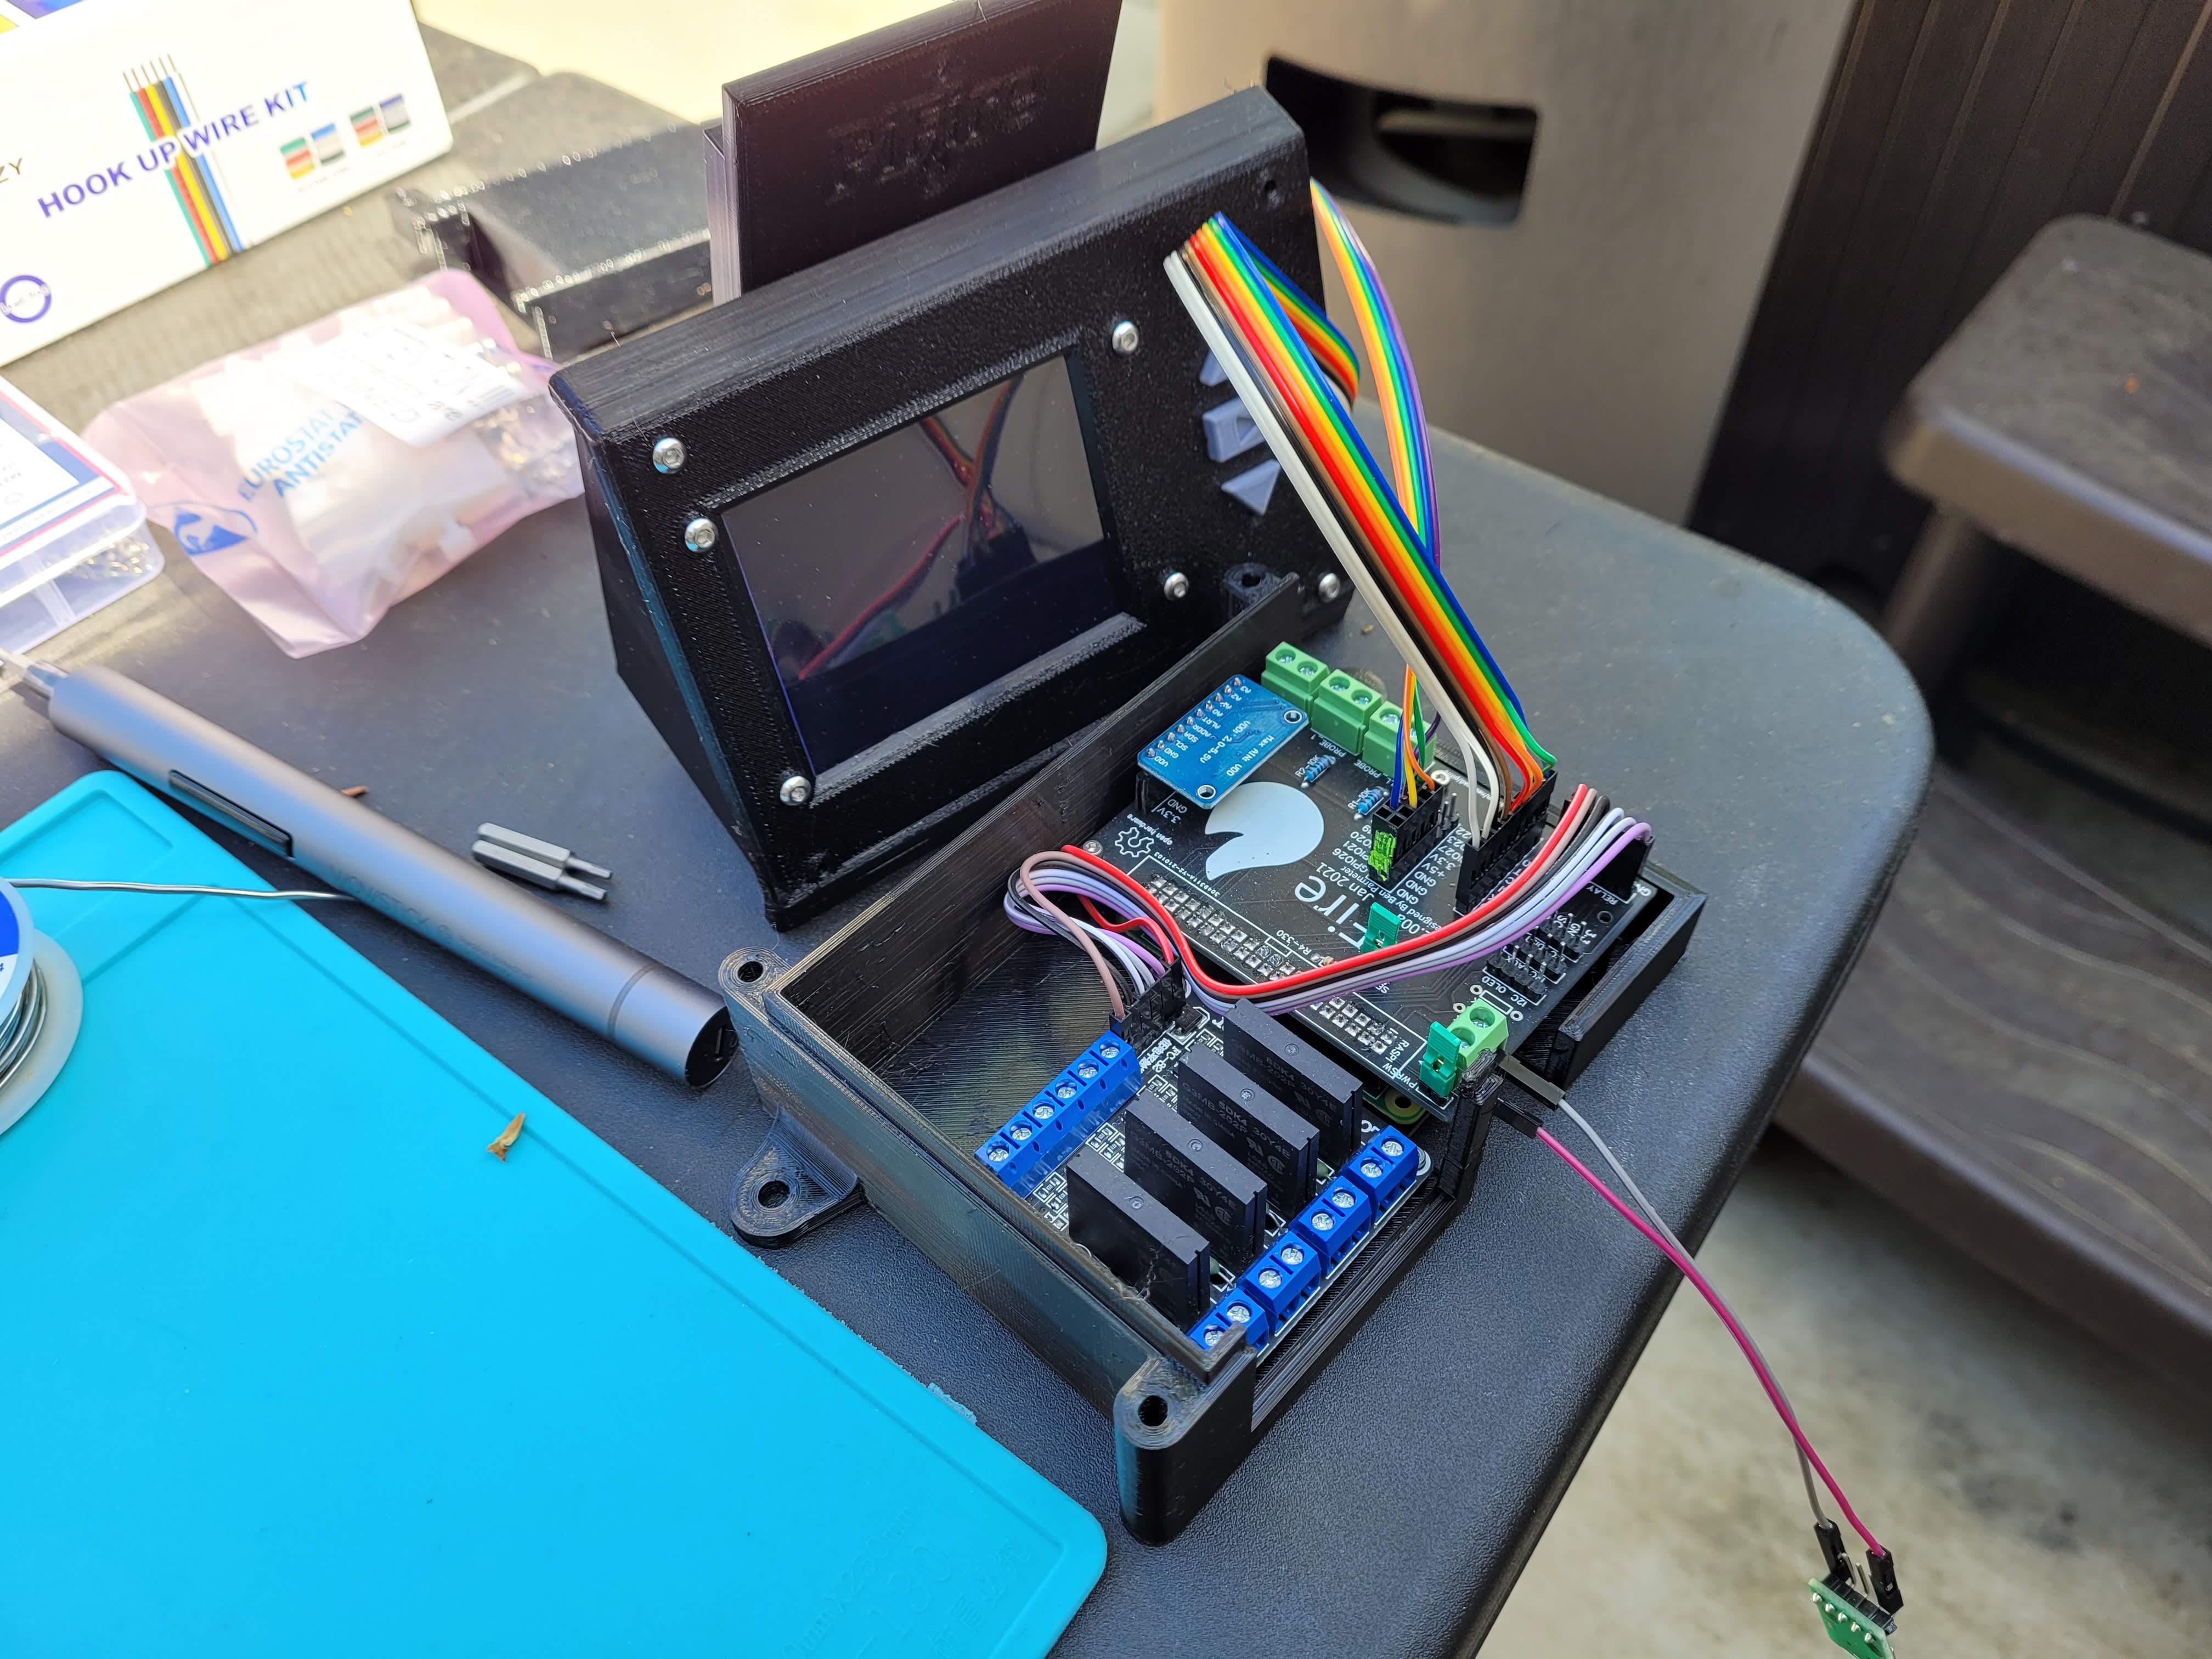
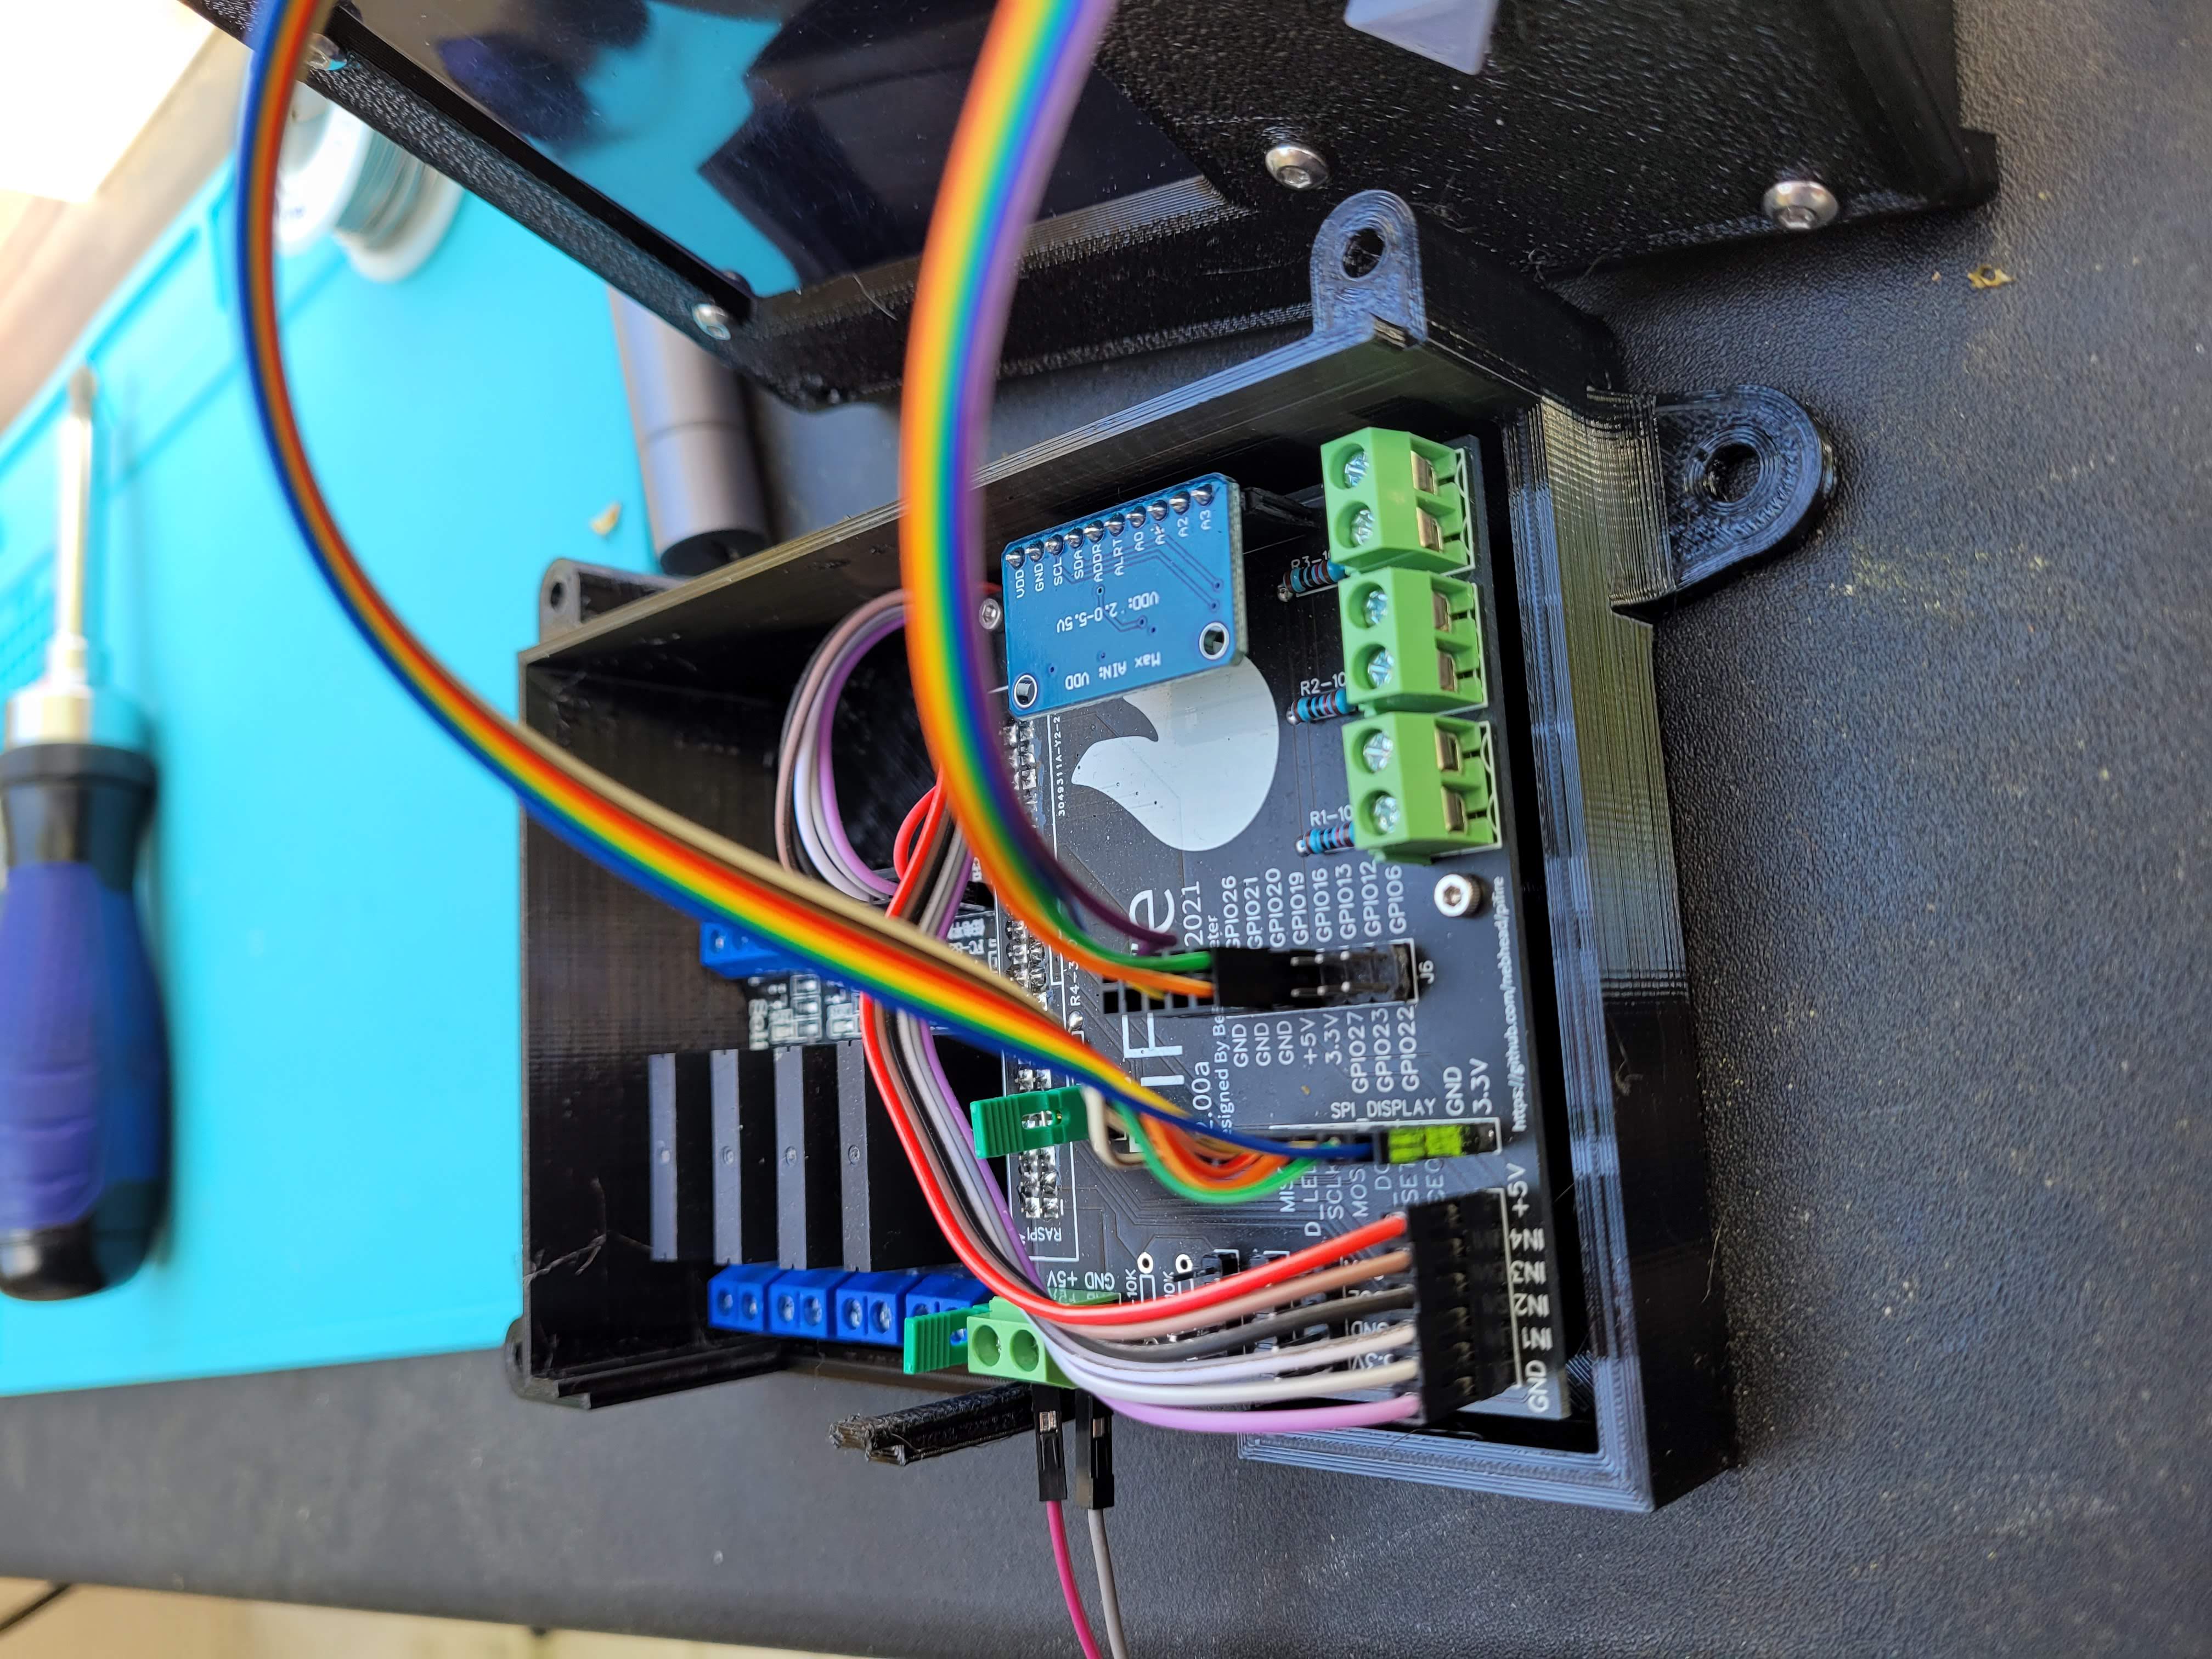
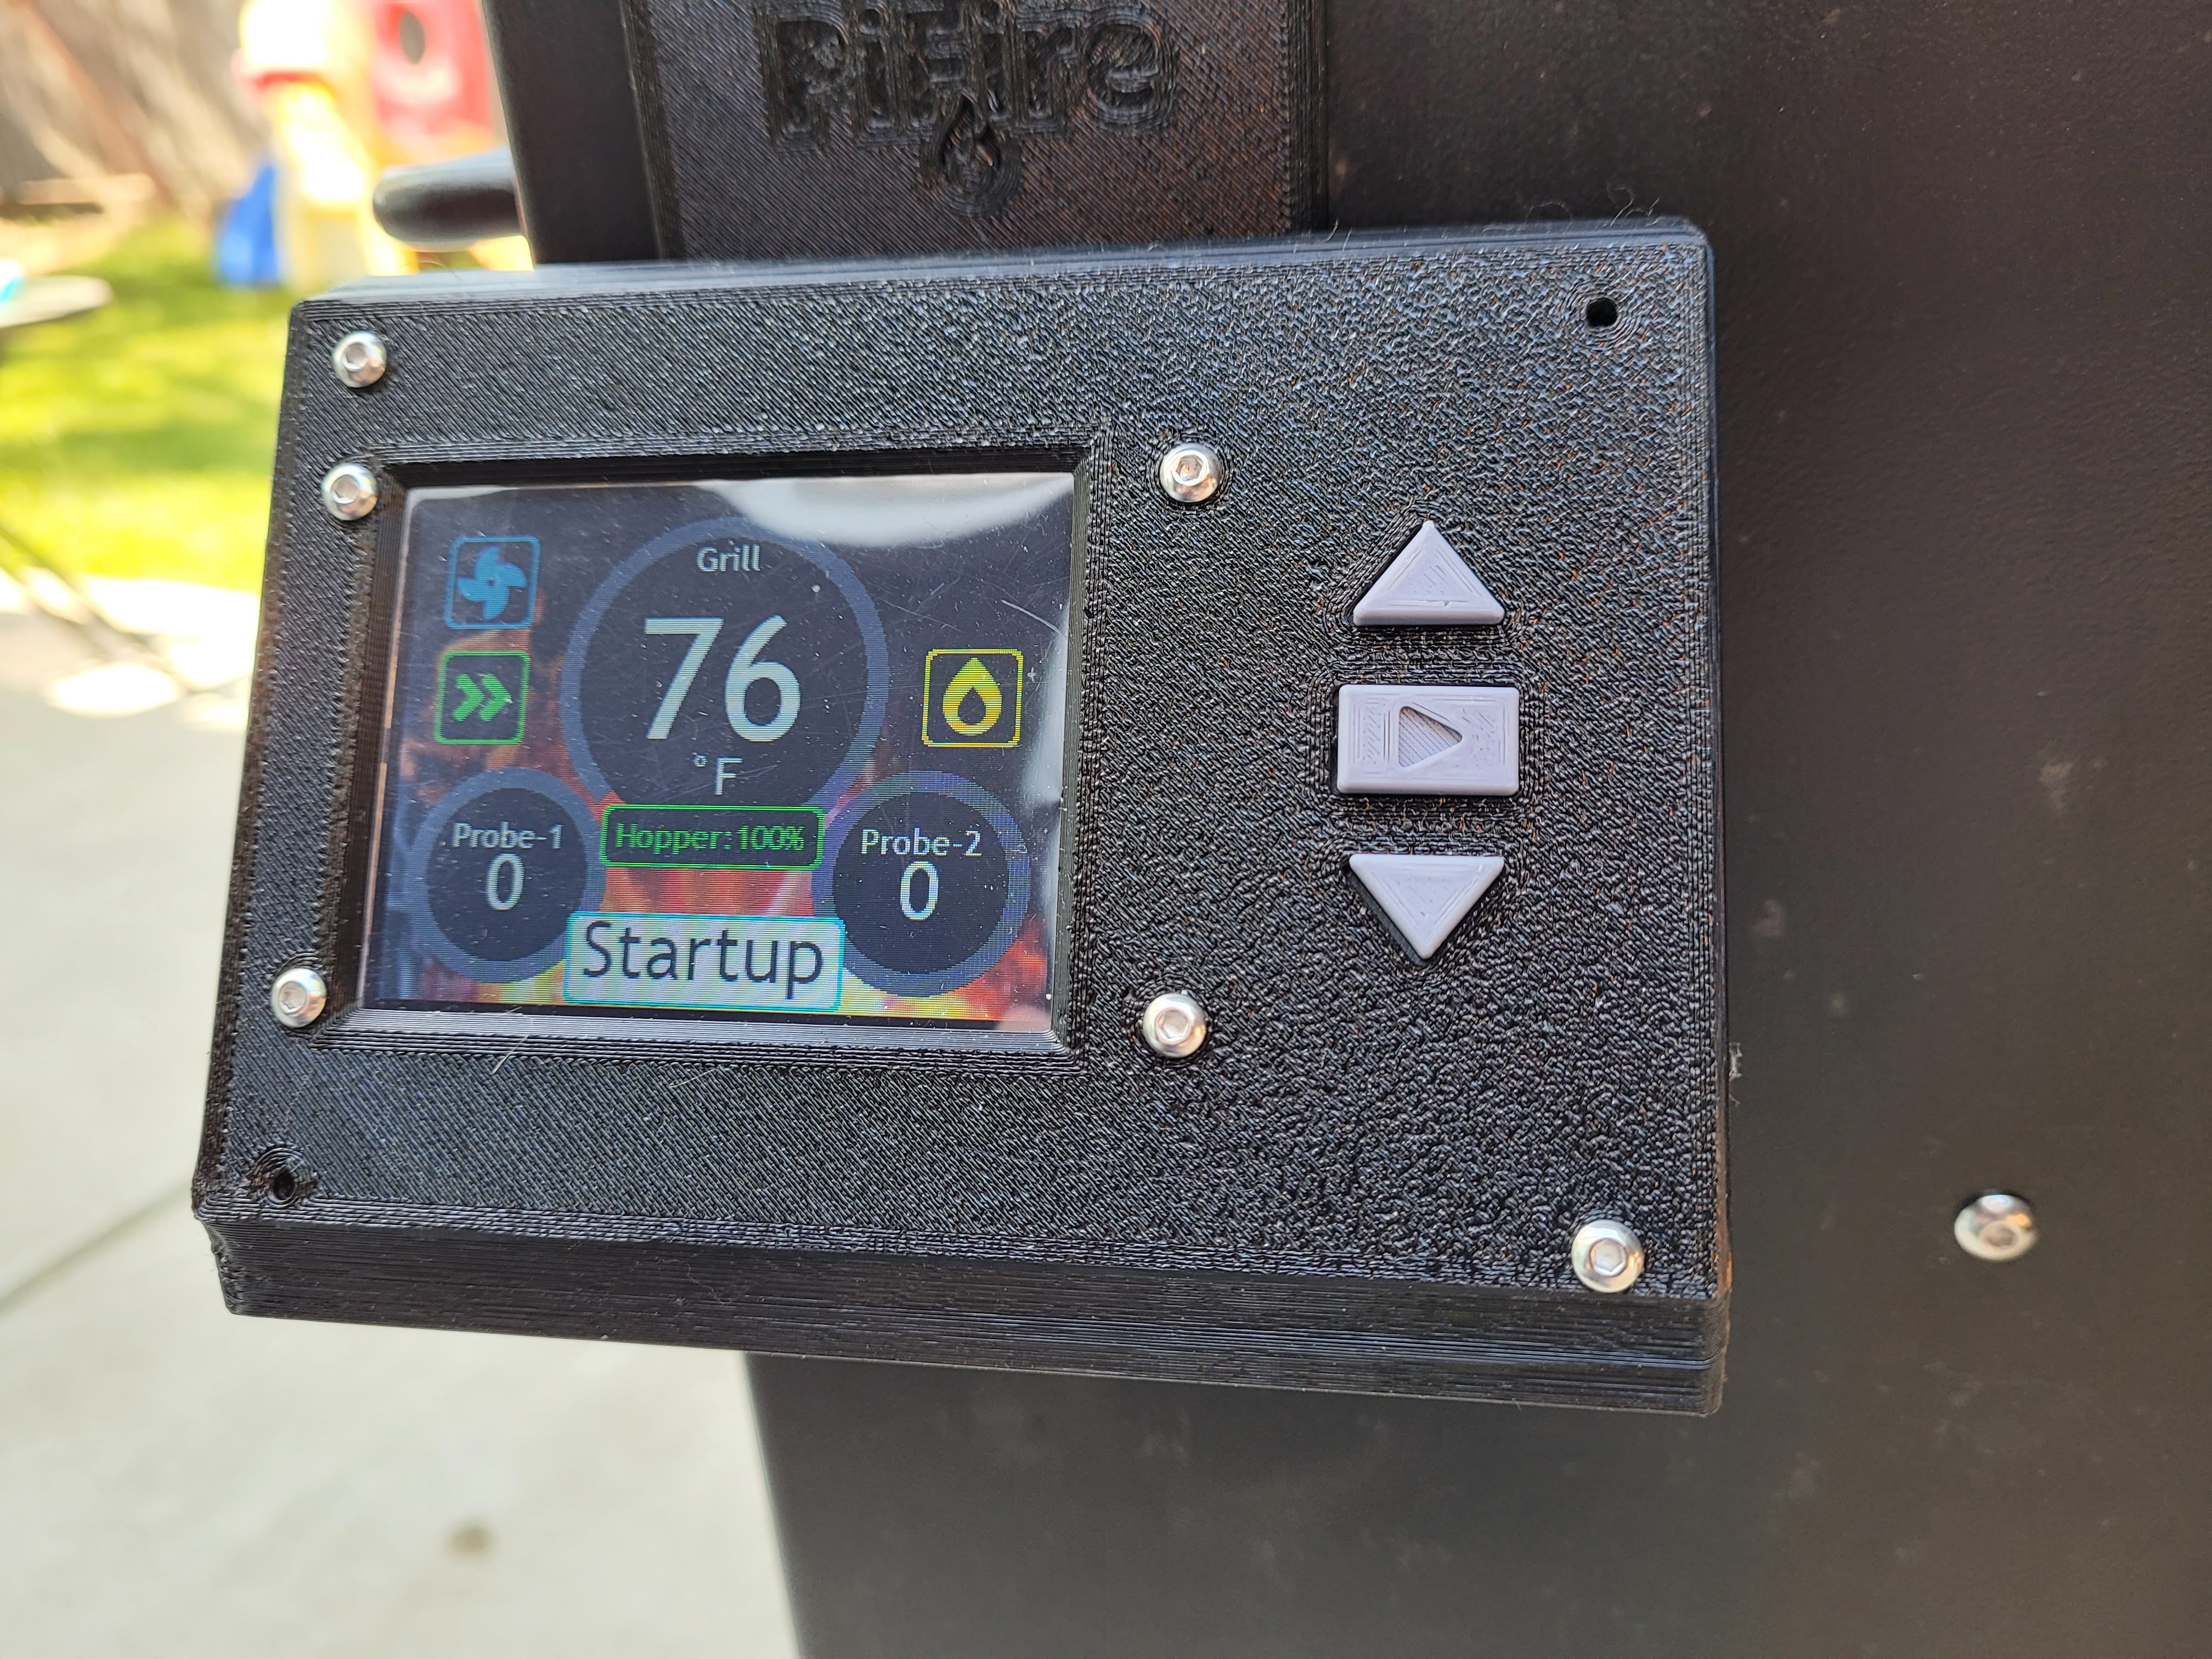
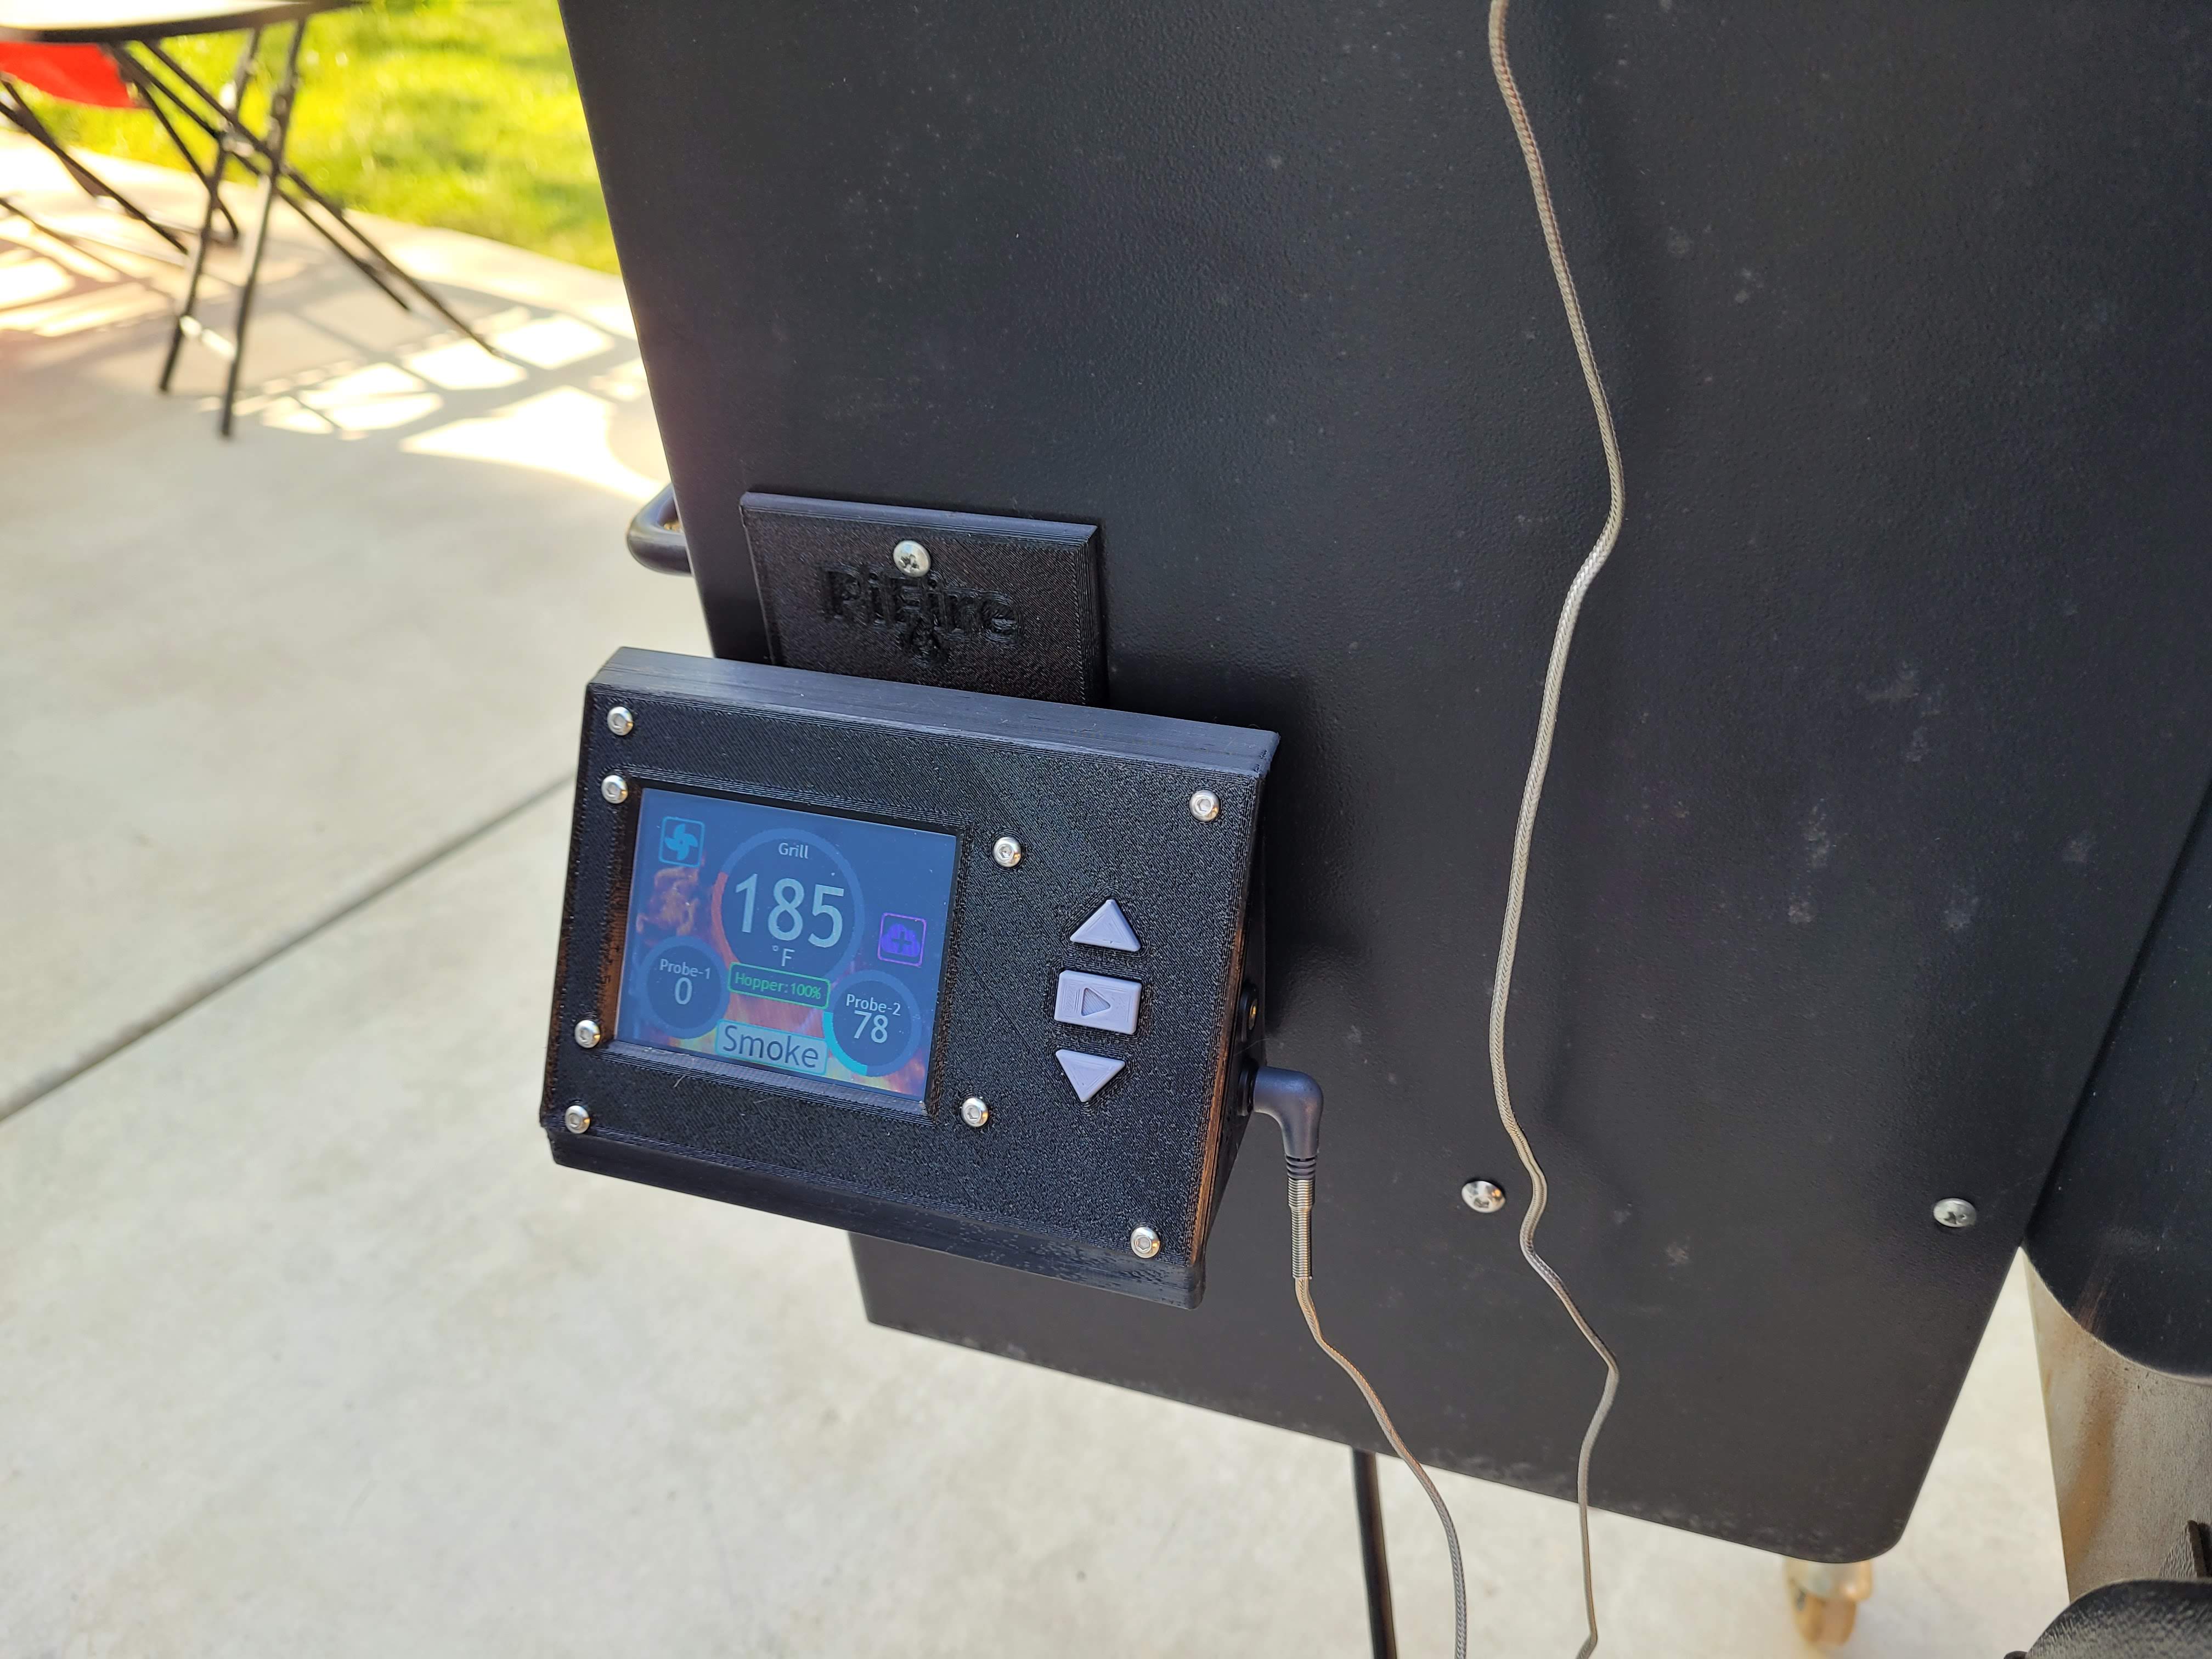
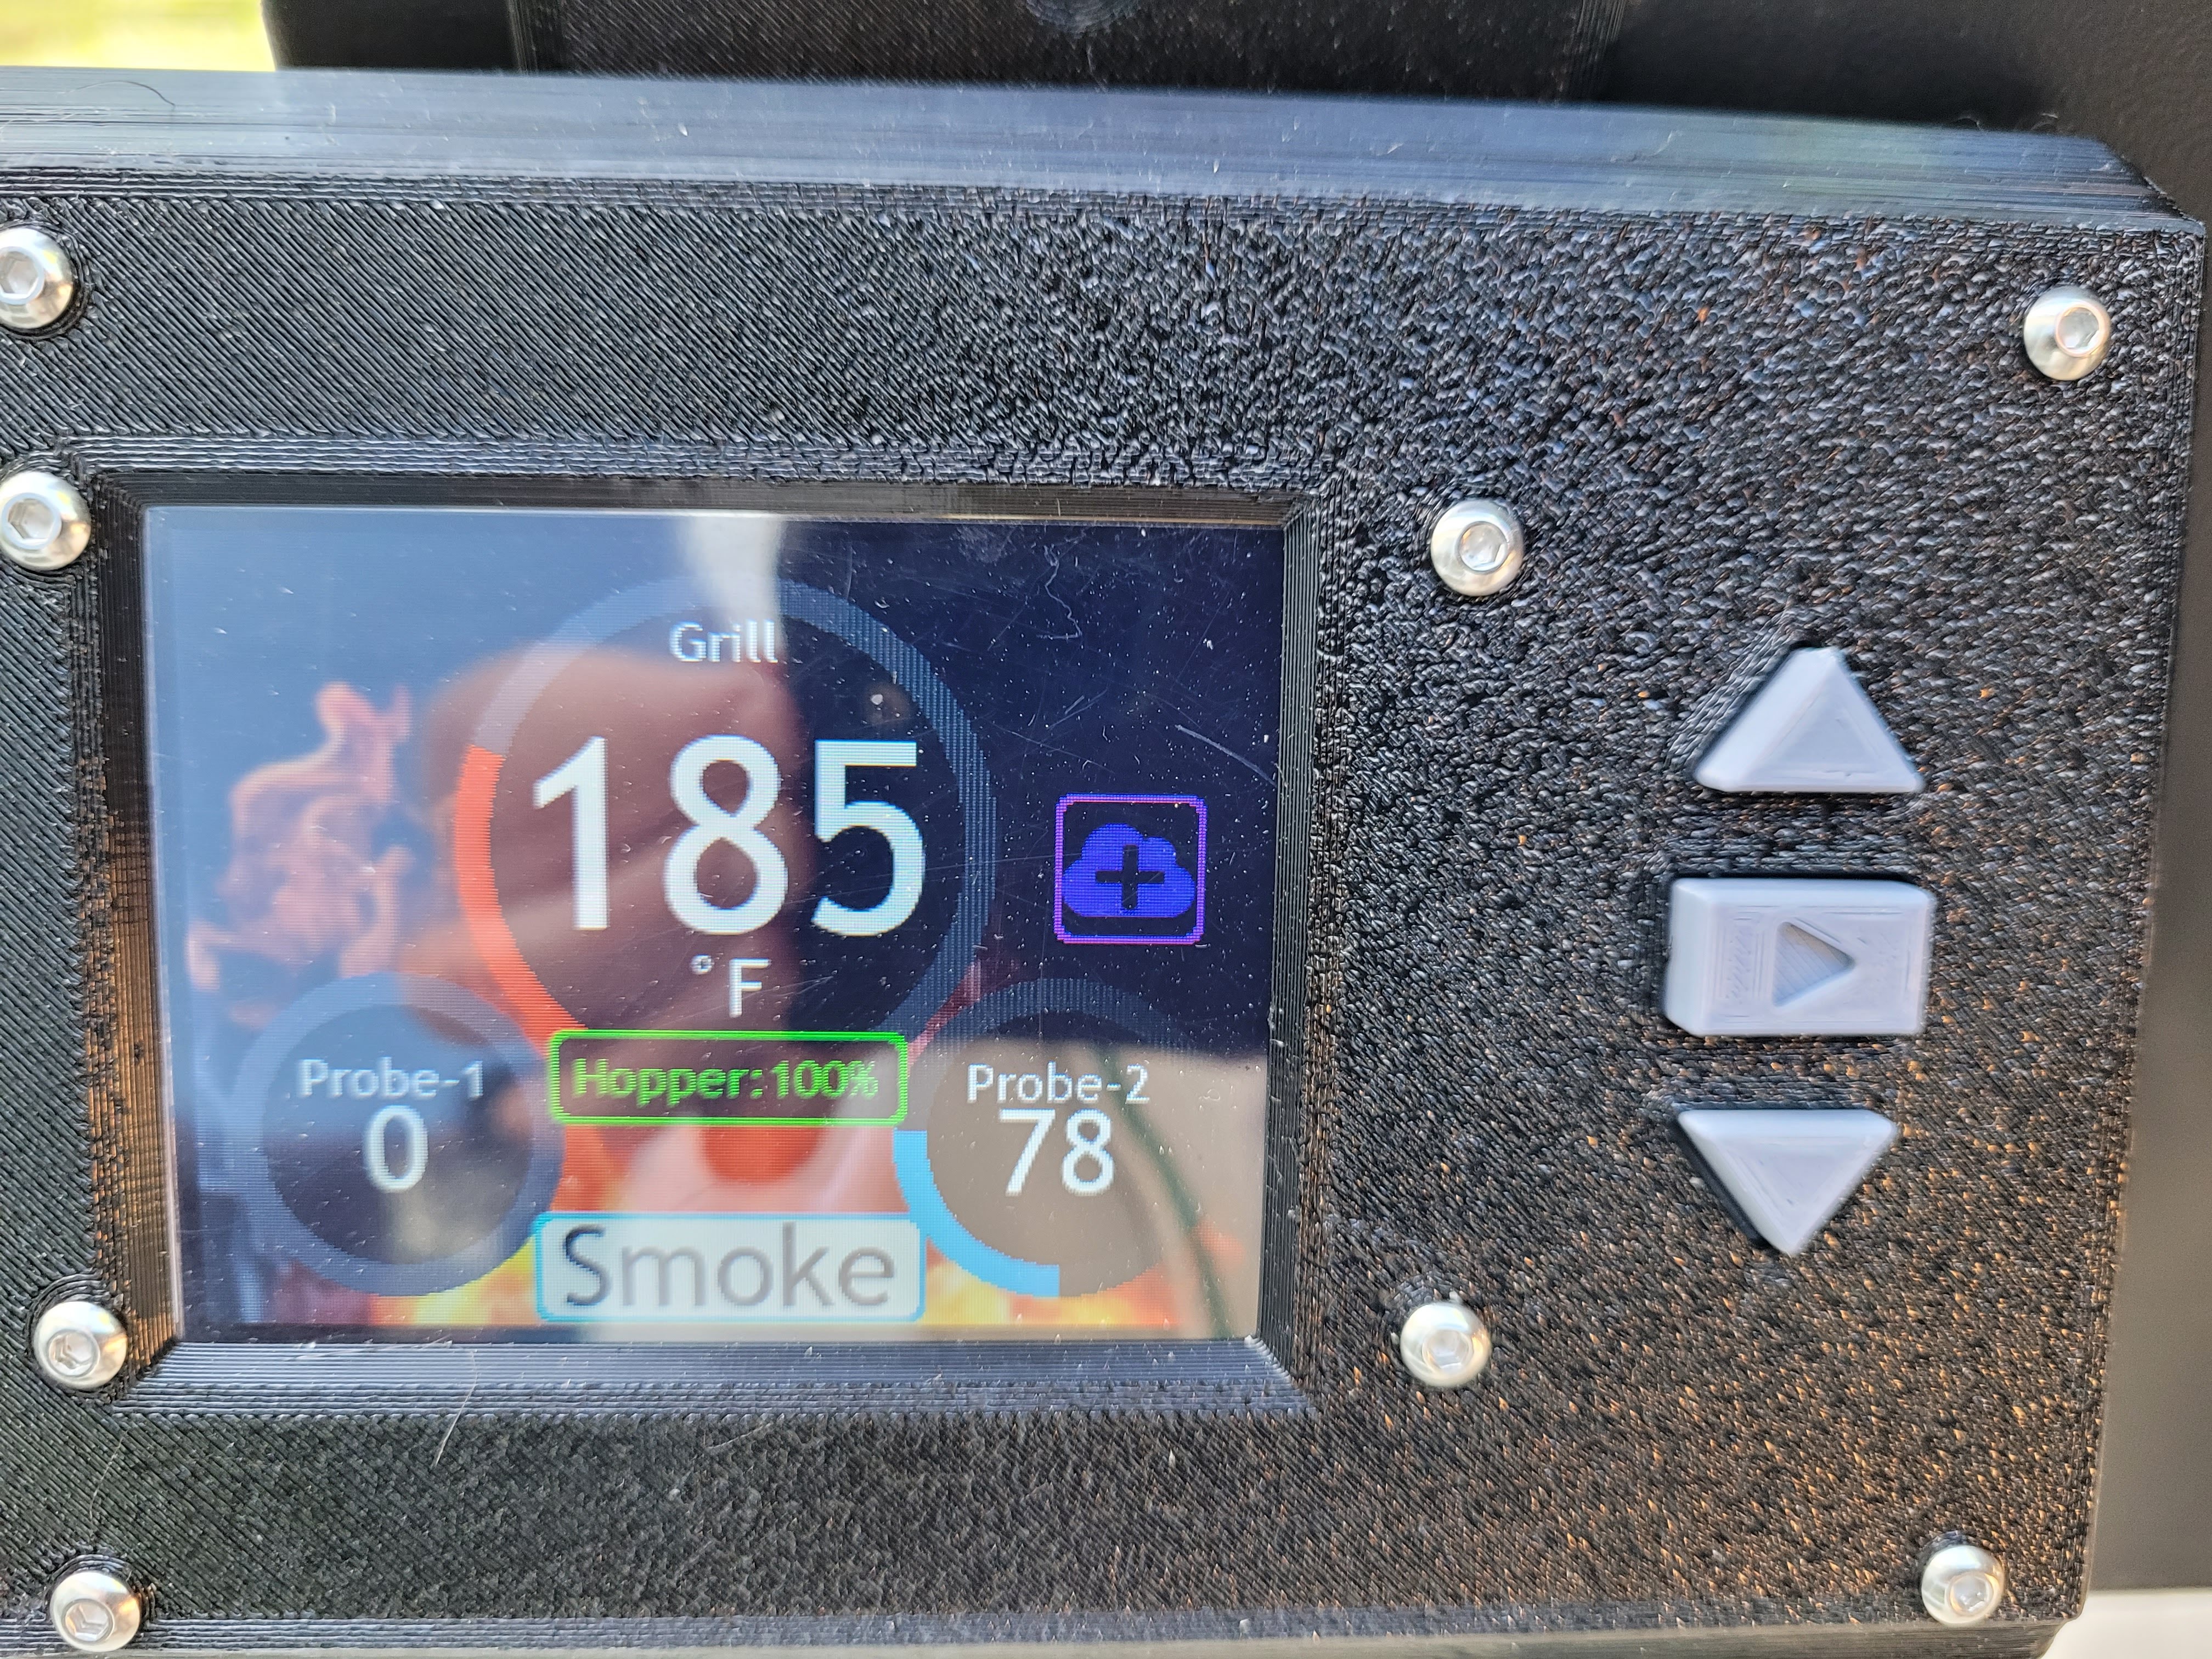
Just wanted to share that I finally got my V2 build installed on my grill and did a brief test run last night (with a nice Tri-Tip). Very happy with how it all came together. I need to tidy some wiring up and start working on the hopper sensor, but otherwise, very happy with how it all turned out.
Pic 1: During wiring and assembly - ended up printing in PETG because my PLA wilted in the sunlight very easily (not great for something that is sitting very close to a grill running at 450F sometimes.
Pic 2: Close up of the main board and enclosure.
Pic 3: Partial initial fitment.
Pic 4: Final fitment with probe attached.
Pic 5: Close up of final fitment - mid-cook. |
|
Looks great, so are you still using the original controller as a backup?
Meaning do you still have it mounted ?
I am still stuck in London, haven't had much time to look at the touch
screen of the display.
Can't wait to get back to Malaysia and start grilling again.
…On Sun, 11 Apr 2021, 17:29 nebhead, ***@***.***> wrote:
Just wanted to share that I finally got my V2 build installed on my grill
and did a brief test run last night (with a nice Tri-Tip). Very happy with
how it all came together. I need to tidy some wiring up and start working
on the hopper sensor, but otherwise, very happy with how it all turned out.
[image: 20210410_123426]
<https://user-images.githubusercontent.com/19876886/114312476-af86e000-9aa7-11eb-9d86-7a4ef3420ec2.jpg>
Pic 1: During wiring and assembly - ended up printing in PETG because my
PLA wilted in the sunlight very easily (not great for something that is
sitting very close to a grill running at 450F sometimes.
[image: 20210410_123433]
<https://user-images.githubusercontent.com/19876886/114312571-e5c45f80-9aa7-11eb-9677-0a26e9f17b5c.jpg>
Pic 2: Close up of the main board and enclosure.
[image: 20210410_161018]
<https://user-images.githubusercontent.com/19876886/114312598-055b8800-9aa8-11eb-8cc8-ea4e4d9153ba.jpg>
Pic 3: Partial initial fitment.
[image: 20210410_163709]
<https://user-images.githubusercontent.com/19876886/114312645-29b76480-9aa8-11eb-8a86-7b89896d68b5.jpg>
Pic 4: Final fitment with probe attached.
[image: 20210410_163733]
<https://user-images.githubusercontent.com/19876886/114312651-31770900-9aa8-11eb-8d3e-d77925cfed30.jpg>
Pic 5: Close up of final fitment - mid-cook.
—
You are receiving this because you commented.
Reply to this email directly, view it on GitHub
<#19 (comment)>,
or unsubscribe
<https://github.com/notifications/unsubscribe-auth/AIZKCHH63TAN5BD34XLQYN3TIHE7JANCNFSM4VQSDLEA>
.
|
|
Thanks! I finally gathered the confidence to remove the original controller in this version. In fact, I haven't used the original controller in many months, so I felt comfortable to remove it completely and replace it with this. It's now sitting in a box nearby, as an emergency backup. :) So far, it's working well - and I have connected the distance sensor for the hopper level and that also seems to be working pretty well so far. Pretty pleased with having manual buttons which makes life easier at the end of a cook when I just want to shutdown the grill but don't want to dig into my pocket to get my phone. Touch screen would be great - but I've not spent much time on that one either. Might be a little while before I can devote more time to that due to some other projects, etc. that I need to attend to. :) |
|
The buttons look great, really neat and convenient too.
Work related projects? Or some other interesting projects? Sorry for my
curiosity.
…On Tue, 13 Apr 2021 at 06:16, nebhead ***@***.***> wrote:
Thanks! I finally gathered the confidence to remove the original
controller in this version. In fact, I haven't used the original controller
in many months, so I felt comfortable to remove it completely and replace
it with this. It's now sitting in a box nearby, as an emergency backup. :)
So far, it's working well - and I have connected the distance sensor for
the hopper level and that also seems to be working pretty well so far.
Pretty pleased with having manual buttons which makes life easier at the
end of a cook when I just want to shutdown the grill but don't want to dig
into my pocket to get my phone.
Touch screen would be great - but I've not spent much time on that one
either. Might be a little while before I can devote more time to that due
to some other projects, etc. that I need to attend to. :)
—
You are receiving this because you commented.
Reply to this email directly, view it on GitHub
<#19 (reply in thread)>,
or unsubscribe
<https://github.com/notifications/unsubscribe-auth/AIZKCHHK4RZGONQT6AOAAODTIPHRHANCNFSM4VQSDLEA>
.
|
|
LoL - Well, it's more revisiting an old project that I actually also have posted here on GitHub called spkr-select. It's one of my first projects where I have a Raspberry Pi controlling in-ceiling speakers in my house. A friend of mine is also setting up speakers in his house and I decided it was time to revamp the project, start over, and build a new app whilst attempting to learn new tricks. First part of that was to build the hardware from scratch... which I'm part way through. Next part will be to redesign the software - which might be a complete fail, but I thought I would give it a shot. :) |
|
So I finally got my pin headers and adc in today. Got the PCB soldered up. Now I'm just waiting for my display and relays to come in and then I will hopefully be able to get the pifire up and running in the next week or so. I'm starting with a cheap 0.96in display but I'm hoping to move to a touch screen at some point in the future. I'm looking at possibly running the touchscreen off a Pi pico since it has the adc required built in and then I could just communicate between the pico and the zero w to relay commands. |
|
That's great! Yeah, I'm less familiar with the Arduino / Pico side of the world but have dabbled a little bit. The reason I went with a Raspberry Pi was be able to provide both a rich webUI (and possibly mobile phone app UI), and provide basic screen output as well. I felt that Arduino might be a little limiting in those cases, but I say more power to you if you can make it work! I wanted to also see if I could get the touch screen working with the ILI9341 devices for this project, but haven't gotten around to it yet. Looking at the existing libraries, it leaves a little to be desired - so might require building a custom library. |

|
This is an amazing project and I am dying to implement it!! I am a planning on using this on my Black Olive Kamado pellet grill. Its a very small company that is no longer. I got the grill for free and I am pretty confident that I can make this work!! @nebhead you mentions in the article that you may have some extra boards. If so, can I buy one from you? I have never ordered a PCB before and I was getting a little confused trying get it... Lastly, is there any reason I couldn't add a 3rd probe? |
|
Hey @ccc9090 - I do have a few more spare boards, but I'm away from my workshop for the next three weeks. I'd happily send one to you when I get back, if you can wait. If you can't wait, then I'd recommend ordering on JLCPCB. The schematic, PCB and gerber files are available here: https://easyeda.com/nebhead77/pifire-v2. You should be able to open the PCB files in EasyEDA online and just go to the fabrication menu to order from JLCPCB. There might be an easier way, but I'm not sure how to go about it. As for adding a probe, it's actually a bit significant of a redesign (especially for the PCB since there are only three total probes designed into this today). It can certainly be done, but would require webUI layout changes, control changes, and display changes. It's not completely off the table, but it might be something we consider for PiFire v3.0. :) |
|
@ccc9090 - I'm back to the workshop and can mail out a board if you'd like. Just let me know. |

|
Have trouble with my new build. Order the PCB's, soldered everything on, flashed the SD card, booted up with Pi Zero, and all the relays turn on. When I go the webpage and hit the PLAY button, the relays turn off. When I hit the STOP button, the relays all turn on again. It's like the GPIO logic is all reversed. Any thoughts on what I could have done wrong? |
|
The relays should be soldered to the Normally Open(NO) side of the relays, Sounds like they are connected on the Normally Closed(NC) side of the relay check no any marking on the relays - take a pic and post it if you can, get a few from different angles |

|
Sorry, I should have clarified originally I am using the solid state relay so it only NO. More testing shows that when I got the PLAY button the OLED displays startup up mode, relay 1, 3, and 4 are off. When I got the STOP button, the OLED screen turns off and all 4 relays come on. I do not have a selector switch installed either. |
|
Is your solid state relay active low or active high?
…On Sun, Jun 27, 2021, 1:59 PM gsherwin74 ***@***.***> wrote:
Sorry, I should have clarified originally I am using the solid state relay
so it only NO. More testing shows that when I got the PLAY button the OLED
displays startup up mode, relay 1, 3, and 4 are off. When I got the STOP
button, the OLED screen turns off and all 4 relays come on. I do not have a
selector switch installed either.
—
You are receiving this because you were mentioned.
Reply to this email directly, view it on GitHub
<#19 (reply in thread)>,
or unsubscribe
<https://github.com/notifications/unsubscribe-auth/AEXUYFQDYDW4MM54MZXMASDTU6GM5ANCNFSM4VQSDLEA>
.
|
|
Active high. I can jumper a signal to a channel that is off and make it turn on so I think the relay is working ok. Seems like it is getting a high signal from the Pi when it should be low and vice versa. |
|
Ok, that's the issue. Most hobbiest relay modules are active low, which is
why it's designed this way. You can either hack the grill platform file to
reverse the logic, or maybe get an active low relay module instead.
…On Sun, Jun 27, 2021, 2:57 PM gsherwin74 ***@***.***> wrote:
Active high. I can jumper a signal to a channel that is off and make it
turn on so I think the relay is working ok. Seems like it is getting a high
signal from the Pi when it should be low and vice versa.
—
You are receiving this because you were mentioned.
Reply to this email directly, view it on GitHub
<#19 (reply in thread)>,
or unsubscribe
<https://github.com/notifications/unsubscribe-auth/AEXUYFUJ3ZRY7J3265I3LVDTU6NF3ANCNFSM4VQSDLEA>
.
|
|
This is the one I purchased from the link in the build instructions... |
|
actually yeah that is what's link on the pifire site 😆 |
|
Well now I'm embarrassed. 😊 I should have linked a low trigger/active low
relay module. No worries though! All you'll need to do is reverse the
logic in the grillplat_pifire.py file. I'm on a road trip at the moment
so, I'm on my phone, but let me try to point you in the right direction.
Change the following initial values from 0 to 1 or vice versa.
if GPIO.input(self.inpins['selector']) == 0:
GPIO.setup(self.outpins['power'], GPIO.OUT, initial=0)
GPIO.setup(self.outpins['igniter'], GPIO.OUT, initial=1)
GPIO.setup(self.outpins['fan'], GPIO.OUT, initial=1)
GPIO.setup(self.outpins['auger'], GPIO.OUT, initial=1)
else:
GPIO.setup(self.outpins['power'], GPIO.OUT, initial=1)
GPIO.setup(self.outpins['igniter'], GPIO.OUT, initial=1)
GPIO.setup(self.outpins['fan'], GPIO.OUT, initial=1)
GPIO.setup(self.outpins['auger'], GPIO.OUT, initial=1)
And change the other functions as well. Same as before by flipping the 1s
to 0s, etc.
def AugerOn(self):
GPIO.output(self.outpins['auger'], 0)
def AugerOff(self):
GPIO.output(self.outpins['auger'], 1)
def FanOn(self):
GPIO.output(self.outpins['fan'], 0)
def FanOff(self):
GPIO.output(self.outpins['fan'], 1)
def FanToggle(self):
if(GPIO.input(self.outpins['fan']) == 0):
GPIO.output(self.outpins['fan'], 1)
else:
GPIO.output(self.outpins['fan'], 0)
def IgniterOn(self):
GPIO.output(self.outpins['igniter'], 0)
def IgniterOff(self):
GPIO.output(self.outpins['igniter'], 1)
def PowerOn(self):
GPIO.output(self.outpins['power'], 0)
def PowerOff(self):
GPIO.output(self.outpins['power'], 1)
…On Sun, Jun 27, 2021, 5:11 PM Aviator85 ***@***.***> wrote:
actually yeah that is what's link on the pifire site 😆
—
You are receiving this because you were mentioned.
Reply to this email directly, view it on GitHub
<#19 (reply in thread)>,
or unsubscribe
<https://github.com/notifications/unsubscribe-auth/AEXUYFSNFXUIWG5Q4UH7BJ3TU643LANCNFSM4VQSDLEA>
.
|
|
I only know enough about Linux to be dangerous. How do I make these edits? Using ssh and sudo nano? |
|
Did some quick edits to the file to replace the appropriate 1/0's to the relay with 'defines' instead, so it's easy enough to switch between active high or low. I'm not entirely sure this is going to work with the entire system, but we'll see how it goes with you first. You should be able to sFTP into your pi and overwrite the grillplat_pifire.py file with the above. |
|
Looking a little deeper at this, there are more changes that will need to be made in the control.py, since it's using the raw output values to indicate to the display whether the auger, fan, etc. is active. Also, the auger control relies on reading the output level. Thus, I'll need to make a global setting for relay type. Apologies, but this will take a little longer to modify. |
|
So I switched the 0's and 1's in grillplat_pifire.py. Is there more that needs to be done elsewhere? Should I hang tight for your updated files? |
|
@gsherwin74 OK, made all the changes and pushed to the development branch. If you could test and let me know how it goes, that would be wonderful. Commit is here: 9d8e76e Once you've pulled the new files, you'll need to edit the settings.json file and reboot. Replace the e.g. Reboot, and you should be back in business. |
|
I think I'll update this file so it's easy to switch between active low and
active high relays in a future update so that you don't need to
continuously update this file.
…On Sun, Jun 27, 2021, 5:29 PM Ben Parmeter ***@***.***> wrote:
Well now I'm embarrassed. 😊 I should have linked a low trigger/active low
relay module. No worries though! All you'll need to do is reverse the
logic in the grillplat_pifire.py file. I'm on a road trip at the moment
so, I'm on my phone, but let me try to point you in the right direction.
Change the following initial values from 0 to 1 or vice versa.
if GPIO.input(self.inpins['selector']) == 0:
GPIO.setup(self.outpins['power'], GPIO.OUT, initial=0)
GPIO.setup(self.outpins['igniter'], GPIO.OUT, initial=1)
GPIO.setup(self.outpins['fan'], GPIO.OUT, initial=1)
GPIO.setup(self.outpins['auger'], GPIO.OUT, initial=1)
else:
GPIO.setup(self.outpins['power'], GPIO.OUT, initial=1)
GPIO.setup(self.outpins['igniter'], GPIO.OUT, initial=1)
GPIO.setup(self.outpins['fan'], GPIO.OUT, initial=1)
GPIO.setup(self.outpins['auger'], GPIO.OUT, initial=1)
And change the other functions as well. Same as before by flipping the 1s
to 0s, etc.
def AugerOn(self):
GPIO.output(self.outpins['auger'], 0)
def AugerOff(self):
GPIO.output(self.outpins['auger'], 1)
def FanOn(self):
GPIO.output(self.outpins['fan'], 0)
def FanOff(self):
GPIO.output(self.outpins['fan'], 1)
def FanToggle(self):
if(GPIO.input(self.outpins['fan']) == 0):
GPIO.output(self.outpins['fan'], 1)
else:
GPIO.output(self.outpins['fan'], 0)
def IgniterOn(self):
GPIO.output(self.outpins['igniter'], 0)
def IgniterOff(self):
GPIO.output(self.outpins['igniter'], 1)
def PowerOn(self):
GPIO.output(self.outpins['power'], 0)
def PowerOff(self):
GPIO.output(self.outpins['power'], 1)
On Sun, Jun 27, 2021, 5:11 PM Aviator85 ***@***.***> wrote:
> actually yeah that is what's link on the pifire site 😆
>
> —
> You are receiving this because you were mentioned.
> Reply to this email directly, view it on GitHub
> <#19 (reply in thread)>,
> or unsubscribe
> <https://github.com/notifications/unsubscribe-auth/AEXUYFSNFXUIWG5Q4UH7BJ3TU643LANCNFSM4VQSDLEA>
> .
>
|
|
Yep! Just ssh into your pi, then go to the pifire folder then sudo nano
grillplat_pifire.py. When done, ctrl-o to save, ctrl-x to exit. Then sudo
reboot.
…On Sun, Jun 27, 2021, 7:10 PM gsherwin74 ***@***.***> wrote:
I only know enough about Linux to be dangerous. How do I make these edits?
Using ssh and sudo nano?
—
You are receiving this because you were mentioned.
Reply to this email directly, view it on GitHub
<#19 (reply in thread)>,
or unsubscribe
<https://github.com/notifications/unsubscribe-auth/AEXUYFWKA6OMGJEOFILFMA3TU7K2TANCNFSM4VQSDLEA>
.
|
|
Apologies - was completely offline for a week, but I'm back and will take a
look at this again. Looks like we will definitely need to make some
changes elsewhere in the code, so hang tight and I will see what I can do.
Thanks!
…On Fri, Jul 2, 2021 at 6:38 AM gsherwin74 ***@***.***> wrote:
So I switched the 0's and 1's in grillplat_pifire.py. Is there more that
needs to be done elsewhere? Should I hang tight for your updated files?
—
You are receiving this because you were mentioned.
Reply to this email directly, view it on GitHub
<#19 (reply in thread)>,
or unsubscribe
<https://github.com/notifications/unsubscribe-auth/AEXUYFSWUP446SUWD6G6LBTTVW6NBANCNFSM4VQSDLEA>
.
|


Uh oh!
There was an error while loading. Please reload this page.
Just FYI, that in the course of adding the pellet sensor plans, I thought it might be good to do some modifications on the PiFire PCB for ease of use. Plans for the new version include: making it a "HAT" that can fit on the Pi Zero header, adding a header for additional I2C devices (including the pellet sensor), adding a header for a SPI display (like the ILI9341), optional pull-ups for I2C, headers for the rest of the GPIO which can be used for buttons or future expansion. I will be sure to drop a link to the EasyEDA files when I've gotten it ready.
All reactions